TestComplete integration with Visual Studio adds a new item type to Visual Studio Test projects, TestComplete 14 Test. Use this item to add TestComplete projects and project suites to Visual Studio test projects and run them in the same way you run native Visual Studio tests.
 1. Add a TestComplete 14 Test Item to Visual Studio Test Project
 2. Configure TestComplete 14 Test Item to Run TestComplete Tests
Requirements
You must have the following software installed on your computer:
-
One of the following Visual Studio versions:
-
Microsoft Visual Studio 2015–2017 (Community, Enterprise or Professional edition).
-
Microsoft Visual Studio 2013 (Community, Ultimate, Premium, or Professional edition).
-
Microsoft Visual Studio 2010–2012 (Ultimate, Premium, or Professional edition).
-
-
TestComplete 14.
-
TestComplete 14 Visual Studio Integration Package.
The Integration Package installer is shipped along with TestComplete. You can find it in the TestComplete folder after installing the product:
<TestComplete 14>\VS Integration\VSIntegration.exe
Run this installer after installing TestComplete on your computer. In the installation wizard, select the Visual Studio Integration feature appropriate for your Visual Studio version.
Before You Start
-
TestComplete 14 Test items store a relative path to TestComplete projects to be run.
If you run TestComplete tests remotely (for example, on a build computer as part of a pipeline), the path to the TestComplete project that the TestComplete 14 Test item stores may become invalid. To avoid this issue, make sure that the path that the item stores corresponds to the actual location of the TestComplete project.
You can find detailed instructions on how to do it in appropriate sections.
-
You cannot add TestComplete tests to Visual C++ unmanaged (native) test projects.
As a workaround, we suggest that you add a test project of any other type (for example, a Visual C++ Managed Test project) to your solution in Visual Studio and run TestComplete tests from that project.
1. Add a TestComplete 14 Test Item to Visual Studio Test Project
-
In Microsoft Visual Studio, open your Visual Studio test project or create a new one:
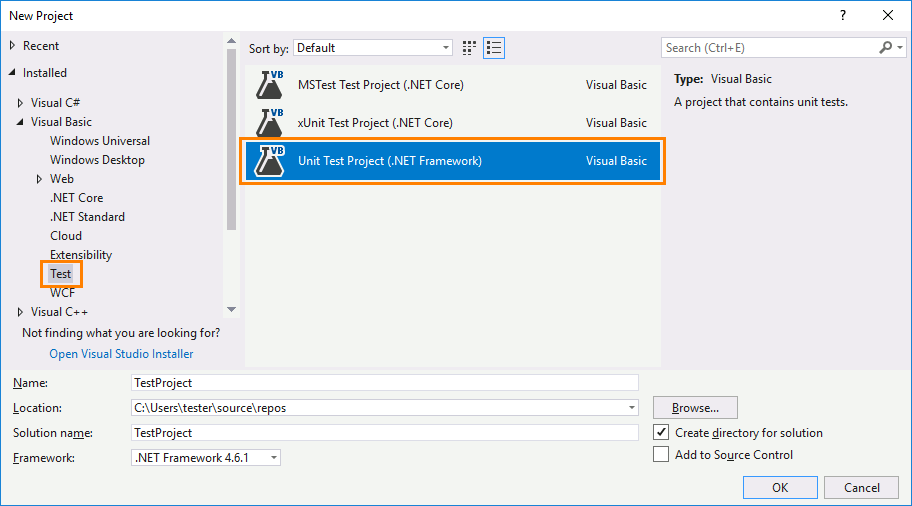
Note: You cannot add TestComplete tests to Visual C++ unmanaged (native) test projects. As a workaround, we suggest that you use a test project of any other type (for example, a Visual C++ Managed Test project) to keep TestComplete tests.
-
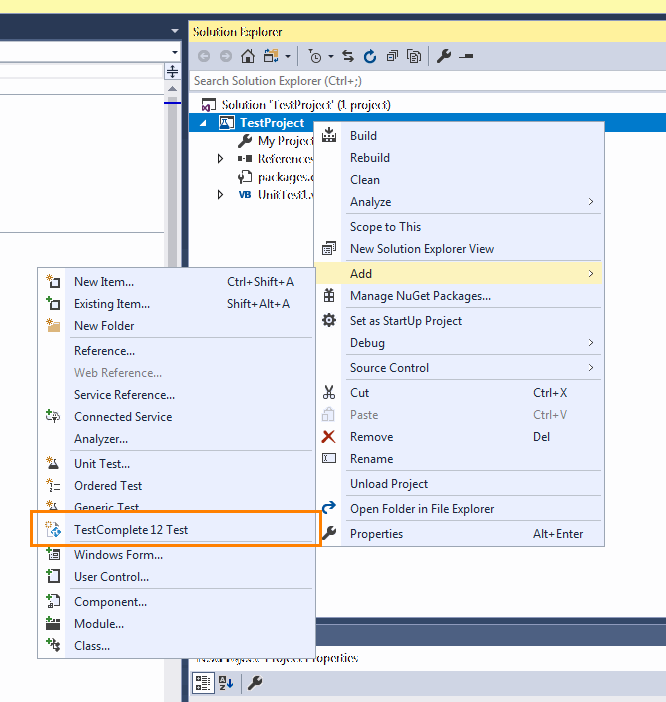
(In Visual Studio 2012–2017, for Visual Basic Test, Visual C# Test and Visual C++ Managed Test projects) Right-click your project in the Solution Explorer, and then click Add > TestComplete 14 Test:
– or –
Right-click your project in the Solution Explorer, and then click Add > New Item (in Visual Studio 2012–2017) or Add > New Test (in Visual Studio 2010). Visual Studio will display a dialog with available item types. In the dialog, select the TestComplete 14 Test type:
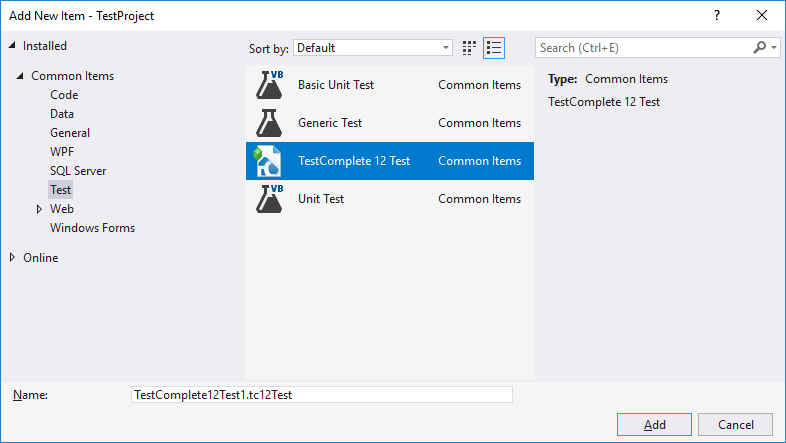
Specify the needed test name and click OK.
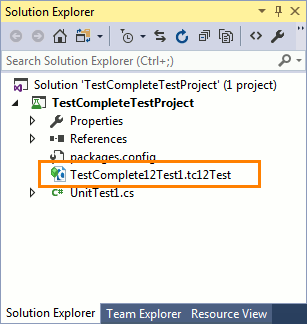
Visual Studio will create a new test of the TestComplete 14 Test type and add it to the project:
2. Configure TestComplete 14 Test Item to Run TestComplete Tests
-
Double-click the TestComplete 14 Test node in the Solution Explorer. Visual Studio will open it in the TestComplete Test editor.
-
In the TestComplete project box, click the ellipsis button and browse for the TestComplete project or project suite file that contains the tests you want to run.
-
The editor will show a tree-like structure of available test items:
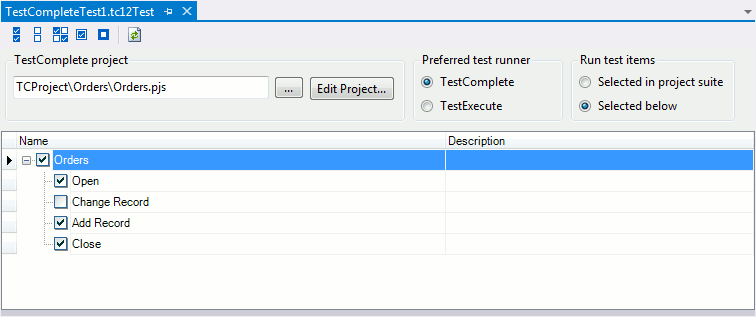
By default, the structure and selection of items coincide with the structure and selection stored in your TestComplete project or project suite.
-
To run test items selected in the project suite, click Selected in project suite in the Run test items section.
To select needed tests items manually, click Selected below in the Run test items section and select the needed items in the test items tree. To select and unselect items, you can also use buttons on the toolbar at the top of the editor.
-
In the Preferred test runner section, choose the application (TestComplete or TestExecute) that you want to use to run tests. If only one of the applications is installed on the computer where the test project is run, the corresponding test runner is selected automatically.
-
To modify the TestComplete project or project suite, click Edit Project.
-
Save the changes.
3. Run TestComplete Test Item
-
Locally from Visual Studio
-
Remotely by using Test Agents and Test Controllers
 Run TestComplete Tests Remotely With Visual Studio Test Agents
 -
As part of the Build & Release pipeline
 Run TestComplete Tests as Part of Build Pipeline (Team Builds)
 -
As part of a test plan
Preparing Visual Studio Test Projects (Running TestComplete Tests as Part of Team Builds)
Preparing Visual Studio Test Projects (Running TestComplete Tests as Part of a Test Plan)
See Also
Integration With Azure DevOps Services and Team Foundation Server
Run TestComplete Tests Locally From Visual Studio
Run TestComplete Tests Remotely With Visual Studio Test Agents
Run TestComplete Tests as Part of Build Pipeline (Team Builds)
Run TestComplete Tests as Part of a Test Plan
