
XML checkpoints verify values stored in an XML document against baseline values stored in your project as an XMLCheckpoint element of the Stores > XML collection.
You can create XML checkpoints both during test recording and at design time. To help you set up XML checkpoints, TestComplete includes the Checkpoint Wizard. To create an XML checkpoint using the wizard, follow the steps below:
 1. Launching the Wizard
1. Launching the Wizard
The way you launch the wizard depends on the test creation mode:
-
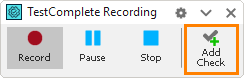
If you are recording a test –
-
Click Add Check on the Recording toolbar:
-
In the Checkpoint Wizard, select File, and then click Next.

Click the image to enlarge it.
-
-
If you are editing a keyword test –
-
Select the Checkpoints category in the Operations panel of the Keyword Test editor.
-
Find the Checkpoint Wizard operation in the list and drag it to your test. In the Checkpoint wizard, click File.
– or –
Find the XML Checkpoint operation in the list and drag it to your test.

-
-
If you are editing a script –
-
Open the script to be edited.
-
Click
 on the Code Editor toolbar:
-
In the Checkpoint Wizard, select File, and then click Next.
-
2. Specifying an XML Document to Check
On the next page of the wizard, you specify the type of the file you want to verify. Click XML to verify an XML file. (If you are configuring the XML Checkpoint operation, the wizard will select the appropriate comparison type automatically.)
In the Specify the XML file name or URL edit box, enter the file name or the URL address of the needed XML document.

Click the image to enlarge it.
Click Next to proceed.
3. Specifying the Baseline XML Checkpoint Element
On the third page of the wizard, specify an XMLCheckpoint element storing baseline data that will be used for verification:

Click the image to enlarge it.
-
To create a new element, click Current file contents, and then enter the desired name of the element in the Save the files to Stores as a baseline copy edit box.
This name will be used to address the element from scripts, so it must be a valid identifier. Scripting languages supported by TestComplete use different naming rules for identifiers. To specify a name that will match the rules of any language, enter a string that starts with a letter and that contains only letters, digits, and underscore characters.
-
To use an existing element, click File from Stores, and then select the desired element from the Select a Stores item drop-down list.
4. Closing the Wizard
Click Finish to complete the checkpoint creation and close the wizard.
Upon closing the wizard, TestComplete will automatically insert the XML checkpoint statement into the test.
If you are creating an XML checkpoint while editing a script test, TestComplete will generate the checkpoint code and display it in the Copy Text to Clipboard dialog in which you can insert the generated code into the script.