BDD scenarios can be written by QA engineers, business analysts, managers or other team members. Quite often, a team starts writing scenarios before QA engineers start creating automated tests for them. TestComplete supports this workflow and enables the engineers to import existing BDD files to test projects and automate test steps.
What BDD files can be imported
TestComplete supports any feature file that is written in the Gherkin language. These can be files created in other TestComplete projects, or files created for other BDD frameworks like Cucumber or SpecFlow. The only requirement for the format is that the files must use the Gherkin syntax. Here is an example:
Example of a feature file in Gherkin Copy Code
Feature: Description of the feature to test
Scenario: Usage scenario
Given Some pre-condition
When An action is performed
Then Check the result
1. Import scenarios from a file
You can import BDD files when creating a new project, or at any time later.
If you are creating a new project
Before you start: The files you are going to add to a new project must have the .feature extension.
-
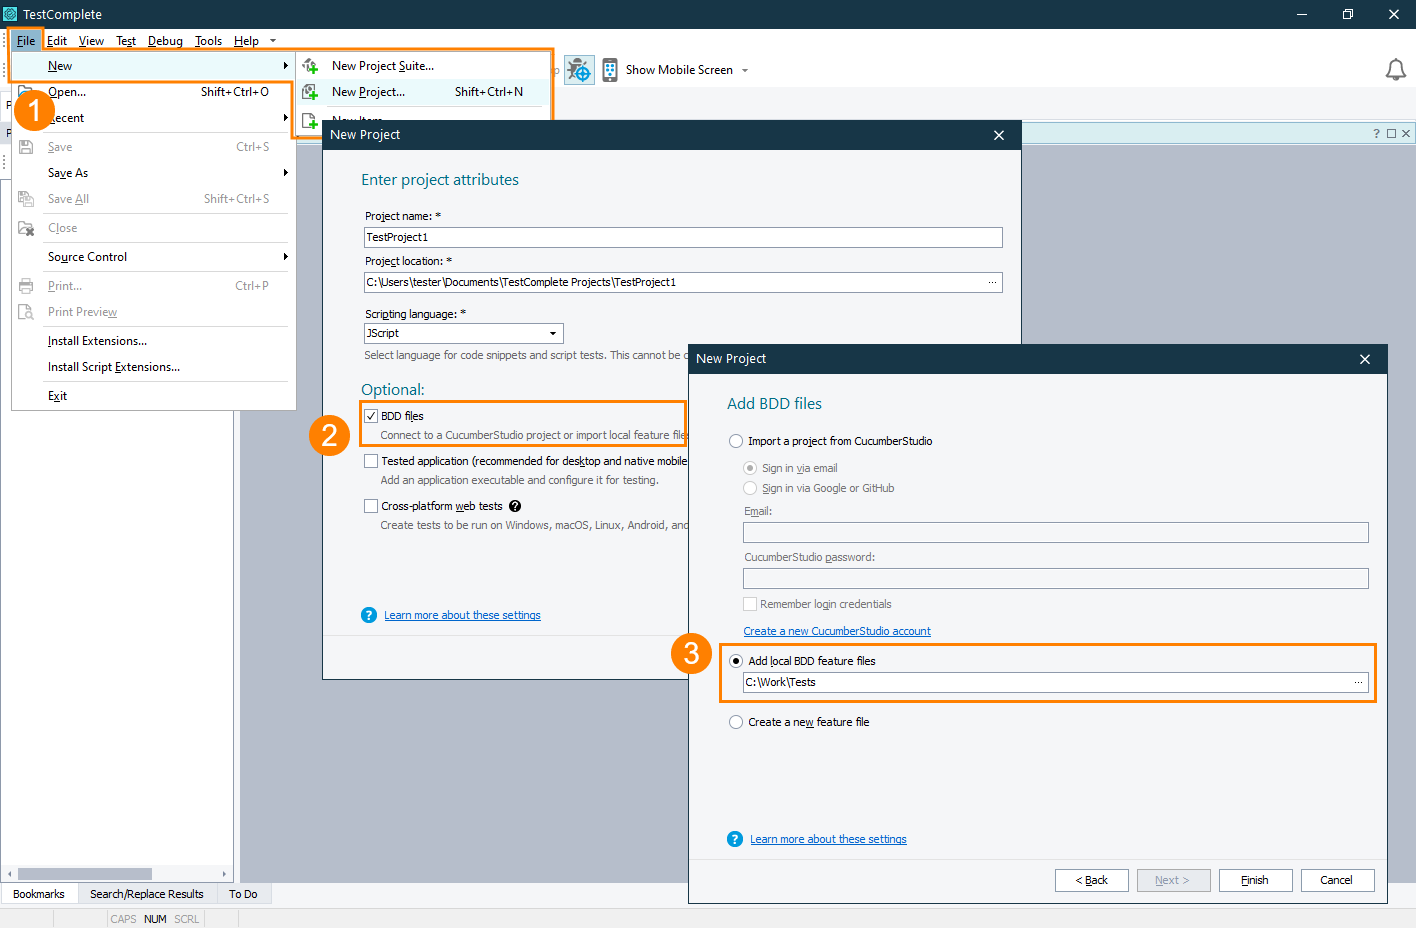
Start creating a new project by selecting File > New Project from the main menu.
-
On the first page of the New Project wizard, select the BDD files check box.
-
On the next page of the wizard, select Add local BDD files, click the ellipsis button and, in the subsequent dialog, specify the folder that contains your .feature files:
Click Finish.
-
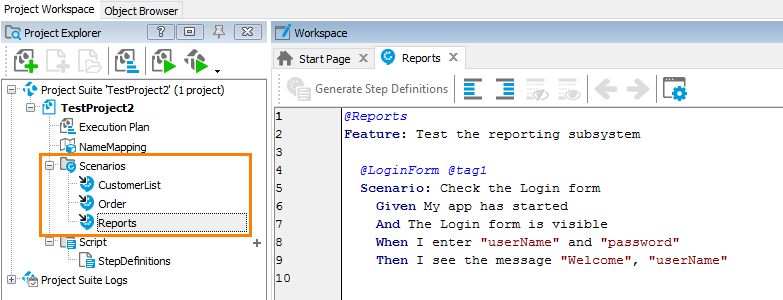
When creating the project, TestComplete will search for the .feature files in the specified folder and in all its subfolders. It will include all the found files in the created test project and will display them below the Scenarios node:
The arrows on the file icons indicate that the files are located outside the project folder, that is, the project contains links to them.
If you have an existing project
-
Add the Scenarios project item to your TestComplete project, if it doesn’t have it:
-
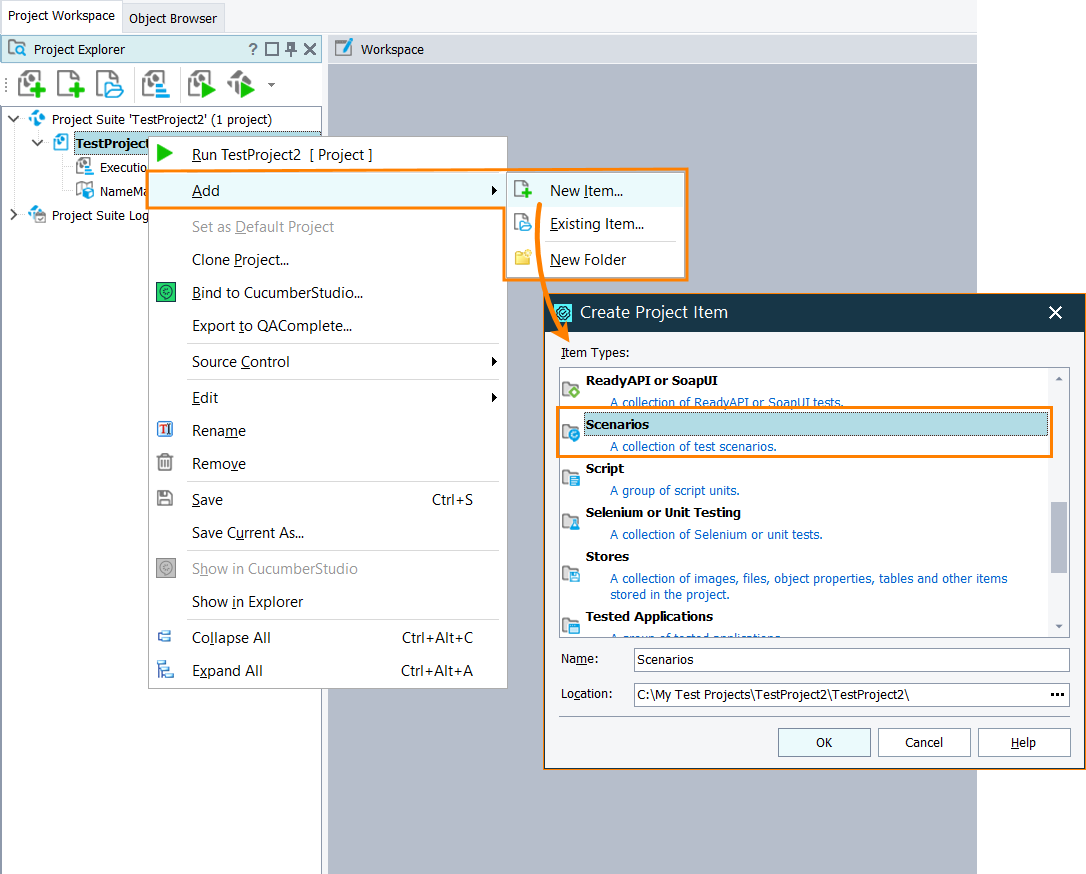
Right-click your project in the Project Explorer and select Add > New Item in the context menu.
-
In the subsequent dialog, select Scenarios and click OK:
If the Project Explorer panel is hidden, select View > Project Explorer from the main menu to make it visible.
-
-
Import a feature file to the project:
-
Right-click the Scenarios node in the Project Explorer and select Add > Existing Item from the context menu.
-
In the subsequent Open File dialog, select the needed feature and click Open. You will see the file in the Project Explorer under the Scenarios node.
-
2. Create script for test steps
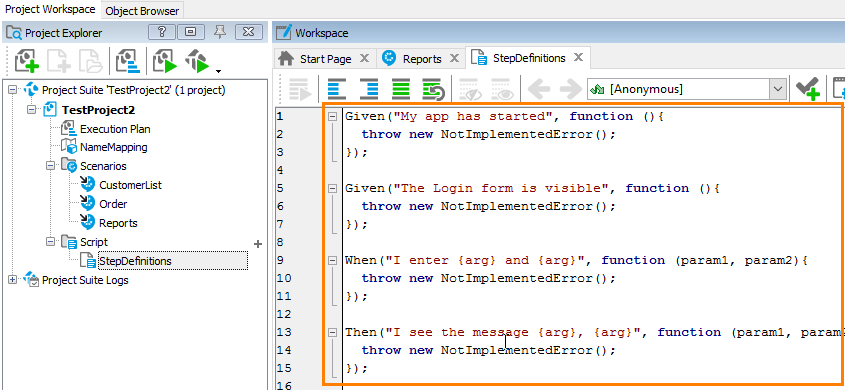
When importing files, TestComplete automatically creates script functions for the test steps of the imported scenarios. After the import is over, you can see them in the script editor:
By default, the script functions has code that raises an exception. To automate your scenario, you need to replace the generated code with script statements, methods and properties that will simulate the needed user actions. You can write this code manually or record it. See Create Test Step Scripts for details.


