The SmartBear Test Extension makes it possible to record and run web tests in Google Chrome and Chromium-based Microsoft Edge. This extension is automatically installed in Chrome and Edge during the TestComplete installation, and is shared among all user accounts in these browsers.
SmartBear Test Extension adds its icon to the web browser navigation bar — this way, you can confirm that the extension is installed and enabled.
Install and enable the extension
 The web browser (Chrome or Chromium-based Edge) must be installed before installing the extension.
There is no need to exit Chrome or Edge before installing the extension.
Automatic installation
The SmartBear Test Extension is installed automatically during the TestComplete (or TestExecute) installation. After the extension is installed, it is enabled automatically.
Note: If Chrome or Edge has been running during the extension installation, you may need to reload web pages opened in the web browser so that the test engine could access them.
Manual installation
-
Launch the browser (Chrome or Chromium-based Edge).
-
Open the SmartBear Test Extension page of the appropriate web store:
-
Click Add or Get.
If you start test recording in a browser and the extension is not installed, TestComplete will suggest that you install the extension. As an alternative, you can close your browser and reinstall TestComplete in the Modify mode.
Enable the extension
In Chrome
-
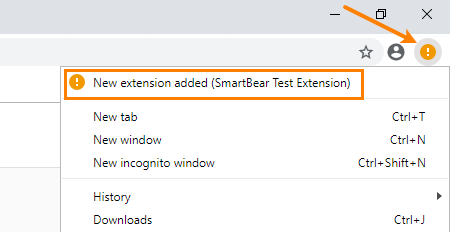
Launch Chrome. Note that its menu icon (three points at the top right) changes the view and becomes orange.
-
Click the Chrome menu icon and then select New extension added (SmartBear Test Extension).

-
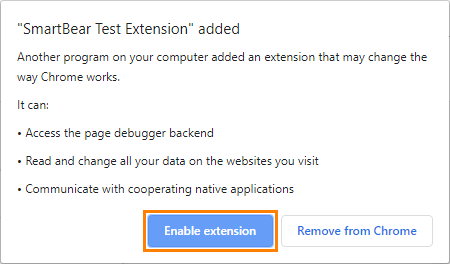
In the dialog that appears, click Enable extension.

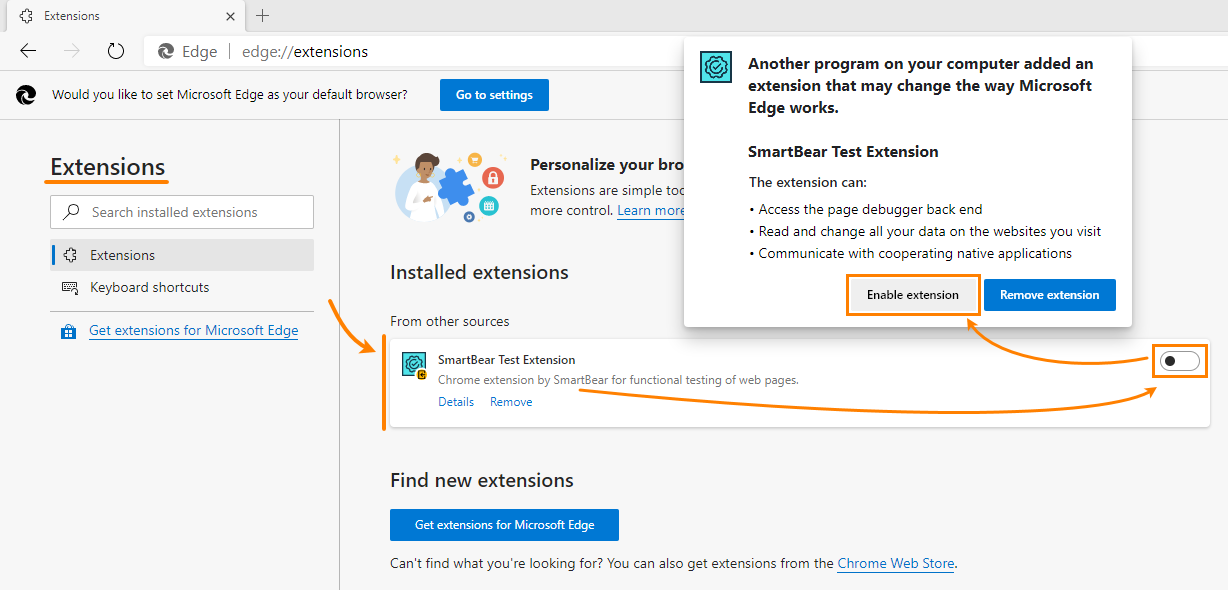
In Edge
Installing Without Internet Access
If you do not have Internet access or do not have access to the appropriate browser store (for example, because of the security policy in your company), you can install and activate the SmartBear Test Extension manually as described below:
-
In Chrome or Edge, open the browser’s Extensions page.
-
Switch to the Developer mode. The switcher is in the right corner of the opened page in Chrome, and in the bottom left corner in Edge.
-
In Windows Explorer or any other file manager, open this folder:
<Program Files> \Common Files\SmartBear\tcCrExtension\gmhjclgpamdccpomoomknemhmmialaae – on 32-bit Windows versions
<Program Files (x86)> \Common Files\SmartBear\tcCrExtension\gmhjclgpamdccpomoomknemhmmialaae – on 64-bit Windows versions
Note: TestComplete must be already installed on your machine. -
Drag the tcCrExtension.crx file from your file manager to the browser’s Extensions page.
-
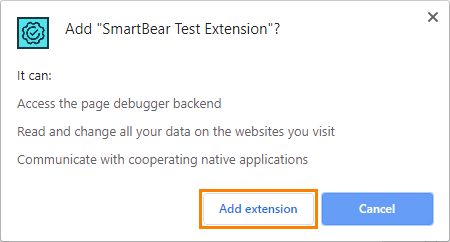
Click Add extension in the subsequent dialog (the image below shows the dialog in Chrome. Edge offers a similar dialog):

-
Restart the web browser to apply the changes.
Reinstalling
If you remove SmartBear Test Extension from the browser, reinstall it from its page in the web store:
For detailed instructions, see above.
Extension Options
The SmartBear Test Extension provides a number of options to customize web testing recording and playback capabilities. To view or change these options, click the arrow on the left of the SmartBear Test Extension on the Extensions page:
| Option | Description |
|---|---|
Allow in InPrivate (Edge) |
Enable this option to test web pages during private browsing. |
|
Allow access to file URLs |
Select this option to test local web pages or web pages stored as local files (their URLs start with the file:// prefix). |
 After you change these options, you must restart the web browser. Otherwise, TestComplete will not be able to access web pages in it.
See Also
Preparing Chrome for Web Testing
Considerations for Web Testing
Classic Web Testing
Requirements for Web Testing


