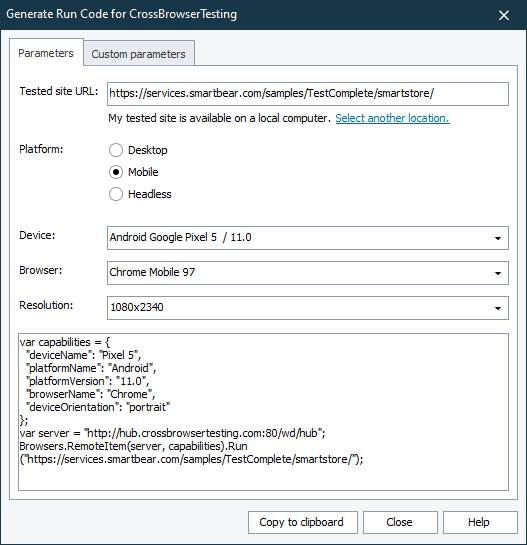
You use the Generate Run Code dialog to connect to a device cloud (if not connected yet) and generate script code that will describe a remote platform where you want to run your web test.
To which device cloud the dialog connects depends on the Device Cloud > Web > Web cloud provider property of your TestComplete project.
To call the dialog
Click  on the Code Editor toolbar in TestComplete.
Requirements
-
An active license for the TestComplete Web Module.
-
The Web Testing plugin and the Cross-Platform Web Testing plugin must be enabled in TestComplete (they are installed and enabled by default).
-
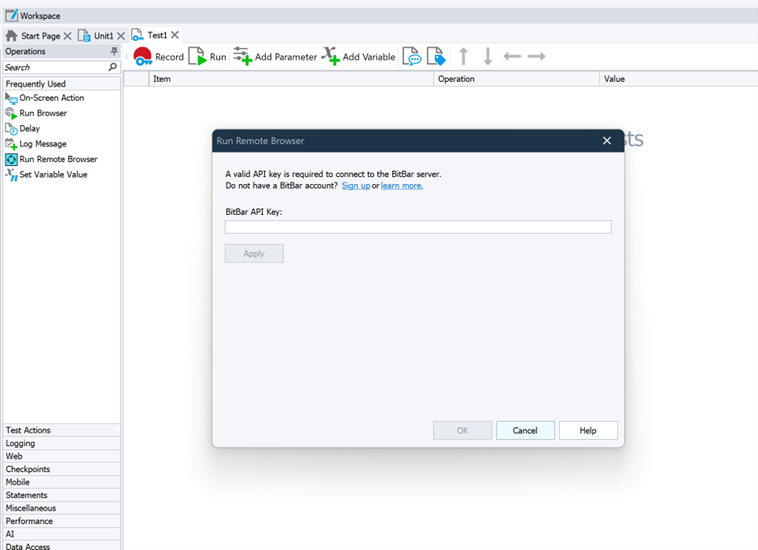
An active BitBar account.
Note: If you do not have an account, you can sign up for a free trial directly from TestComplete — TestComplete will suggest that you do this automatically if it does not find the appropriate account data when you open the dialog.
-
TestComplete must have access to the device cloud. If there are any firewalls or proxies in your network, make sure that they allow traffic from the TestComplete workstation to the device cloud. If needed, configure the firewall to allow connecting to the cloud. See TestComplete and Windows Firewall.
Sign In
If there are no proper device cloud credentials specified in the project, specify them:
Generate run code
Parameters
-
Tested site URL - The URL of the tested web page that the specified remote browser will open upon launching. Typically, it should be the page from which your testing actions will start.
 We recommend that you specify the complete URL of your target web page, including the protocol name. For example, http://services.smartbear.com/samples/TestComplete15/smartstore/. Otherwise, TestComplete will use the
 HTTPSprotocol to navigate to the target web page and post a warning to the test log. -
If your tested web application is behind a firewall in your local network or on your local computer, or if you want to route traffic to your tested application through a proxy server, you can configure a secure tunnel.
If the tunnel has not been configured yet, click Select another location and then, in the resulting Choose Your Web Application Location dialog, specify the application location.
-
Platform - You can select one of the following platform types:
-
Desktop
-
Mobile
-
Headless (available for the BitBar device cloud only)
-
-
Device - Select one of the devices provided by the device cloud.
-
Browser - Select a web browser in which you want to run your web test. For Firefox and Chrome, you can select a specific browser version, or you can select the Latest version available option.
-
Resolution - Select the screen resolution that will be set on the target platform for the test run.
Custom parameters
On this tabbed page of the dialog, you can specify additional capabilities that will be used for your test run.
Copying the generated code
The dialog will generate the code based on the items you select and will show the generated code in the lower part of the dialog.
You can select and copy the code to the clipboard manually, or you can click Copy to clipboard. The dialog will copy the entire code to the clipboard and then close. Insert the code from the clipboard to the needed place in your code.
Click Close to close the dialog without copying anything.
See Also
About Cross-Platform Web Tests
Creating and Running Cross-Platform Web Tests


 Using an existing account - See instructions
