 |
Exporting virtual services and running them as WAR files was deprecated as of ReadyAPI 3.8 but is still available in the latest ReadyAPI product. It's important to be aware that when using the WAR format, certain ReadyAPI Virtualization-specific features such as assertions, data sources and others are not compatible. If you require these capabilities, the suggested approach for running a virtual service on a remote machine involves utilizing VirtServer. |
One possible way to run a virtual API (virtual service) is to save it in the WAR format (Web Application aRchive) and deploy and run this file on a servlet container like Tomcat. To do this, you use the Save as WAR command of the ReadyAPI menu. The command works for all the virtual services of your ReadyAPI project. The resultant services will offer a simple web interface to view request and script logs.
Save Virtual Service to a WAR File
From the ReadyAPI Interface
-
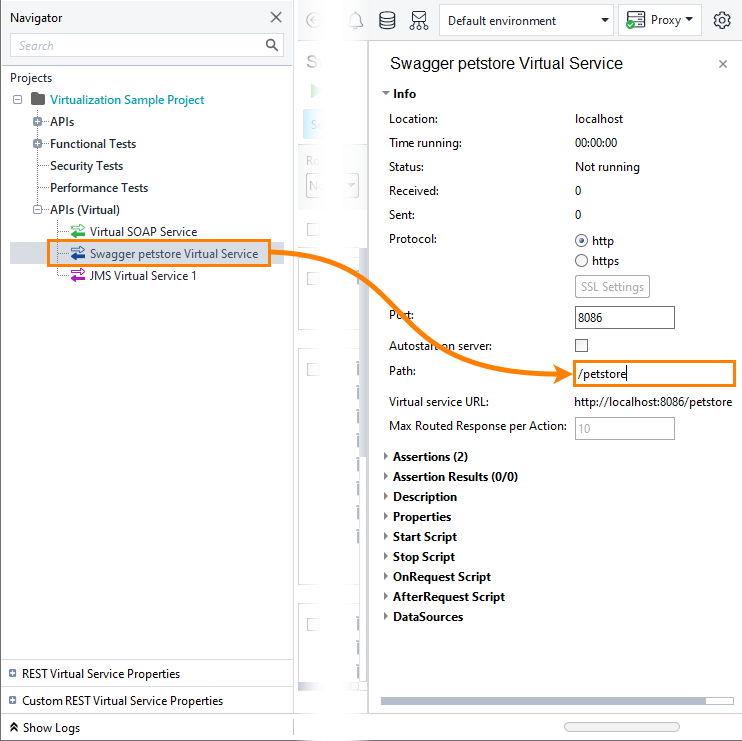
 Important: Specify a value for your virtual service's Path property. The web server will use this value to form the service address on the server. To specify the property value, select your virtual service in the Navigator panel on the left and specify a value in the editor on the right:
The Path value cannot be a slash (/) or an empty string. Use a value like
/some-word.The “Save as WAR” command exports all the virtual services you have in your project to one WAR file. So, if you have several virtual services in your project, then set a unique Path property value for each virtual service.
-
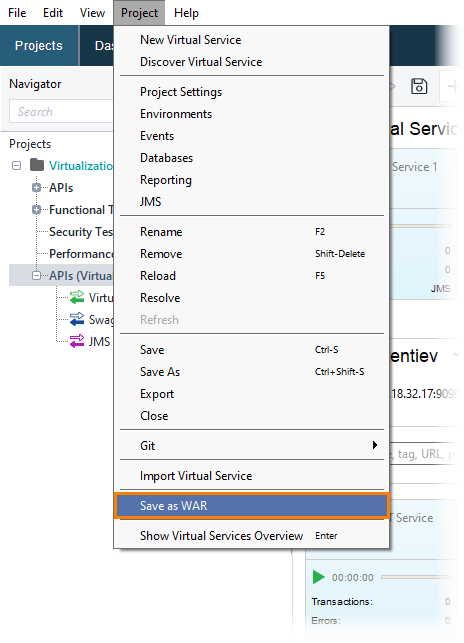
In the Navigator panel, select the APIs (Virtual) node or any virtual service in your project and then select Project > Save as WAR from the main menu:
– or –
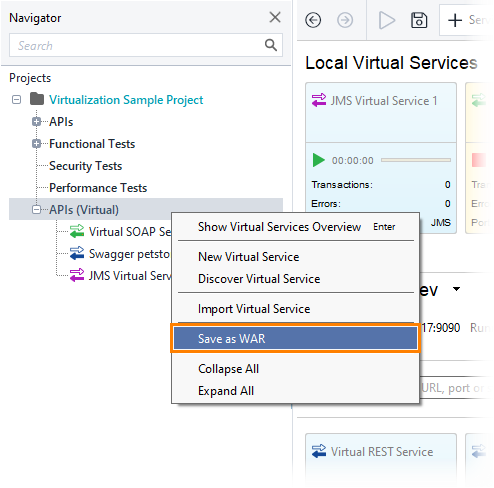
Right-click the APIs (Virtual) node in the Navigator and choose Save as WAR from the context menu:
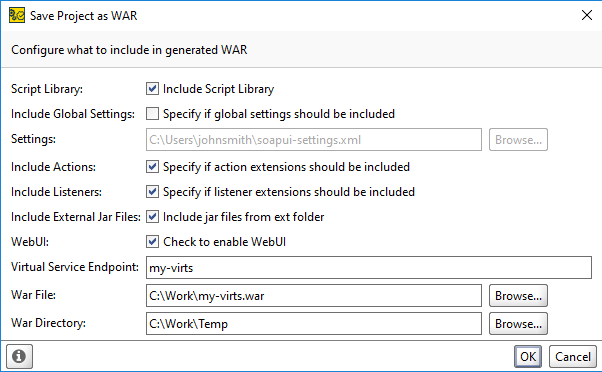
The following dialog box will appear:
-
In the dialog, configure the settings for generating the WAR file:
Setting Description Script Library Includes files of the ReadyAPI script library into the generated WAR file (the files that are located in the <ReadyAPI>/bin/scripts folder). Include Global Settings Select this check box to package the ReadyAPI setting file into the resultant WAR file. If you keep this check box clear, your virtual services will use default settings. To specify the setting file, use the Settings edit box (see below). Settings Specifies the fully-qualified name of the ReadyAPI setting file. Used along with the “Include Global Settings” option. By default, the edit box contains the default setting file name. Include Actions Select this check box to include action extension files into the resulting WAR file. Keep this check box clear if you do not use action extensions. Include Listeners Select this check box to include listener extension files into the resulting WAR. Keep this check box clear if you do not use listener extensions. Include External Jar Files Select this check box to include custom Java libraries, JDBC drivers and other .jar files from the <ReadyAPI>\bin\ext folder into the generated WAR file. WebUI Select this check box (recommended) to generate special pages for viewing the exported web services, their specifications, logs and other data. Virtual Service Endpoint The endpoint that will be used in generated WSDL and schemes. War file The fully-qualified name of the resulting WAR file. War Directory The fully-qualified name of a folder to which ReadyAPI will save temporary files before packaging them into the WAR file. After you set the needed values, click OK to generate the WAR file.
By Using Command-Line Wargenerator
You use Wargenerator to execute ReadyAPI load tests from the command line.
The generator is located in the <ReadyAPI>/bin directory. The file name is wargenerator.bat (Windows) or wargenerator.sh (Linux and macOS).
General Syntax
The generator command line has the following format:
Arguments
-
test-project-file – A fully-qualified name of a project file. If the file name or path includes spaces, enclose the entire argument in quotes.
-
-a – If specified, action extension files are included into the resulting WAR file.
-
-c – The full path to the script library that should be included in the WAR file.
-
-d – The fully-qualified name of a folder to which ReadyAPI will save temporary files before packaging them into the WAR file.
-
-e – The endpoint that will be used in generated WSDL and schemes.
-
-f – The fully-qualified name of the resulting WAR file.
-
-l – Include listener extension files into the resulting WAR.
-
-O – If specified, no usage statistics are sent.
-
-p – The project password for working with encrypted projects.
-
-s – The fully-qualified name of the ReadyAPI setting file.
-
-v – The password that is used to access the setting file.
-
-w – Recommended. If specified, the special pages for viewing the exported web services, their specifications, logs and other data are generated.
-
-x – Include custom Java libraries, JDBC drivers and other .jar files from the <ReadyAPI>\bin\ext folder into the generated WAR file.
Deploying the WAR File to Tomcat
To deploy your WAR file to Tomcat, copy the file to the Tomcat webapps directory and restart Tomcat. After restarting, Tomcat will run your WAR file automatically. Alternatively, you can use the Tomcat Web Application Manager to upload your WAR file to the Tomcat server (the Manager is part of the Tomcat administrator console). For more information, see Tomcat documentation.
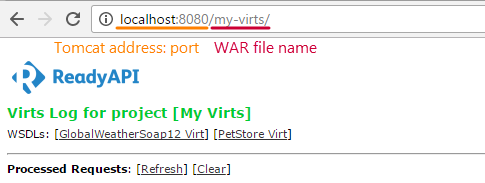
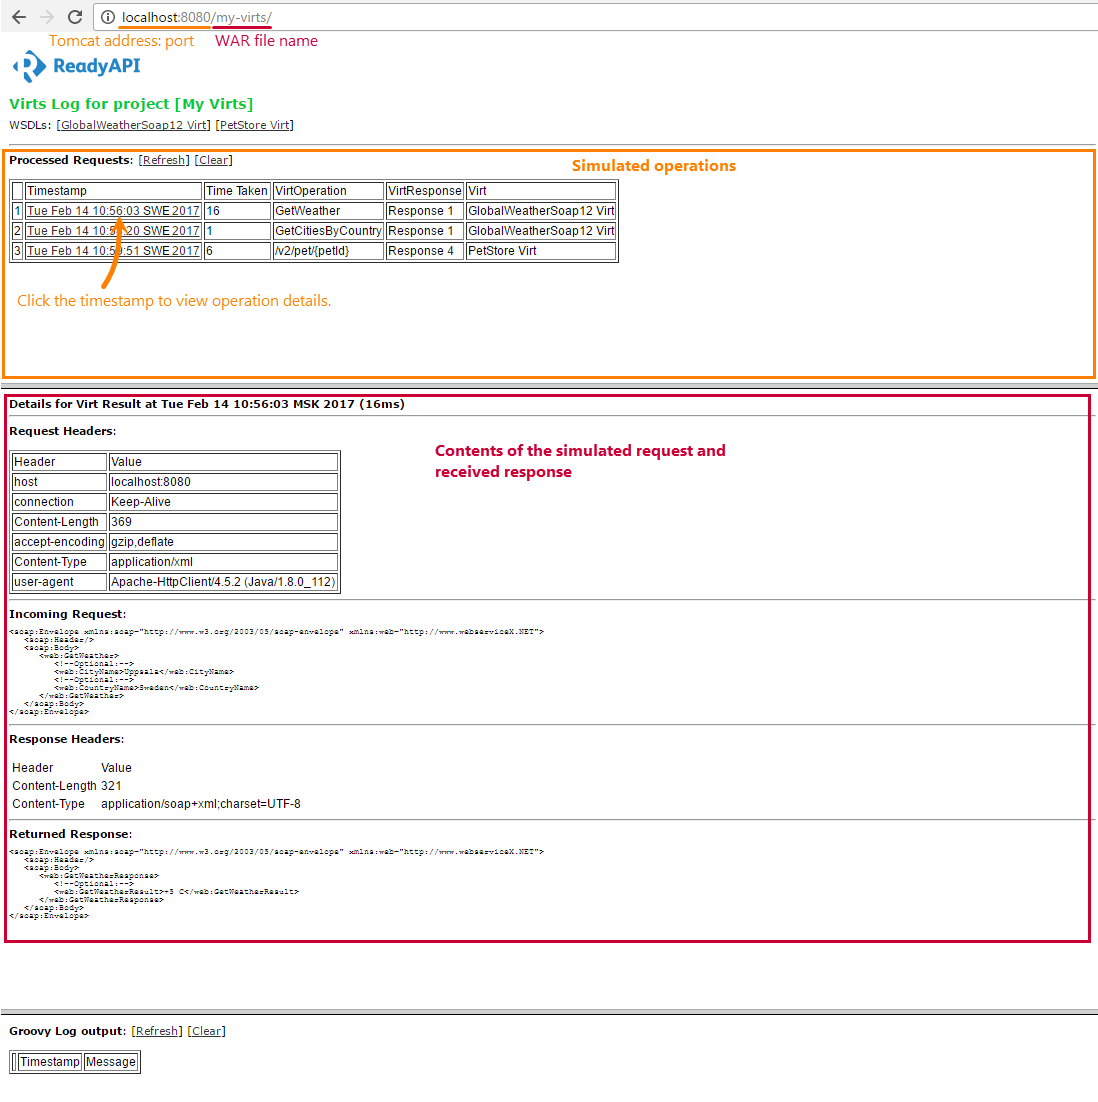
If you enabled Web UI when generating your WAR file, you can view the web interface to get WSDL specifications of your virtual services and to see test log data. To view the web interface, use a URL like this: http://tomcat-server:port/war-file-name:
For example, you can click WSDL links to get the WSDL specification of your SOAP virtual services.
Sending Requests to Web Services in a WAR File
After you deployed the WAR file and started it, you can send test requests to the web service that are inside this file. You can create a test case and send requests, for example, from ReadyAPI. Use URLs of the following format for the requests:
http://tomcat-server:port/war-file-name/virt-endpoint/resource-path
Where –
-
tomcat-server:port is the IP address or computer name and the port on which Tomcat is running.
-
war-file-name is the file name (minus path and extension) of your WAR file.
-
virt-path is the value of the virtual service’s Path property.
-
resource-path – The path of the desired resource (web page, image or other file) on the server.
For example:
http://localhost:8080/my-war-file/my-virt-path/GetWeather
Here is a sample log of WAR file functioning in Tomcat:
Notes
-
In the WAR format, any ReadyAPI Virtualization-specific functionality like assertions, data sources and other are not supported. If you need these features, run your virtual service in other ways.
-
Though you can use WAR files to run both REST and SOAP virtual services, this functionality is mainly useful for SOAP virtual APIs.
See Also
Running Virtual Services
Running Virtual Services on Remote Computers

