
Now, you need to transfer the response’s data to the data sink test step.
To transfer data from a response to a data sink, you can use property expansions. However, in this tutorial, we will use the Property Transfer test step for this purpose.
-
Double-click the Request1 test step to open it for editing.
-
Switch to the Outline tab in the response section.
-
Right-click the id node and select the corresponding data sink property for data transferring:

Click the image to enlarge it.
-
The Transfer to Property dialog appears. You can use it to customize the transfer.
You will not need that during this tutorial, so just click OK.

Click the image to enlarge it.
-
The new Property Transfer test step will appear in the test case.


Since the Property Transfer test step moves data from the response to the data sink test step, it should be placed between the corresponding test steps within the test case. Otherwise, the test case will not work properly. -
Repeat these steps to add a transfer from the group node to the team property:

Click the image to enlarge it.
-
After you do this, the PropertyTransfer 1 step will contain two transfers:
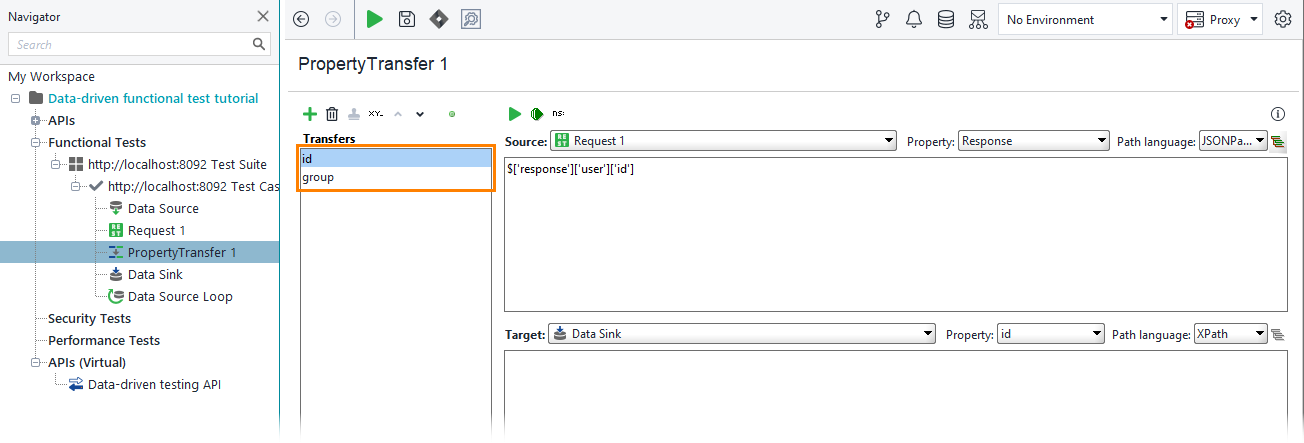
Click the image to enlarge it.
Now, you can run the test.