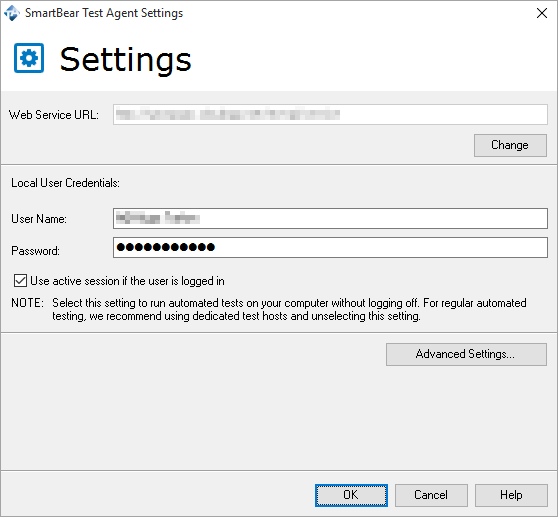
Once the Test Agent is installed on your test computer, you can check or modify the Agent configuration.
To do that, on your test host machine, go to Start > All Programs > SmartBear > Test Agent > Test Agent Settings.
Configure the web service connection
-
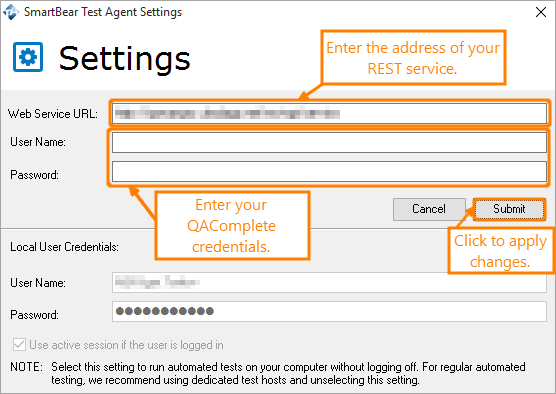
In the Web Service URL field, enter the address of the REST service:
-
For Software as a Service customers, the address is https://rest.qacomplete.smartbear.com/rest-api/service.
-
For On-Premises customers, the address must point to the Agent on your server: http://[your server name]/rest-api/service.
-
-
To change the QAComplete login credentials, click Change and enter the email address and password to use to log in to the QAComplete test account.
Note: for security purposes, when you click Change, you must enter new credentials. -
Click Submit.
Note: If the specified QAComplete account belongs to multiple departments, you will be prompted to select a department to use this computer within.
Configure the test host credentials
-
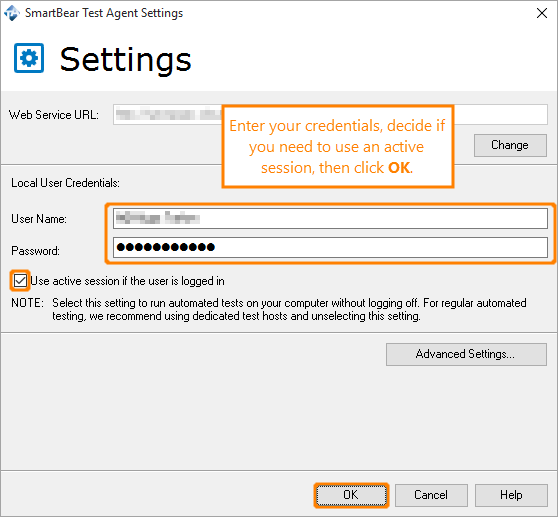
To change login credentials to the host machine, under Local User Credentials, enter the name and password for the Windows user account that will run the automated test from this machine. If the account belongs to a domain, make sure to enter the domain name along with the user name (
[my domain/my domain user name]). -
Set the Use active session option by selecting or removing the selection from the check box.
-
If checked: The Test Agent will check if the local user is currently logged in to the host machine. If so, it will not perform the logout routine. If this user is not logged in, the Agent will close any open applications, log out of the host machine, log in as the user specified here, run the test, and log out.
-
If not checked: The Test Agent will always close open applications on the Host machine, log out, log in, run the test, and log out.
-
-
Click OK to save your changes.
Prepare to use testing frameworks
-
To set paths needed to run tests with various frameworks, click Advanced Settings.
-
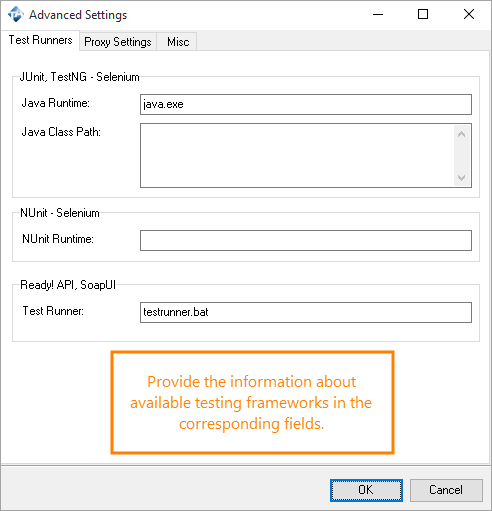
In the Advanced Settings dialog, switch to the Test Runners tab.
-
To set paths needed to run tests with JUnit and TestNG:
-
Enter the path to the Java Runtime executable (java.exe).
Tip: If you have several Java versions installed, specify the path to the Java Runtime version you will use to run tests. -
In the Java Class Path field, enter the path to the required framework library (junit-n.nn.jar or testng-n.n.n.jar).
Note: You can skip this step if you are going to use Maven to run tests).
-
-
To set the path needed to run tests with the NUnit testing framework, enter the path to the NUnit executable (nunit-console.exe).
-
To set the path to the ReadyAPI or SoapUI OS test runner tool, enter the path to the test runner tool (testrunner.bat) that is installed with ReadyAPI or SoapUI OS. By default, the Test Agent will search for the test runner tool in the folder where ReadyAPI or SoapUI OS is installed.
Configure the connection to a proxy server
-
To configure the Test Agent to communicate with QAComplete through a proxy server, click Advanced Settings.
-
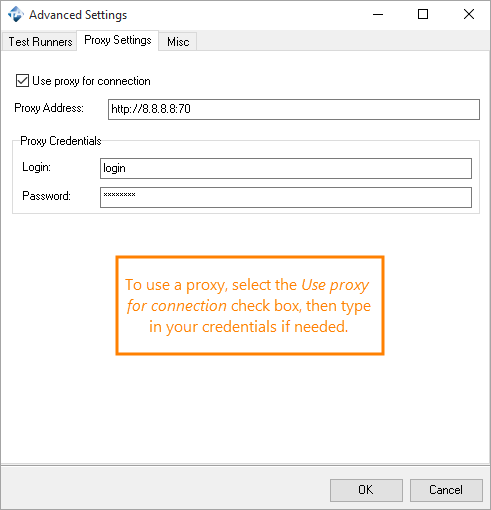
In the Advanced Settings dialog, switch to the Proxy Settings tab.
-
Select the Use Proxy for connection check box.
-
In Proxy Address, enter the network name or IP address and port of your proxy server. For example, 192.168.100.50:8888.
-
If your proxy server requires user authentication, enter the user name and password of the user account which you will use to connect to the proxy server.
-
Click OK to save the changes.
Enhance your experience
To help us improve the Test Agent, please allow it to collect information on how you use the Test Agent and to send that information to SmartBear.
-
In Test Agent Settings, click Advanced Settings.
-
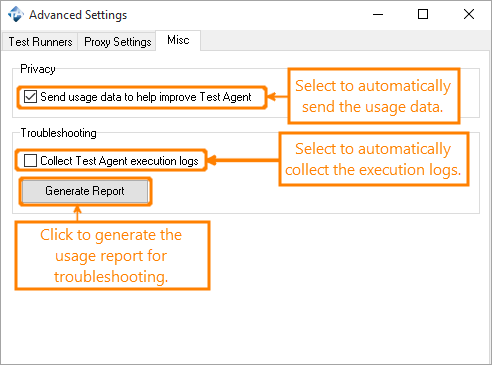
In the Advanced Settings dialog, switch to the Misc tab.
-
Select the Send usage data to help improve TestAgent check box.
-
Click OK to save the changes.
If you allow data collection, the Test Agent will collect information on how you use the product and will send it to our server every time the Test Agent closes or when an error occurs.
From this page, you can also allow the Test Agent to collect execution logs. To do that, select the Collect Test Agent execution logs check box. When this check box is active, the Test Agent will store all execution logs in a temporary folder.
Click Generate Report to automatically pack all available logs to an archive and remove them from the temporary folder. You can send the log archive to the Support Team for more efficient troubleshooting.
SmartBear will not share the collected information with any third parties.
The Test Agent will not collect any personal information, like password, logins, and other sensitive information. Information on how you work with our product will help us understand how we can improve it.

