If you have made all the preparations and the system requirements are met, you can install QAComplete:
 3. Install the Crystal Reports 2008 runtime
 5. Set up the QAComplete database
 6. Specify the notification sender
 7. Enter the QAComplete license key
 8. Choose a location for web applications
 9. Choose the destination location
1. Sign in as administrator
Sign in to your server as an administrator to run the installation successfully.
2. Download files
Download the installation package:
 https://downloads.smartbear.com/QAComplete/Enterprise/144/QAComplete_144_Install.zip
Copy the installation package to a location on the server that will host QAComplete and unzip the files.
3. Install the Crystal Reports 2008 runtime
QAComplete reporting subsystem requires that Crystal Reports 2008 Runtime is installed on your server. The installation package for Crystal Reports 2008 Runtime is shipped with our QAComplete installation package. It resides in the cr2008fp3_redist folder.
Install the Crystal Report 2008 Runtime using the .msi file located in the cr2008fp3_redist folder included in the QAComplete installation package:
<QAComplete_140_Installer>\cr2008fp33_redist\CRRuntime_12_3_mlb.msi
Run the CRRuntime_12_3_mlb.msi installation program and follow the instructions to install Crystal Reports.
4. Start the installation
Run the downloaded QAComplete installer:
QAComplete 14 Setup.exe
Wait until it unpacks the files and displays the following window:
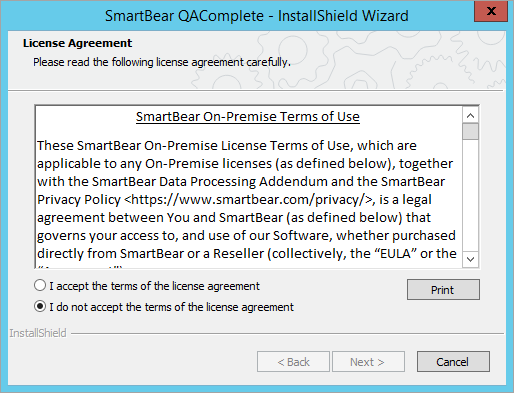
Read the terms of the EULA. Click I accept the terms of the license agreement and click Next.
5. Set up the QAComplete database
The installation can either create a new database, or connect to an existing QAComplete database. This depends on whether you are going to install the product for the first time or re-install it. See the following sections:
Set up a new database
Select Create a new database and the installer will create new QAComplete databases for you:
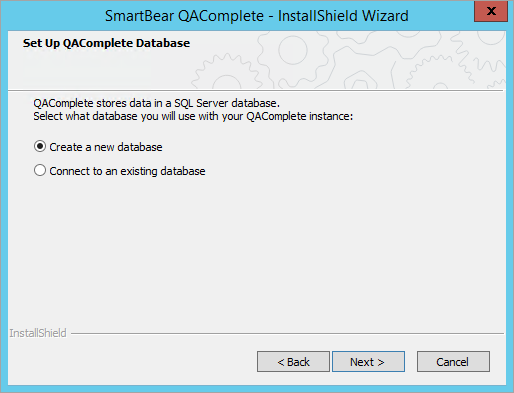
Click Next.
Create a database
To create a database on the current machine, leave the default (local) value.
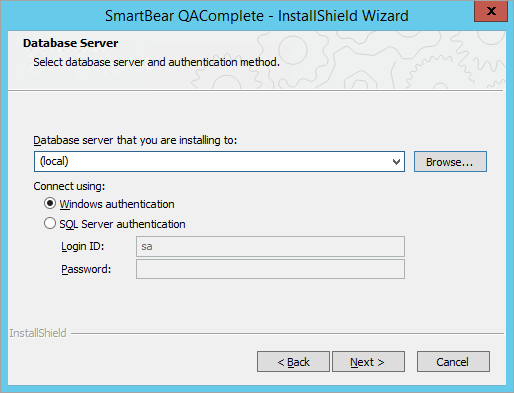
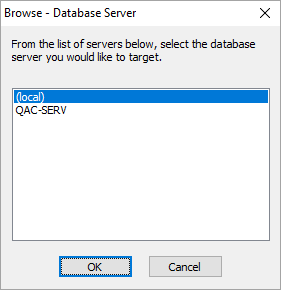
To create a database on a remote machine, specify the machine name or IP address or click Browse and select the needed machine in the resulting dialog:
| Note: | The target machine must be available in the network and have a supported version of SQL Server installed. |
If your SQL and web servers are not on the same machine, and you use the SQL port other than 1433, specify the needed port explicitly:
<Server Name>,<Port Number>
Select an account under which you want to connect to the SQL Server that will host the QAComplete database:
-
Your current Windows account.
– or –
-
SQL Server account. Enter the account name (default value is sa) and the password.
 |
The account you use must belong to the sysadmin fixed role in your SQL Server. Otherwise, an error will occur. |
Click Next.
Set passwords
QAComplete uses three internal SQL Server accounts to perform queries of different types. You can specify passwords or let the installer automatically create the accounts and passwords. We recommend that you allow installer to create the passwords automatically:
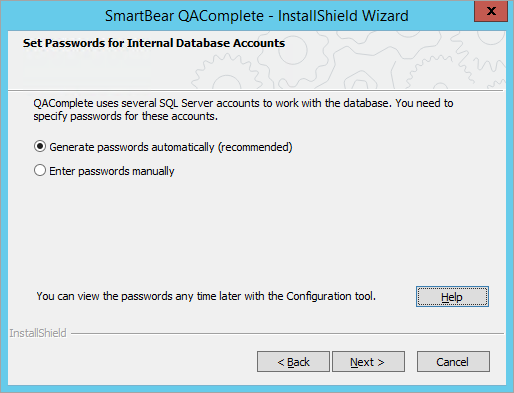
Select Generate passwords automatically (recommended) and click Next.
Alternately, you can specify the passwords for these accounts. Select Enter passwords manually. Enter your passwords and click Next.
 |
Make sure to write down and keep your database password and master password in a safe place. These passwords are stored in an encrypted form on your computer, so you won’t be able to recover the original passwords later if you lose them. You might need these passwords later to change settings or restore access, so keeping a secure copy is very important. |
 |
If needed, you can also view the database password using the EncryptPersonsInfo tool that comes with QAComplete. By default, it is installed to the following folder: <QAComplete>\Password Encryptor |
Create an administrator account
This account is your first QAComplete user and will automatically be a full system administrator. You will use this email and password to log in to QAComplete after the installation completes.
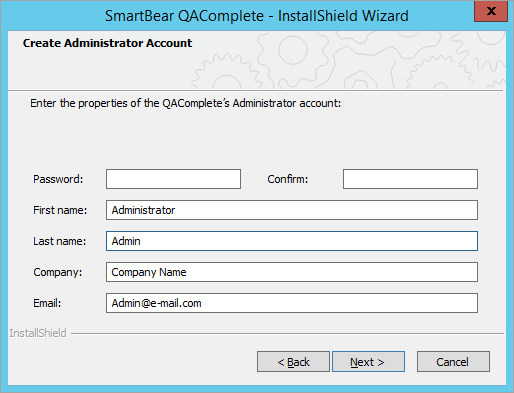
Enter a password and repeat it in the Confirm box to verify it, then enter the First name, Last name, your company name and the administrator's email address.
Click Next.
Encrypt user passwords
You can configure QAComplete to encrypt sensitive user data. It will use an encryption key to encrypt or decrypt user passwords.
To create a new encryption key, select Generate a key automatically.
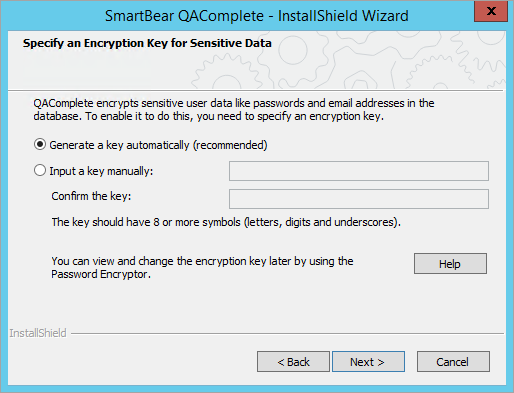
Alternatively, you can specify encryption key manually. Select Input a key manually, enter your key, then confirm it.
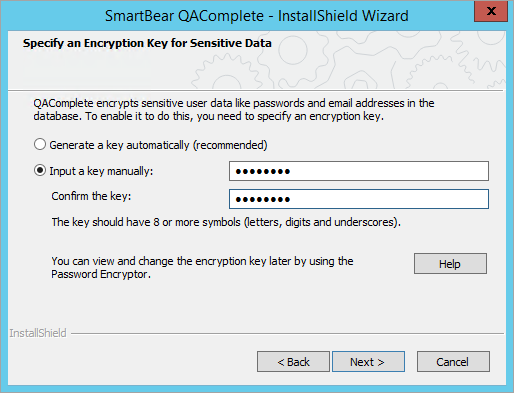
If necessary, you can view and change the encryption key(MassterPassword) later by using the EncryptPersonsInfo tool. The utility is shipped with QAComplete. By default, it is installed to the following folder:
<QAComplete>\Password Encryptor
Click Next to proceed to Specify Notification Sender.
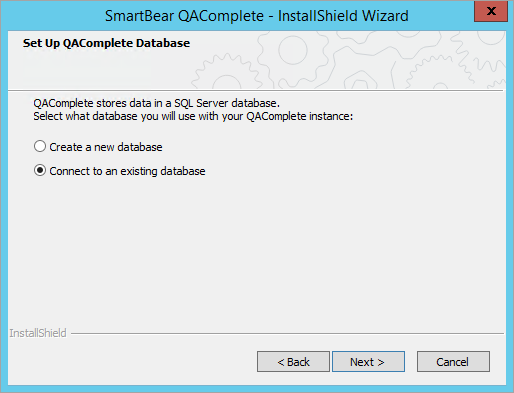
Connect to an existing database
If you are performing a re-installation and already have a QAComplete database, select Connect to an existing database and click Next:
Specify the database server
Select your QAComplete database server from the drop-down list or click Browse and locate the database:
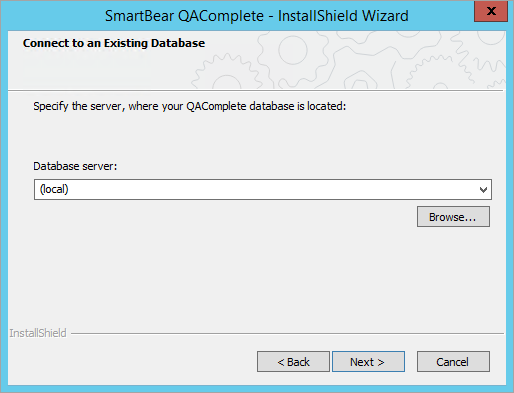
| Note: | If you are using SQL Express on the local machine, this will be (local)\SQLEXPRESS. |
Click Next.
Specify the database account passwords
QAComplete uses three internal SQL Server accounts to perform queries of different types. Enter the passwords for these accounts:
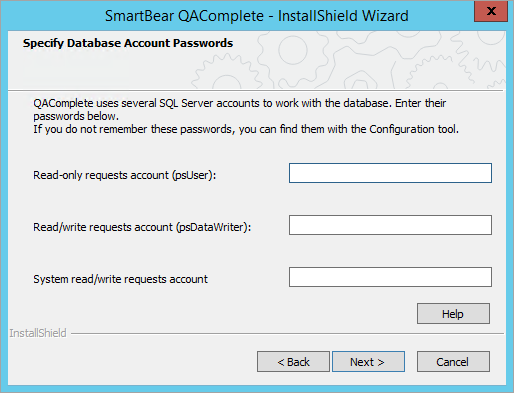
| Note: | If you do not know the passwords, you can find them in the SoftwarePlanner registry on your server –
|
Click Next to continue.
Specify an encryption key
For security reasons, QAComplete can encrypt sensitive user data like passwords. This is an extra security means in addition to the SQL Server security. If your database was encrypted, specify the encryption key on this page:
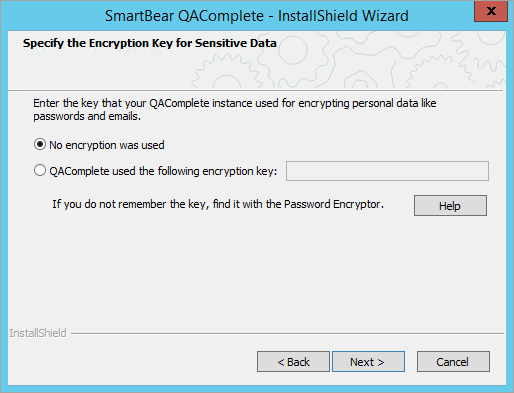
| Note: | If you do not know the encryption key, you can find it in the registry or EncryptPersonsInfo tool. |
Click Next.
6. Specify the notification sender
QAComplete sends email messages and alerts. The Notification Sender email address is used as a default From address for system generated emails:
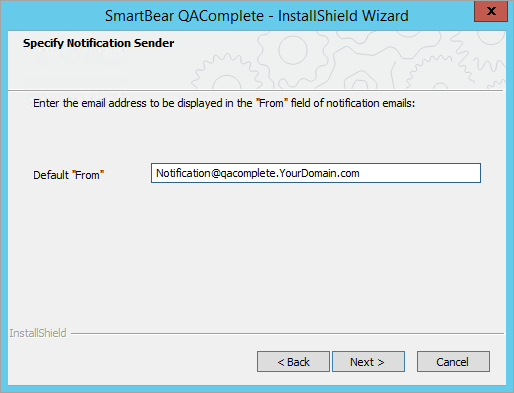
Enter the email address to use for the default From address and click Next.
7. Enter the QAComplete license key
To use QAComplete, you need to activate your license. You can specify the license key now and the license will be activated at your first log in automatically.
You can skip this step, and specify the key and activate the license later (see Activate QAComplete License). QAComplete will request the license key when you log in for the first time.
To enter the key now, select Specify the license key:
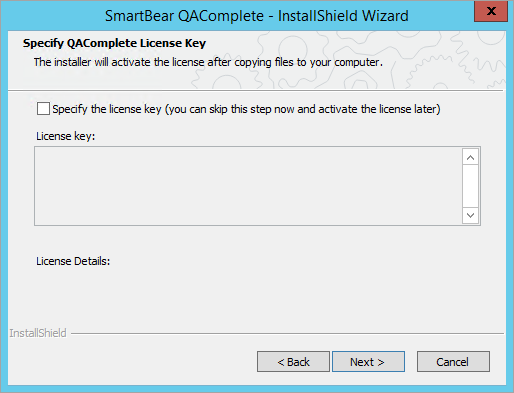
You can find the license key in the email with installation info that you received from SmartBear. Copy the license key from the introductory email and paste it into the License key field.
Click Next to continue.
8. Choose a location for web applications
On this step, you can specify a root folder for QAComplete web applications.
All QAComplete web components should be located in the default web application directory on the current machine.
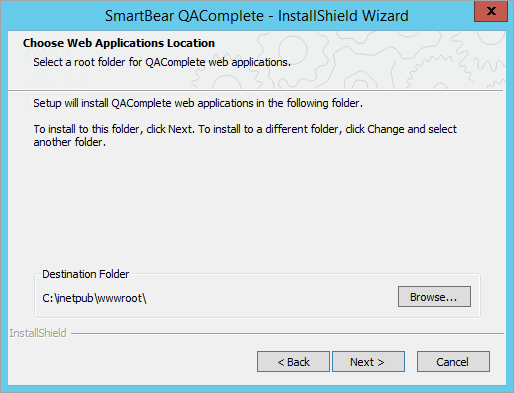
Click Next to continue.
9. Choose the destination location
We recommend you accept the default location for the application.
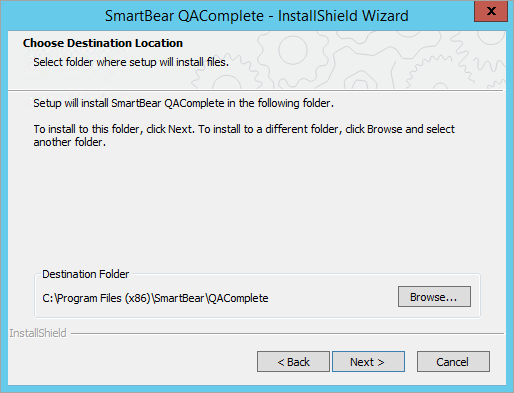
Click Install to copy the QAComplete to your computer.
10. Complete the installation
The installation window will show several progress bars as QAComplete is installed and configured. Several of these processes, particularly the Executing SQL Install Script, can take a considerable amount of time.
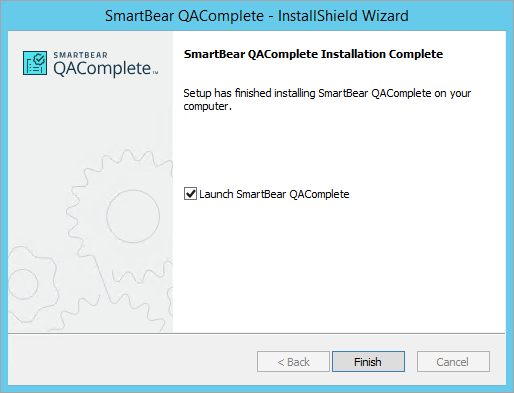
Please wait until you see the Installation Complete window:
11. Log in to QAComplete
To launch QAComplete right after the installation is over, select the Launch QAComplete check box in the Installation Complete window and click Finish. QAComplete will open in your default web browser.
You also can launch QAComplete manually by navigating to the following URL in your web browser:
 http://<server name>/common/Logon.asp?app=agSPEnt
Where server name is the fully qualified domain name of your server.
If you specified the QAComplete license key during installation, log in using the administrator account credentials.
If you did not specified the license key during the installation, QAComplete will ask for your license key.
12. Activate a license
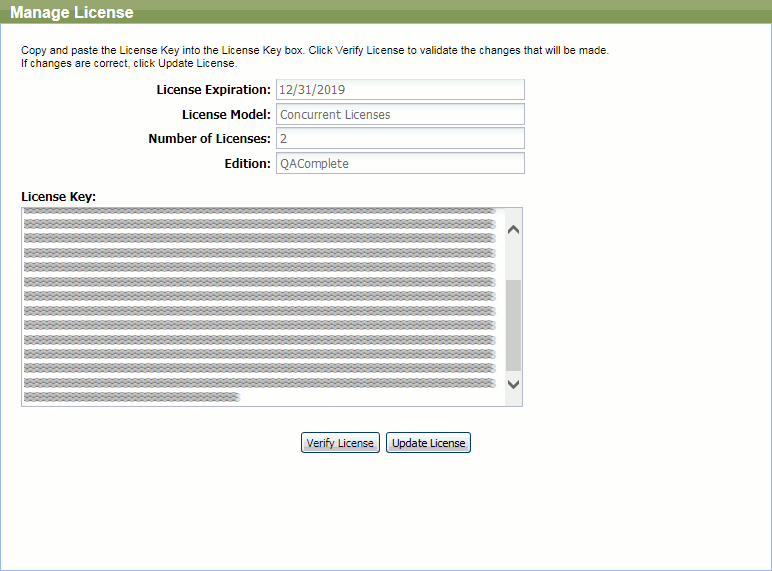
When you open QAComplete, it checks the license. If your QAComplete instance is not activated yet, it will ask you to enter the license key:
You can find the license key in the email with installation info that you received from SmartBear.
Copy and paste the key to the License Key field and click Verify License. QAComplete will check the key. If any issues occur, it will report them.
Click Update License to apply the key.
After activating the license, navigate to the QAComplete logon page:
 http://<server name>/common/Logon.asp?app=agSPEnt
Log in to QAComplete using the administrator account credentials you specified during the installation.
13. Configure email – IIS 6 SMTP server configuration
Configure your local SMTP server to relay messages to your company’s mail server:
-
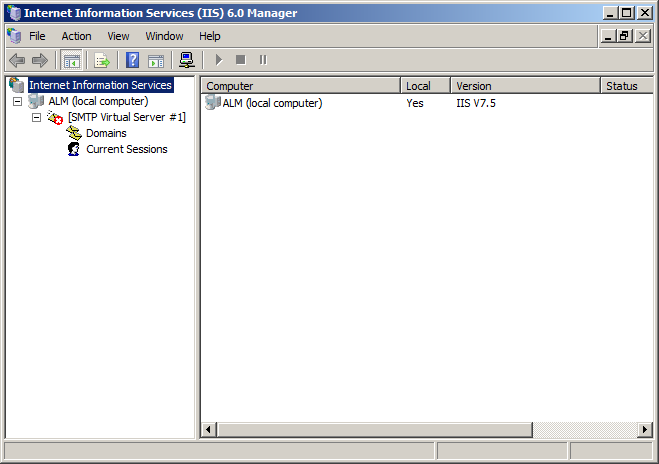
On your server, open the IIS 6 Services Console (click Start, select Run, type
inetsrv/iis6.mscand press Enter). In the console window, locate [SMTP Virtual Server #1].Note: Make sure that this service is stopped before proceeding. -
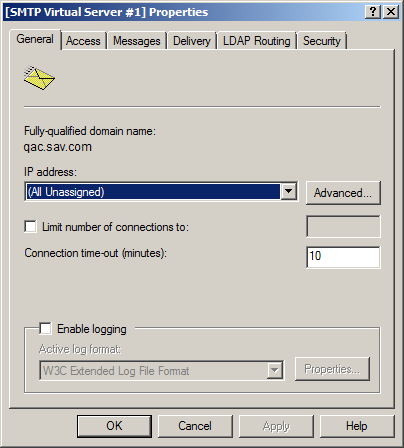
Right-click the [SMTP Virtual Server #1] node and then click Properties.
-
The Properties dialog will appear.
-
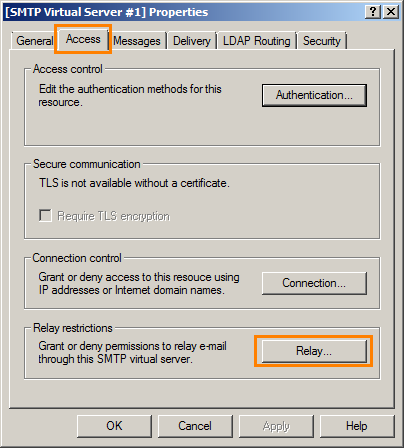
Select the Access tab and click Relay.
-
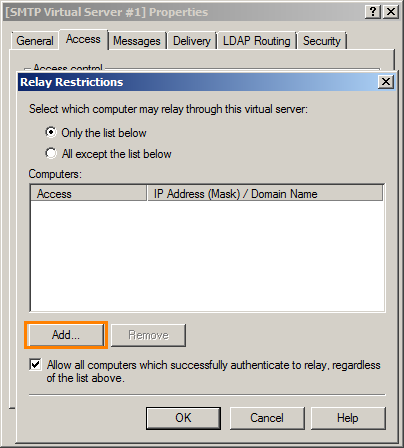
In the Relay Restrictions dialog, click Add.
-
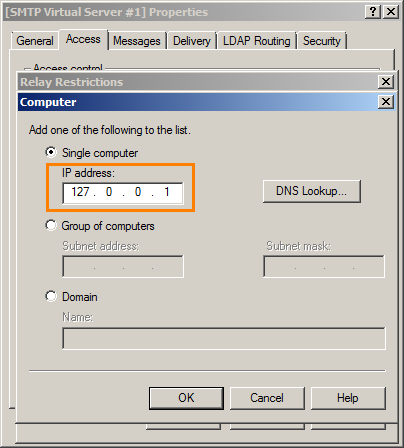
Set the IP address to 127.0.0.1 and click OK.
-
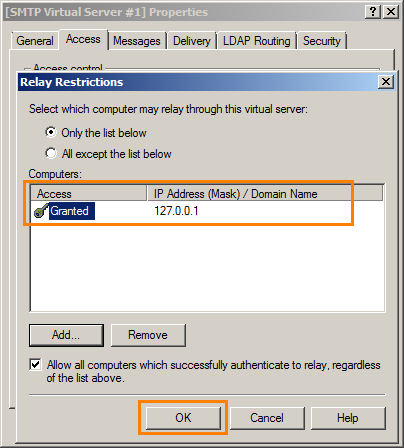
Click OK to close the Relay Restrictions dialog.
-
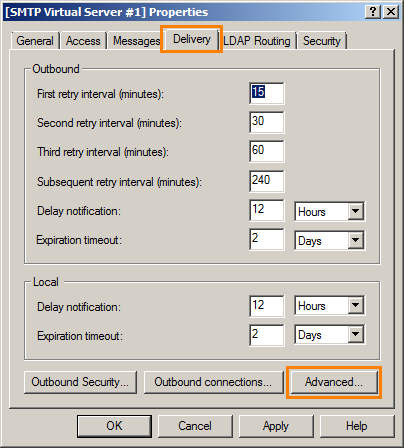
Switch to the Delivery tab and click Advanced.
-
In the Advanced Delivery dialog, the Fully-qualified domain name specifies the name of the current computer.
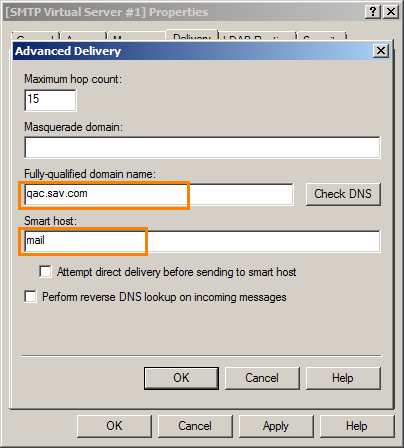
To relay emails to your organization's mail server, specify its IP address or network name in the Smart host field.
Click OK to close the dialog.
-
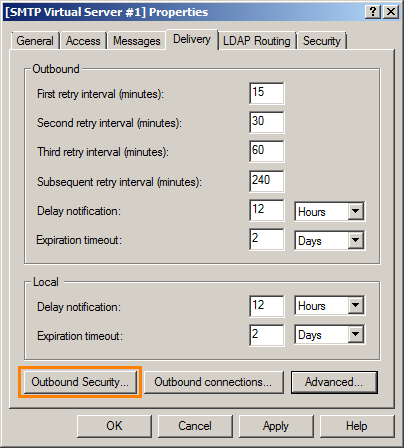
If your organization's mail server requires authentication, click Outbound Security.
-
In the Outbound Security dialog, select the authentication type and specify your credentials:
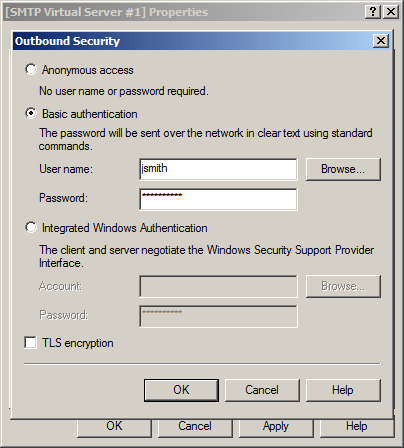
Click OK to close this dialog.
-
Click Apply, then OK to save the changes and close the [SMTP Virtual Server #1] Properties dialog.
-
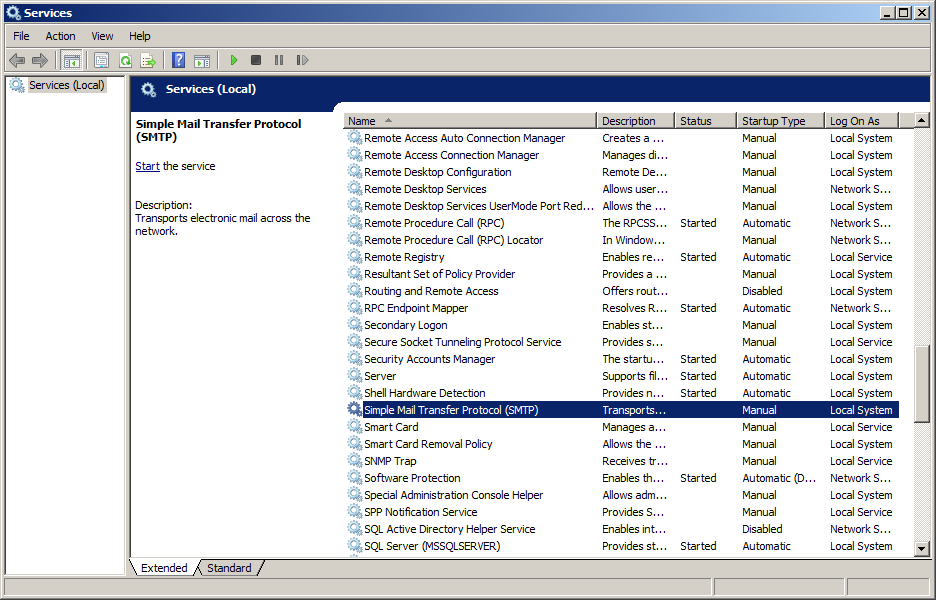
Start the Service Manager (click Start, select Run, type services.msc and press Enter).
-
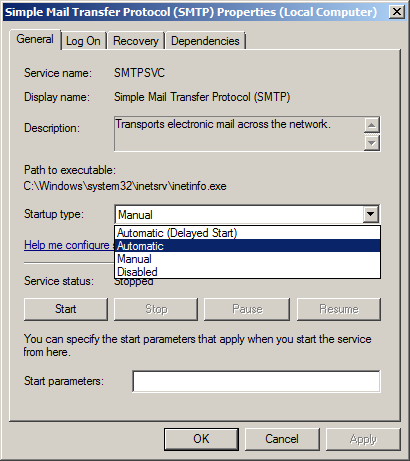
Find the Simple Mail Transfer Protocol (SMTP) service. Right click it and then click Properties.
-
Set Startup type to Automatic. Click Apply and then OK.
-
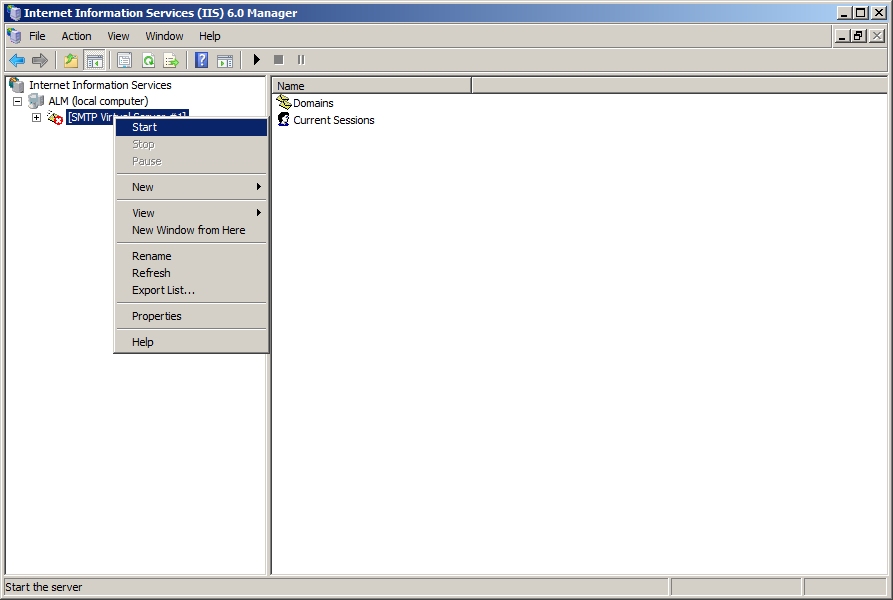
Return to the IIS 6 Services Console.
-
Right-click [SMTP Virtual Server #1] and then click Start to start the service.
14. Increase the maximum allowed file size
By default, the maximum allowed file size for attachments 30000000 (30 Megabytes). You can change this to allow up to 100 Megabytes in IIS:
-
Open the IIS Manager console (Start > Run > inetsrv/iis.msc).
-
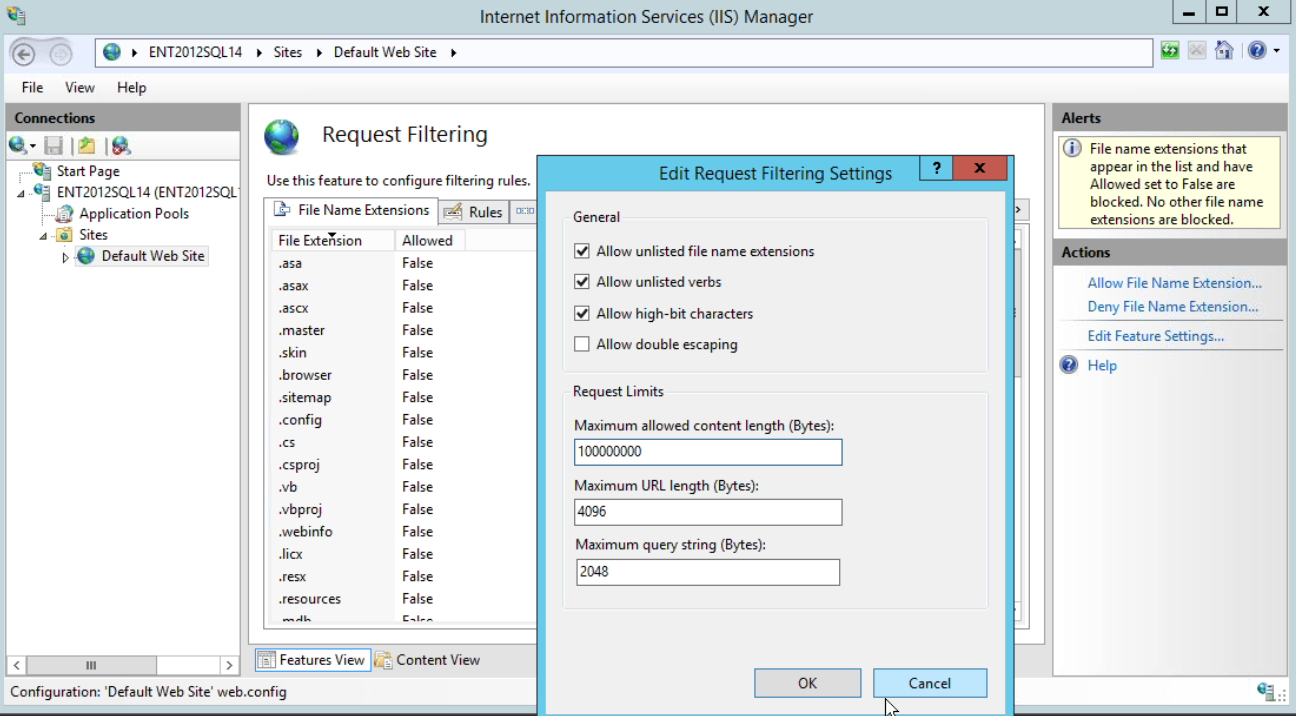
In the navigation pane, select the website hosting the application and open Request Filtering from the Features view:
-
Select Edit Feature Settings from the Actions pane on the right side and set Maximum Allowed content length (Bytes) to the needed value (up to 100000000).
-
Click OK to close the Edit Request Filtering settings window.

