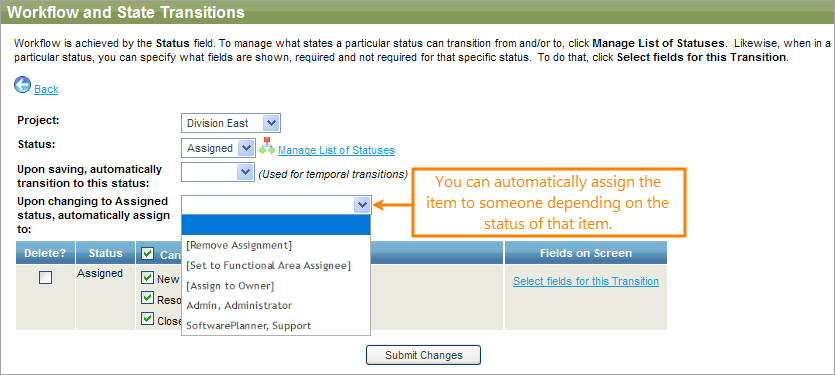
If you wish to have an item automatically assigned to a specific person once it reaches a specific status, you can update your workflow rules for this. To do that, choose the status, and then choose the person to assign it to. For example, you can assign a defect in the New status to a specific team member:
In the preceding example, you can also set Upon changing to Active status, automatically assign to to [Remove Assignment]. That way, it will automatically remove the assignment when it enters that status. This can be helpful for removing assignment when items are closed and in similar cases.
Automatic assignment based on functional areas
| Note: | This feature is available only for Defects. |
The defects workflow has a special type of auto-assignment feature that allows you to automatically assign defects based on the functional area of the defect.
To use this feature, you must first setup your defect functional areas in Tools > Manage Choice Lists area.
| Tip: | If you do not see Functional Area as one of your defect choice lists, go to > Setup > Screen Layouts and add Functional Area to the Create Defect and Edit Defect forms. |
Define a list of values for your functional areas. Once ready, you can setup the assignment rules for each of them:
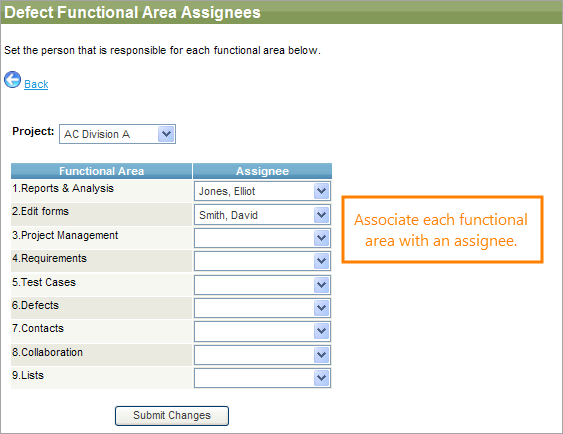
Once you click Manage Functional Area Assignees, you will see a list of functional areas. You can then associate each with an assignee:
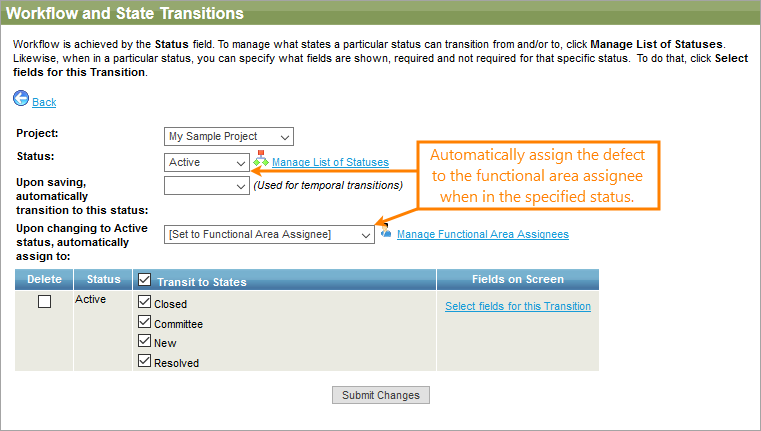
Once ready, set Upon changing to Active status, automatically assign to to [Functional Area Assignee]:
See Also
Define Your Workflow
Modify Workflow
Manage Workflow and State Transitions


