About
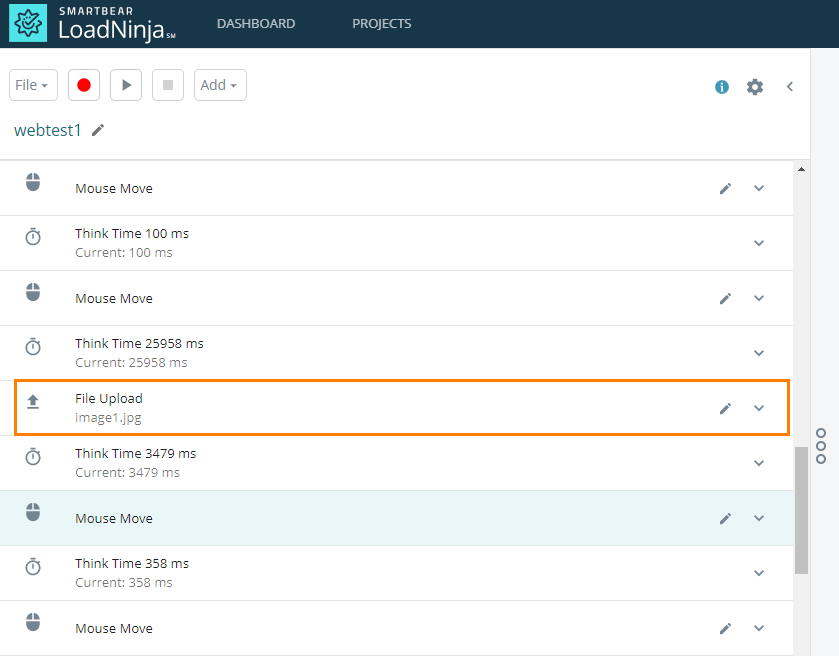
When testing a web application, you may need to upload a file to it, for example, to add an image to a user profile. In LoadNinja, you can record file uploading as any other event – just upload one or multiple files in your application as you normally would during script recording, and LoadNinja will record your actions as a special command:
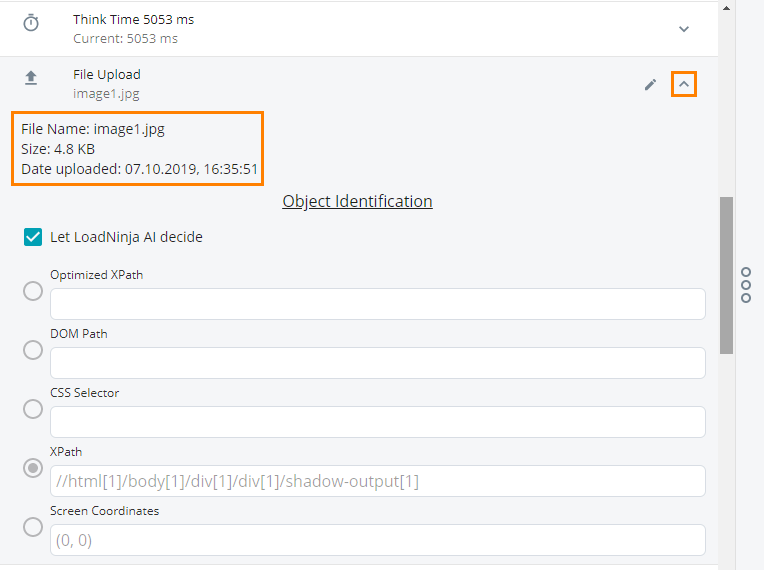
You can upload any file, there are no restrictions on file types. To view the details of an uploaded file (or files), expand the File Upload event in the script editor:
The uploaded files are stored on the LoadNinja server. When you run the recorded script, LoadNinja will copy the files to the servers launched for your test, and virtual users will upload them to the tested application.
After uploading a file, you can replace or download it.
Supported controls
Web developers implement the Upload File feature on their pages in different ways. These can be standard buttons or custom controls. You can interact with any of them when recording your tests, but the way you add a File Upload event is different.
-
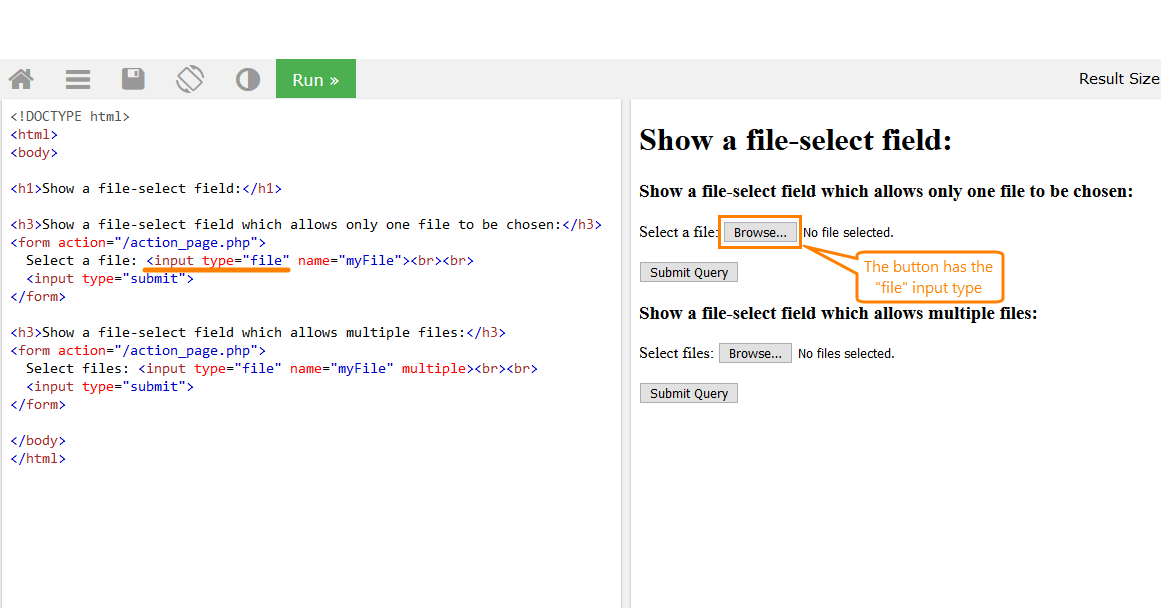
The default way to implement a file selector is to use an HTML element like
<input type="file">. Typically, these elements look like a Browse... or Choose files... button. If you have a page with this control, then to add a file uploading event to your test, simply record your actions on it: during test recording, click the button and select the needed file in the subsequent dialog: -
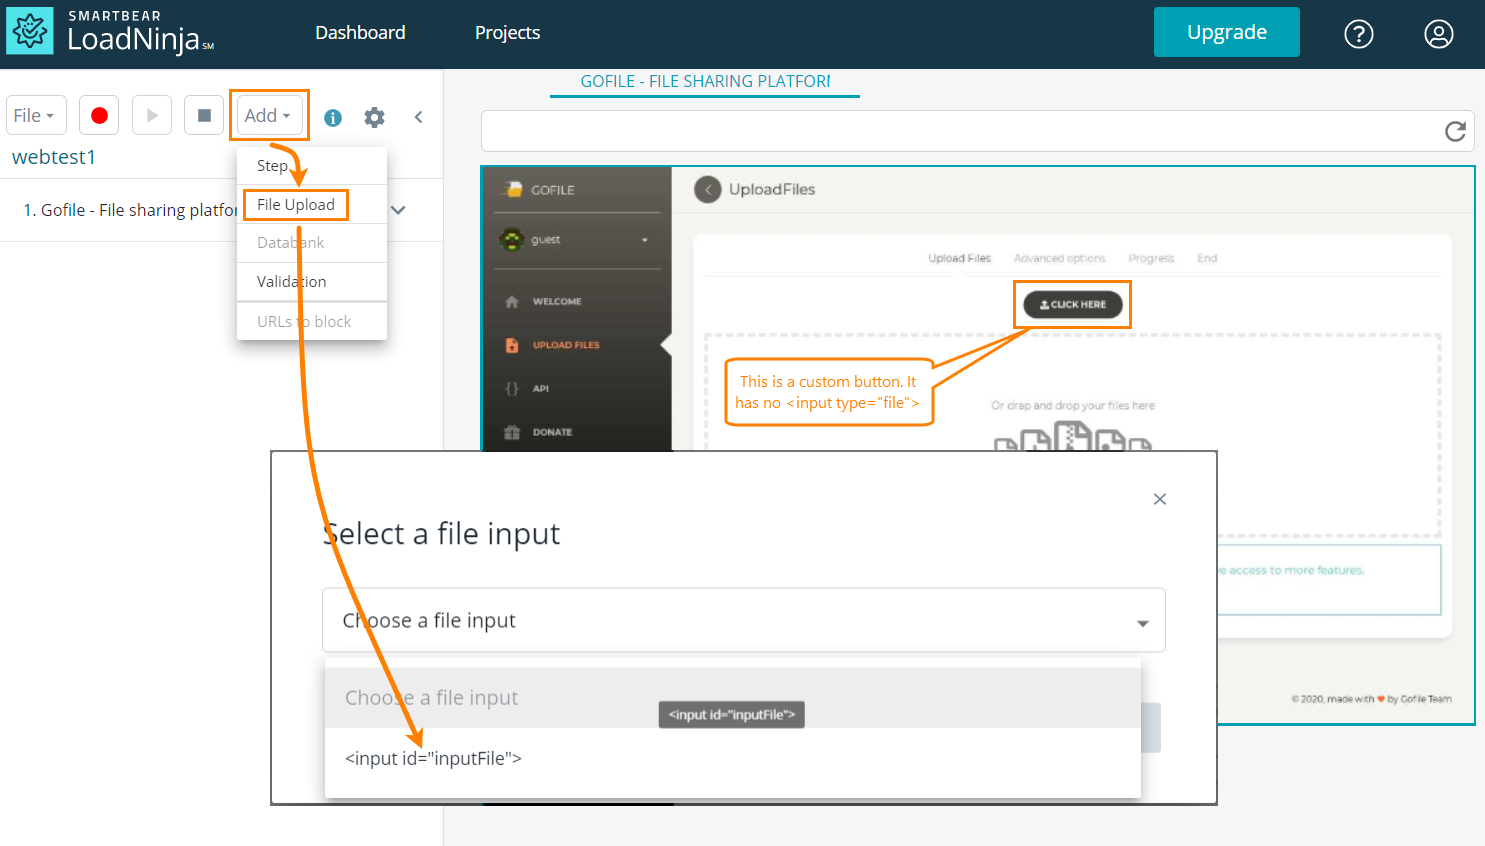
If the tested page has a custom button that uploads a file via JavaScript, then you need to append a File Upload event to your test manually: during test recording or any time later, select Add > File Upload from the recorder menu and choose the desired file (or files) in the subsequent dialog:
Replace file
To replace the file the event uploads, do the following:
-
Click next to the File Upload event and select Replace from the menu:
-
In the subsequent dialog, click Choose File to select a new file (or multiple files), and then click Submit:
If your event works with several files, select the desired files in the dialog. If you want to upload more or fewer files, simply select the desired number of files.

Note that when replacing several files, you can choose up to 10 files.
The size of each file cannot exceed 1MB.
View file
Restrictions
-
One event can upload up to 10 files.
-
Each file should not be larger than 1 MB.


