Data-driven testing implies running a test using different test data. If your test has validations (and good tests normally have them), then the baseline data that the validations use can be different depending on the input data. In LoadNinja UI tests, you can easily make validations “data-driven”.
What validations can be configured
1. Prepare test data
It is a good practice to store baseline data along with the test data. This way it’s easy to create and maintain them and to use them in tests.
Open your databank in an editor and add a column for a baseline value to the databank. If your test has several validations, add a column for every validation. Their data type should match the type of validated data, but, in most cases, it will be text.
Here is an example of the sample data:
| OrderId | Account | Password | Check1Sum | Check2Text |
|---|---|---|---|---|
10 |
johnsmith |
abc123 |
62.35 |
Invalid id |
12 |
alicebaker |
bca321 |
80.4 |
Logged in |
| … | … | … | … | … |
Every row in it corresponds to a set of data for a test run and has validation values in the Check1Data and Check2Text columns.
2. Add a databank to your test
-
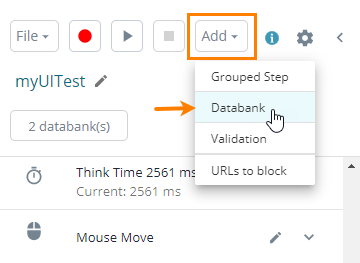
Select Add > Databank from the menu to append a databank to your test:

-
Follow the instructions of the subsequent wizard. For a detailed description, see Attach Databanks to UI Tests.
-
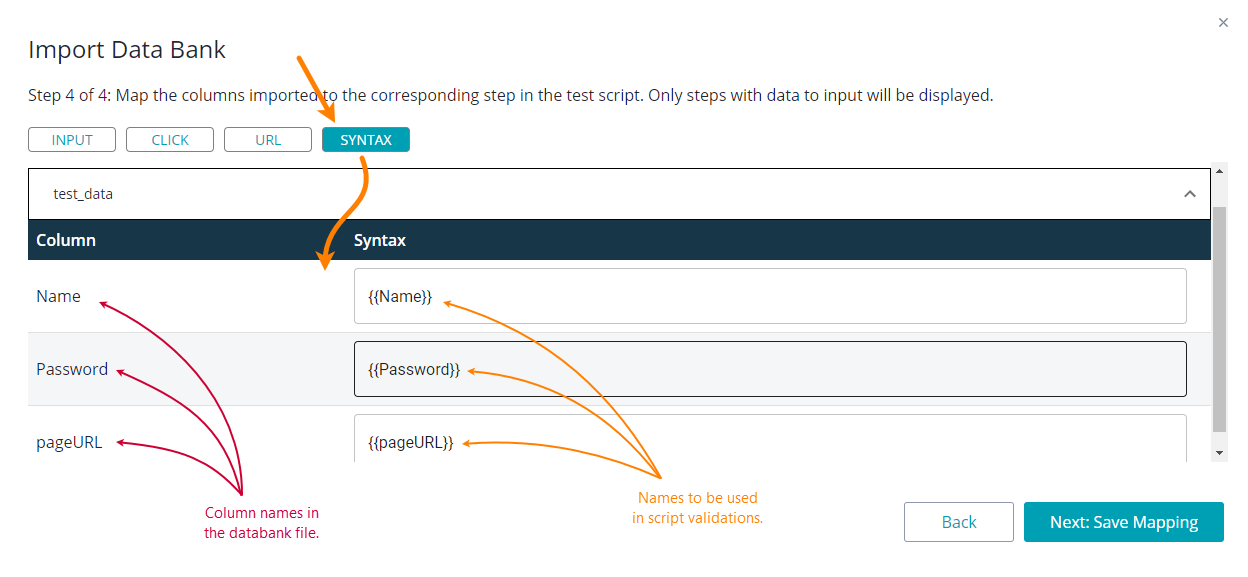
 Important: on the last step of the wizard, select Syntax and specify the aliases that will be used to address columns in validations:
Save the settings.
3. Mention columns in validation settings
Add a validation (or open an existing validation for editing) and refer to the needed baseline data. The way you do this depends on your validation type.
Text validations
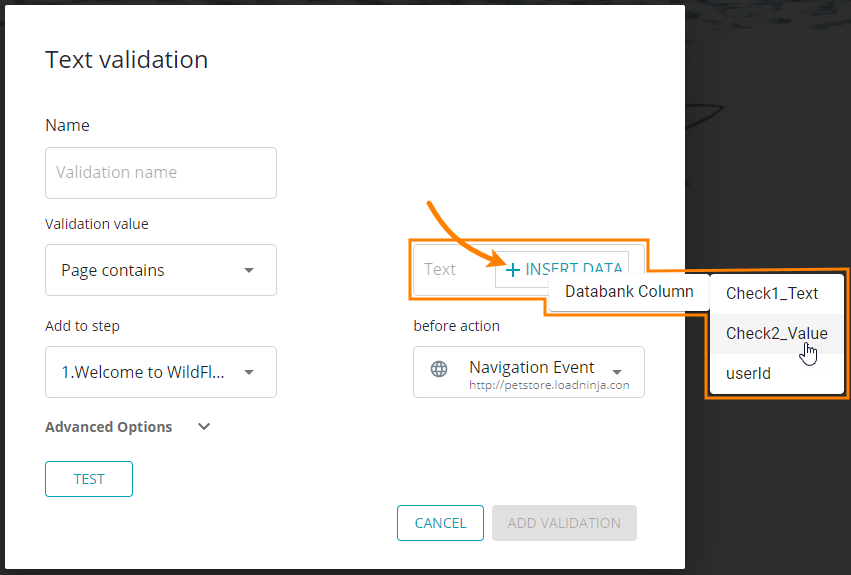
Move the mouse pointer to the Text edit box and click Insert Data there (this button becomes visible only when the pointer is in the text box). Then, click Databank Column and select the desired column from the subsequent menu:
Alternatively, type the column alias in the Text box using the {{column}} syntax.
If needed, you can add multiple columns.
To combine a column value with any other text, simply type this text in the Text field like this: Some text {{column}} More text.
Script validations
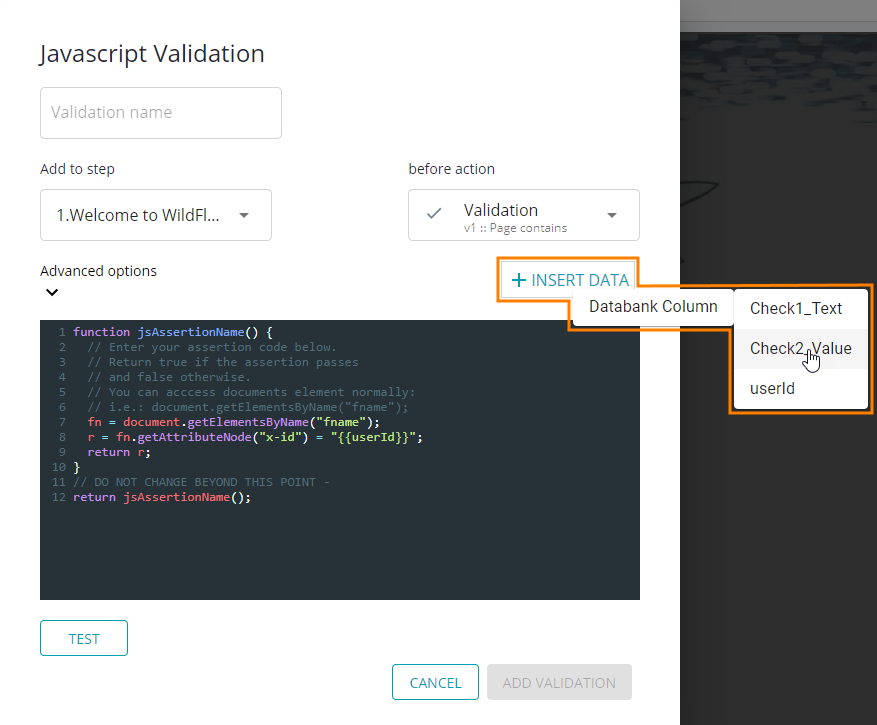
In JavaScript validations, you refer to baseline data by using the names you defined on the last page of the Databank wizard (see above):
-
In the script code, place the cursor to where you would like to insert the data, click Insert Data, and select the desired value from the menu,
– or –
-
Simply type the needed name using the syntax
{{column}}:You can specify multiple columns, if needed.
Note: The column value will be inserted as it is specified in the databank source file. Make sure to add other syntax elements (like quotes or curly brackets) around it to make the resulting script syntax valid. For instance, if a column has a string value, enclose the column name in quotes:
"{{column}}".
Notes
-
If the test engine doesn’t find a column alias you specified in validation settings, it will treat the alias string literally (that is, as a string).
-
You can update mapping settings in the Edit Databank dialog. If you change an alias of some column, that alias will not be changed in validations automatically. If you want to use the new alias, you will have to update validations in your test.


