About
The BDD with Cucumber project type is for those who automate their BDD scenarios and would like to view test results in a convenient way. These projects include support for –
- importing .feature files from a source control like GitHub, GitLab, or Bitbucket, and
- binding test results to your project so you can see the results directly in CucumberStudio and easily find if your scenarios and individual steps passed or failed.
 Currently, the project type is available in CucumberStudio Cloud only.
How it works
The full procedure includes the following steps:
-
Create BDD scenarios, automate them, and put your .feature files along with test files to a source control like GitHub, GitLab, or Bitbucket.
-
Create a BDD with Cucumber test project in CucumberStudio and link it to your source-control repo.
-
Configure your CI system to run automated BDD tests, and
Configure your CI system to push test results back to CucumberStudio so you can view them there.
Requirements
Supported source controls
Any source control that supports repositories of the Git type: GitHub, GitLab, Bitbucket, or any other.
Currently, only Cloud storages are supported. Support for Enterprise/Server editions is to be implemented.
Supported test automation frameworks
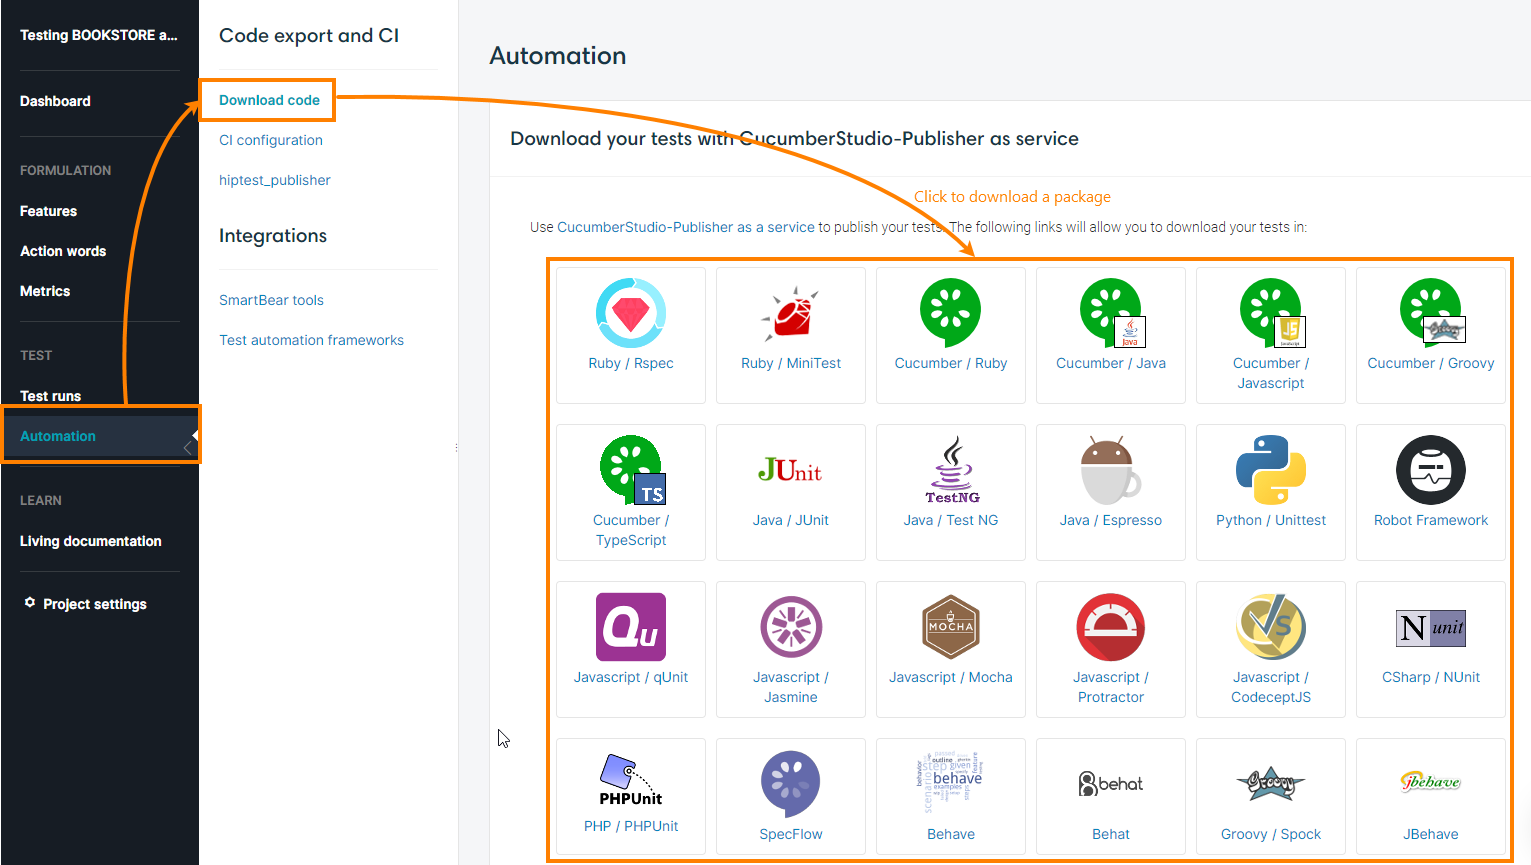
Any framework for automating BDD test scenarios: JUnit, Rspec, MiniTest, JBehave, and many others that generate test results in the Cucumber Messages format. If you have a BDD-friendly project in CucumberStudio, open it and then select Test > Automation from the left-side menu to see the list of supported frameworks.
 It is important that your tests generate results in the Cucumber Message format.
Supported CI/CD systems
Any popular CI/CD system like Jenkins, Bamboo, Azure Pipelines, TeamCity, Circle CI, Travis CI, or another that is able to run programs from the command line.
1. Create, automate, & put tests to SCC
Currently, the BDD with Cucumber projects don’t include these features. We are working on them and will provide them soon. So far, we assume you perform these tasks outside your BDD with Cucumber project. Below are some hints in case you have not done this yet.
Create BDD feature files and scenarios
You can do this in any text editor.
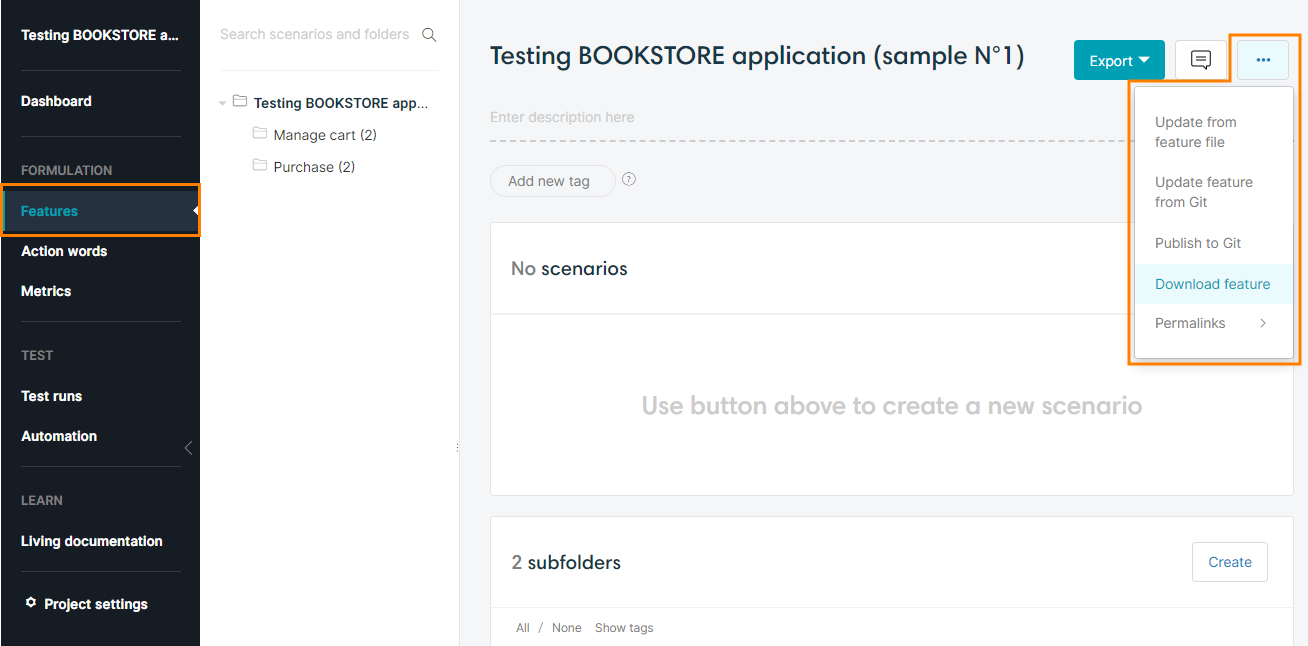
Tip: One possible way is to create a BDD-friendly project in CucumberStudio and then create BDD scenarios in this project by using the power of the CucumberStudio scenario editor. You can then download .feature files from CucumberStudio by selecting Download feature from the menu:
You also get the .feature files as a part of the test automation package (see below).
Automate BDD scenarios
Automation means that you create program code for individual Given, When, and Then steps of your tests. Test runners go through .feature files, find a function that matches the current step, and run it.
You can use any framework for automating BDD scenarios using any available language: Ruby, JavaScript, TypeScript, Python, Java, C#, and many others. For complete information on this, see BDD with Cucumber Projects.
 It is important that your tests generate results in the Cucumber Message format.
Tip: An easy way to get stub code for tests is to create BDD scenarios in a BDD-friendly project and then export an automation package from the Test > Automation > Download code page in CucumberStudio:
This way, you will get program code pre-configured for the test scenarios and action words used in your project. So, writing automation code will be easier than if you started from scratch.
Put scenarios and tests to source control
You add .feature files and test files to a source control the same way you add other files. If needed, see the documentation of your source control.
 Test scenarios and automation code can be changed as your application changes. We’d suggest creating branches for different versions of tests.
2. Bind your project to a repo
A BDD with Cucumber project connects to a source control repo and gets the .feature files from it. If some .feature file changes in the source control, it is updated in the project automatically.
Requirement
 To bind your project to a repo, you need Administrator permissions for the repo.
If you don’t have these permissions, you will get the files, but will not be able to get updates. In this case, you can bind our project to the repo, and then ask the repository administrator to set up a special webhook in the repo to let your project get notifications about changes.
Set up a webhook manually
Webhooks let you get notifications on changes in a repository: when some file is updated, the source control will send a request to a special URL which CucumberStudio monitors. CucumberStudio expects requests of the POST type.
-
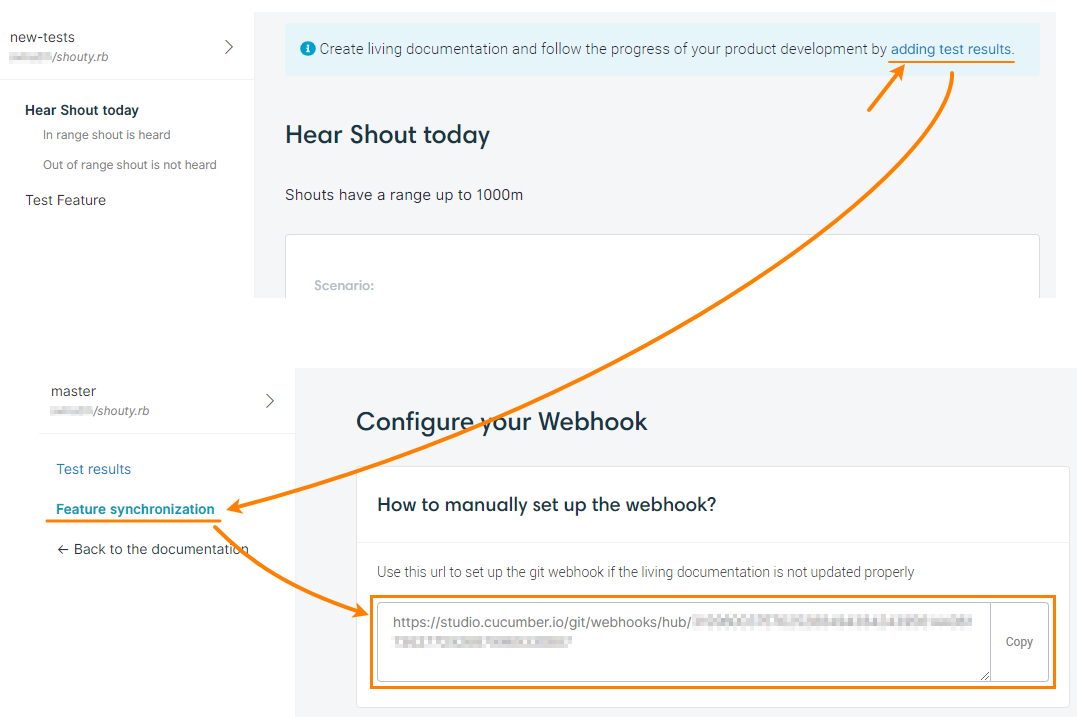
Get the URL for the call
Click the add test results link at the top of the page and select Feature synchronization on the left. This will show a page with a webhook URL configured for your project. Copy this URL to the clipboard:
-
Create a webhook
To create a webhook, you need Administrator permissions for the repository. If you don’t have them, please ask your system administrator to help.
-
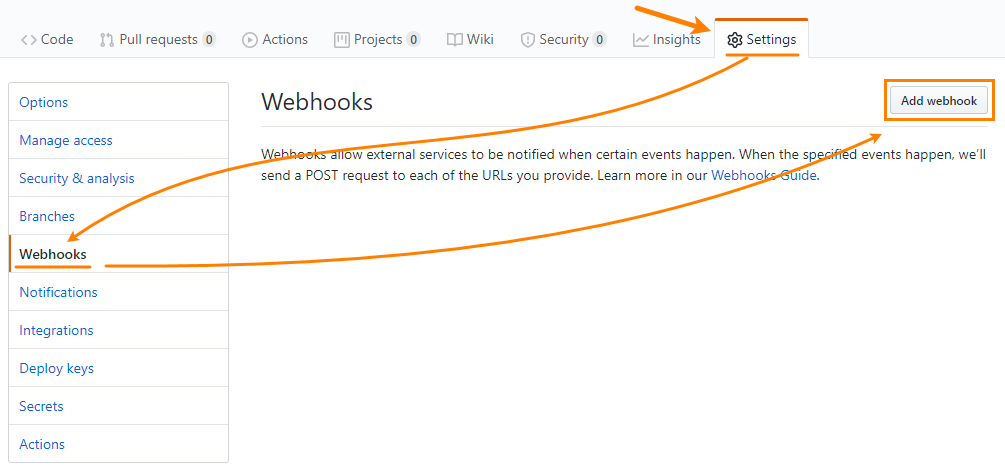
In GitHub, find your repo, go to the Settings > Webhooks page, and click Add webhook:
Note: The Settings page is hidden if you are not an administrator. -
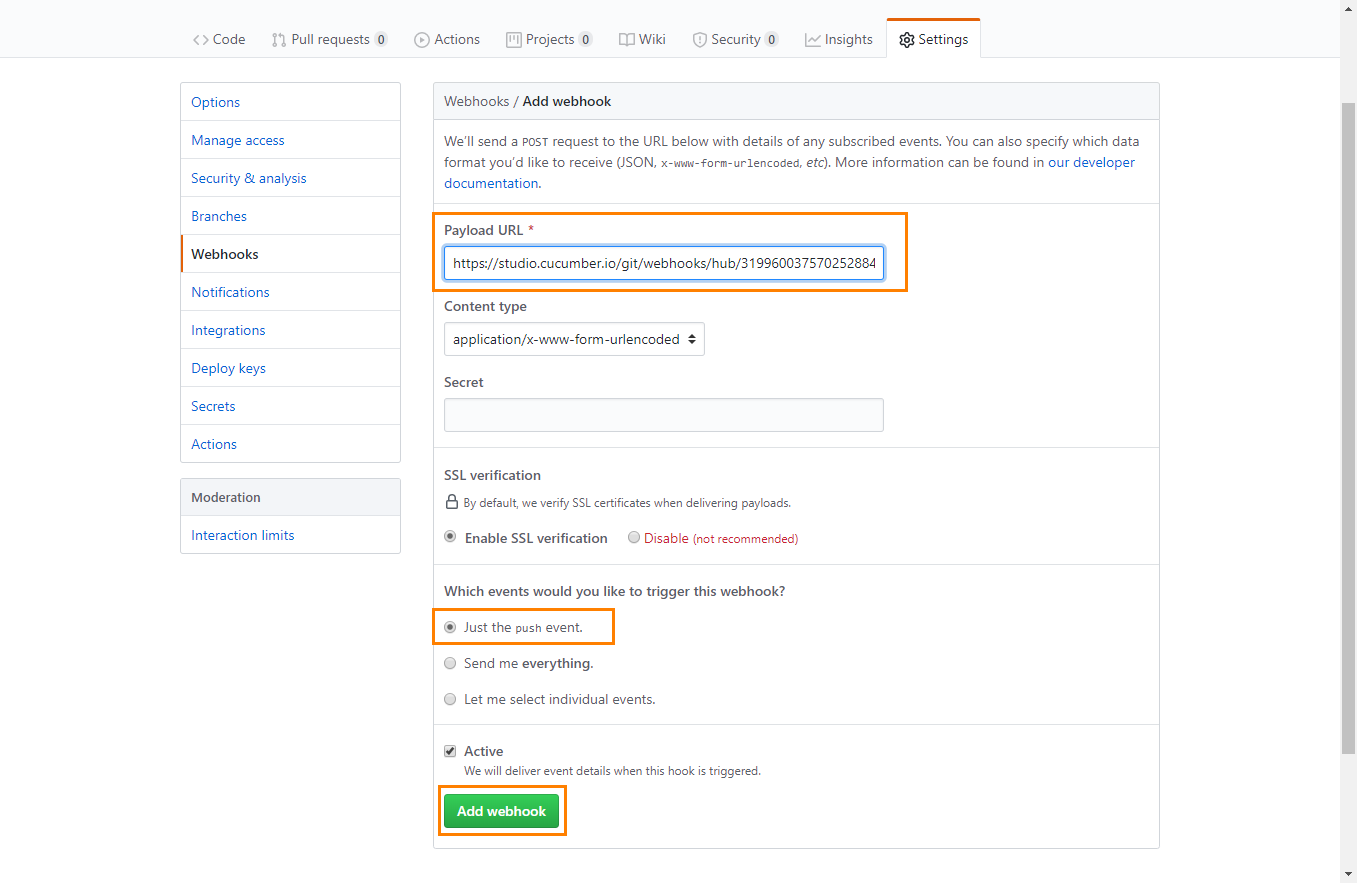
On the subsequent screen, enter the copied URL into the Payload URL edit box and configure other parameters. See the GitHub documentation for more information on them:
For CucumberStudio, it’s enough to receive notifications on
pushevents only.When all the settings are configured, click Add webhook.
-
Binding
To bind your project to a source-control repository:
-
Sign in to CucumberStudio and create a new project of the BDD with Cucumber type:
-
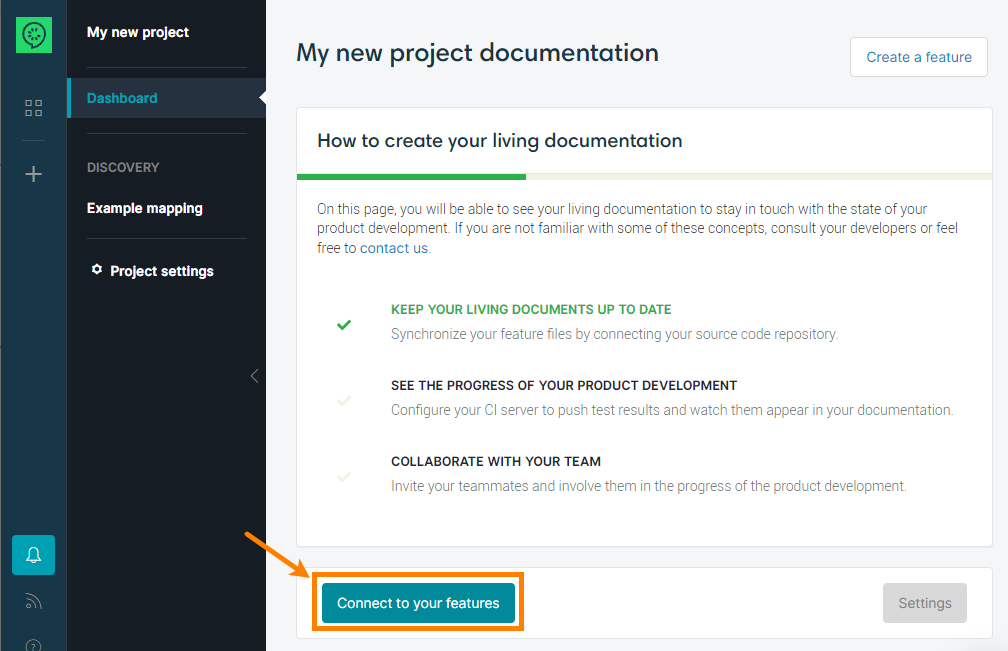
After the project has been created, click Connect to your features to bind it to a source-control repository:
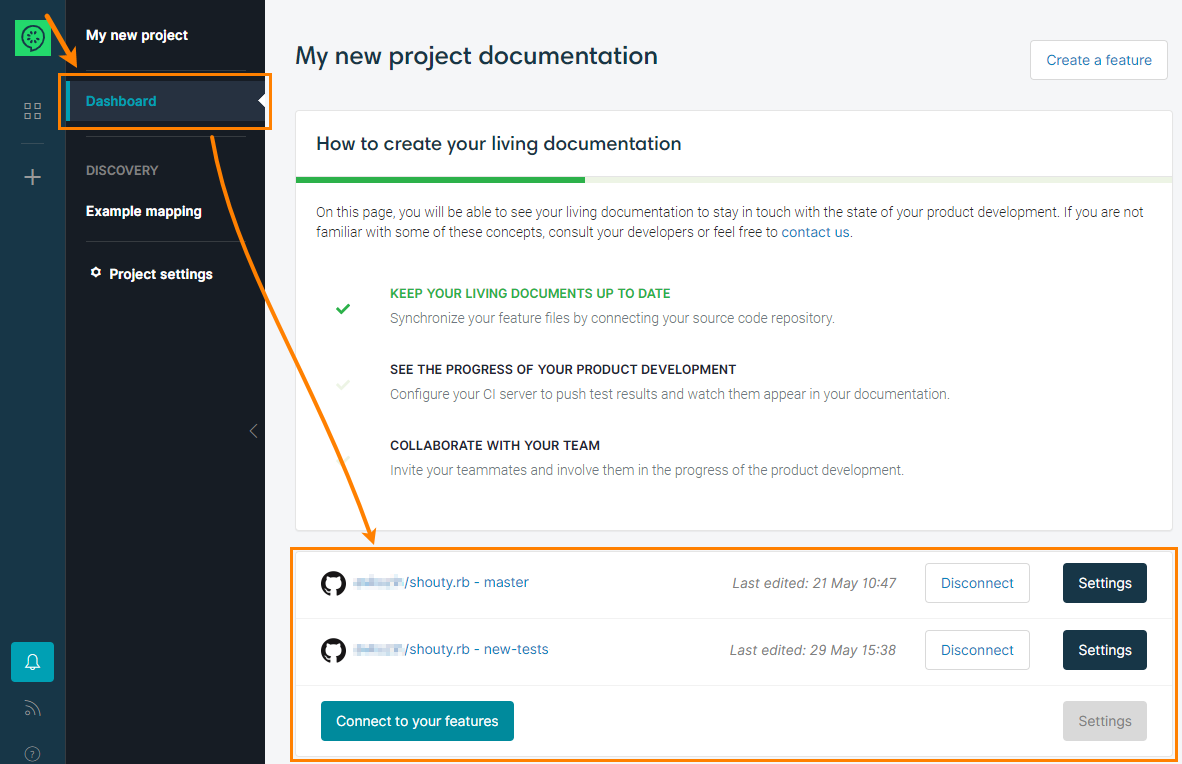
Follow the instructions on the screen to set up a connection with the Git repository that stores your .feature files and tests. When connecting, you will need to select the branch that contains the needed version of your tests.
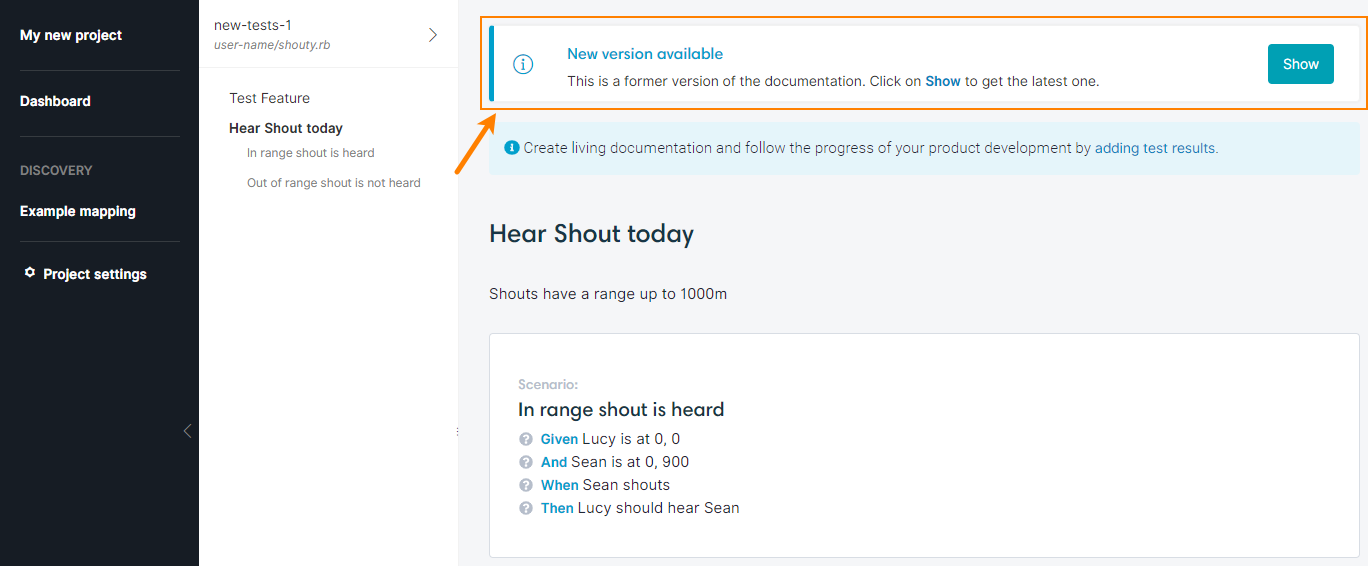
CucumberStudio will import all the .feature files it finds in your repo and will show them in your project:
After binding, CucumberStudio tracks the changes in the repo. If it detects an update to a .feature file in the branch you specified, it displays a warning message asking you to update the project content:
3. Configure CI/CD build to push test results
Typically, automated tests are started automatically at certain points of time (for example, at midnight) or after certain events occur (for example, after a new app build is ready). One of the ways to do this is to create a job (or tasks, or pipeline) in a CI/CD system to run them. This task should perform the following:
-
Prepare the tested application and test environment.
-
Run automated tests. The tool you use for the run depends on the test automation framework you use. For more information on this, see that framework’s documentation.
-
 It’s important to add a step that will push test results back to CucumberStudio. See below for detailed information on this.
Push test results to CucumberStudio
After the automated test run is over, you can return test results back to CucumberStudio. This way, you will see test results for individual Given, When, or Then sentences of your BDD tests. To export test results to CucumberStudio, you send a special request to the CucumberStudio API. The easiest way to do this is to use the curl command-line utility.
Install curl
Download and install curl on the computer where the job (task or pipeline) is running, or where test results are generated:
Get the command line
-
Log in to CucumberStudio and go to your project.
-
Click the branch that has the test file version executed during the test run.
-
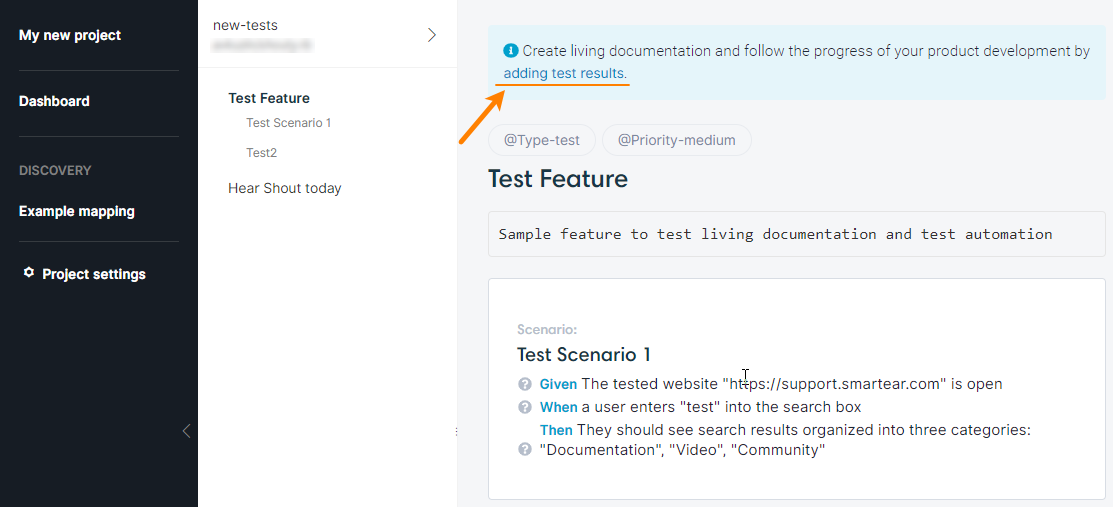
On the subsequent screen, click the following link at the top:
-
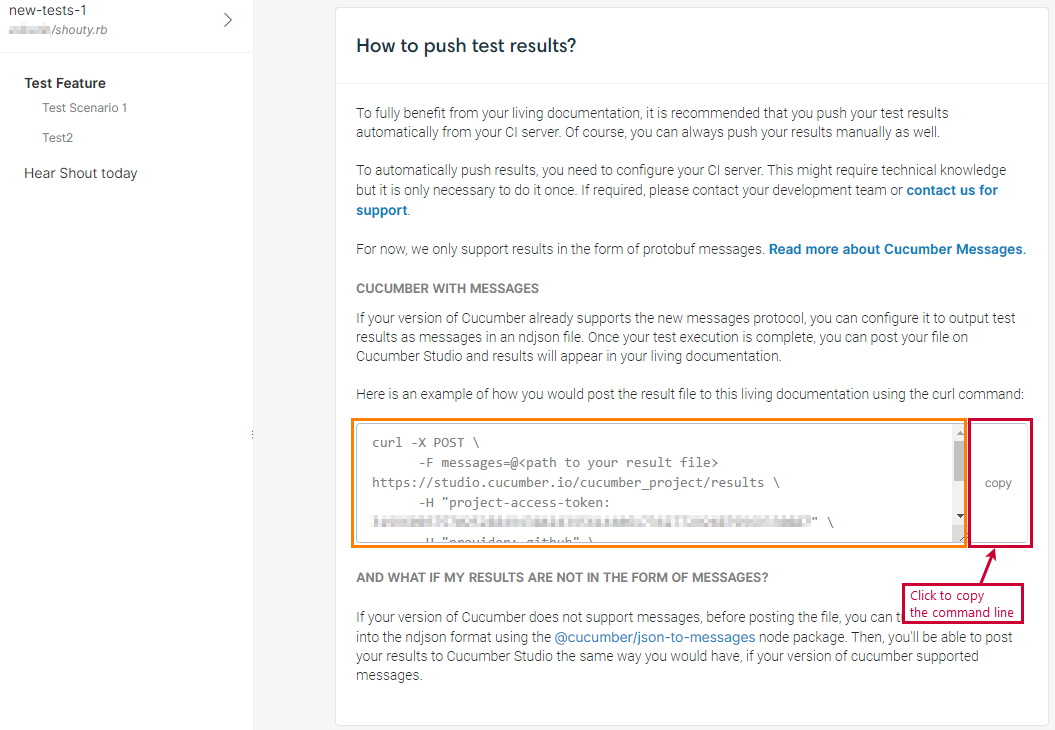
This will invoke a dialog box that has a command line pre-configured for your project:
Click Copy and paste the copied command line to the build step.
The copied string has the endpoint, access token, and other parameters ready. To make the call successful, you need to insert two more values:
-
The name of the file holding the test results (this name can be absolute or relative to the
curllocation). -
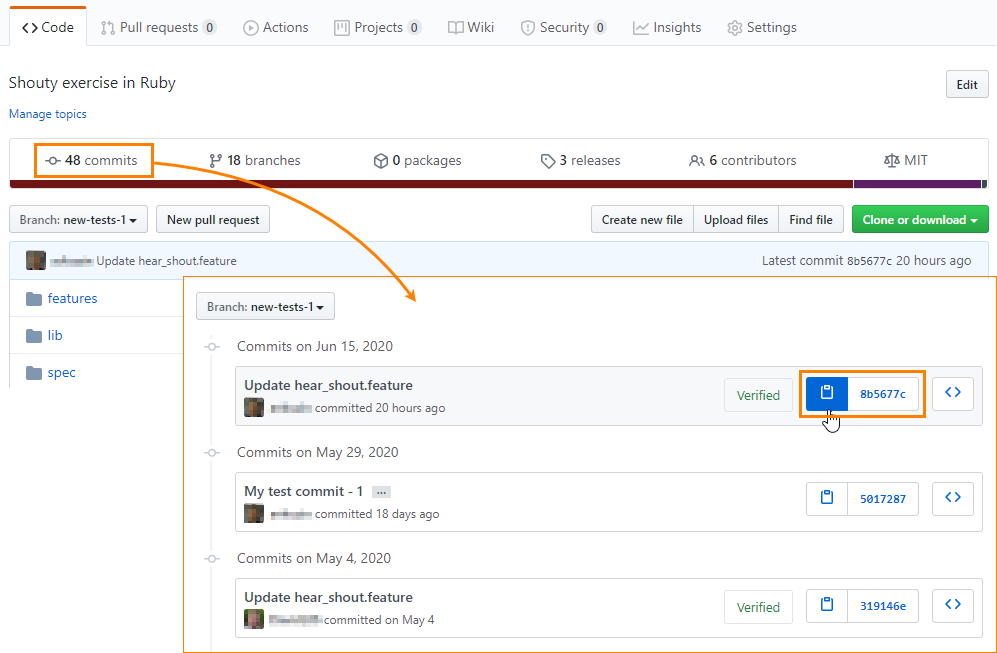
The identifier of the commit of your tests in the source control repo.
Note: A commit id is a string of 40 hexadecimal digits. A shorter variant of 6 hex digits is also often used: Full: 0794c5c5ea64fd05f0489f378c977dfaf5c25d09
Brief: 0794c5cYou can use either a “full” or a “brief” version — CucumberStudio will understand both.
-
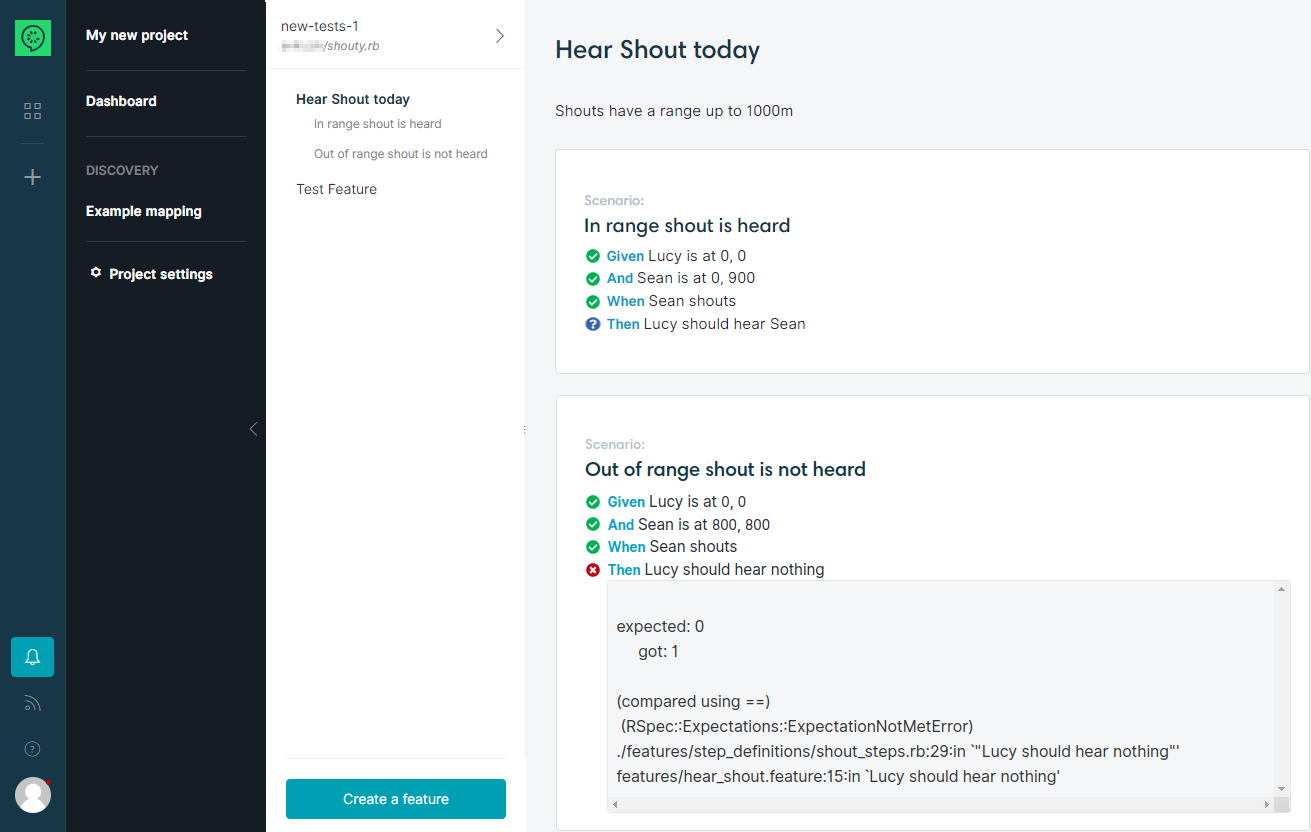
Now your CI/CD task is ready. When you run it, it will execute automated tests and transfer results to CucumberStudio, and you will be able to see the results of the last run visually:
If some step failed, you will see an explanation received from the test runner (see the image above).
Push results manually
You can also push test results manually anytime you need. To do this, prepare the command line as described above and then run curl from the command line.


 If your results have other format …