Learn how to integrate CrossBrowserTesting with Jira.
Install the add-on
| Note: | The CrossBrowserTesting integration add-on only needs to be installed ONCE from your Jira admin console, then each CrossBrowserTesting account that needs to be authorized can be added via the Jira UI. This is only available for Jira Cloud. |
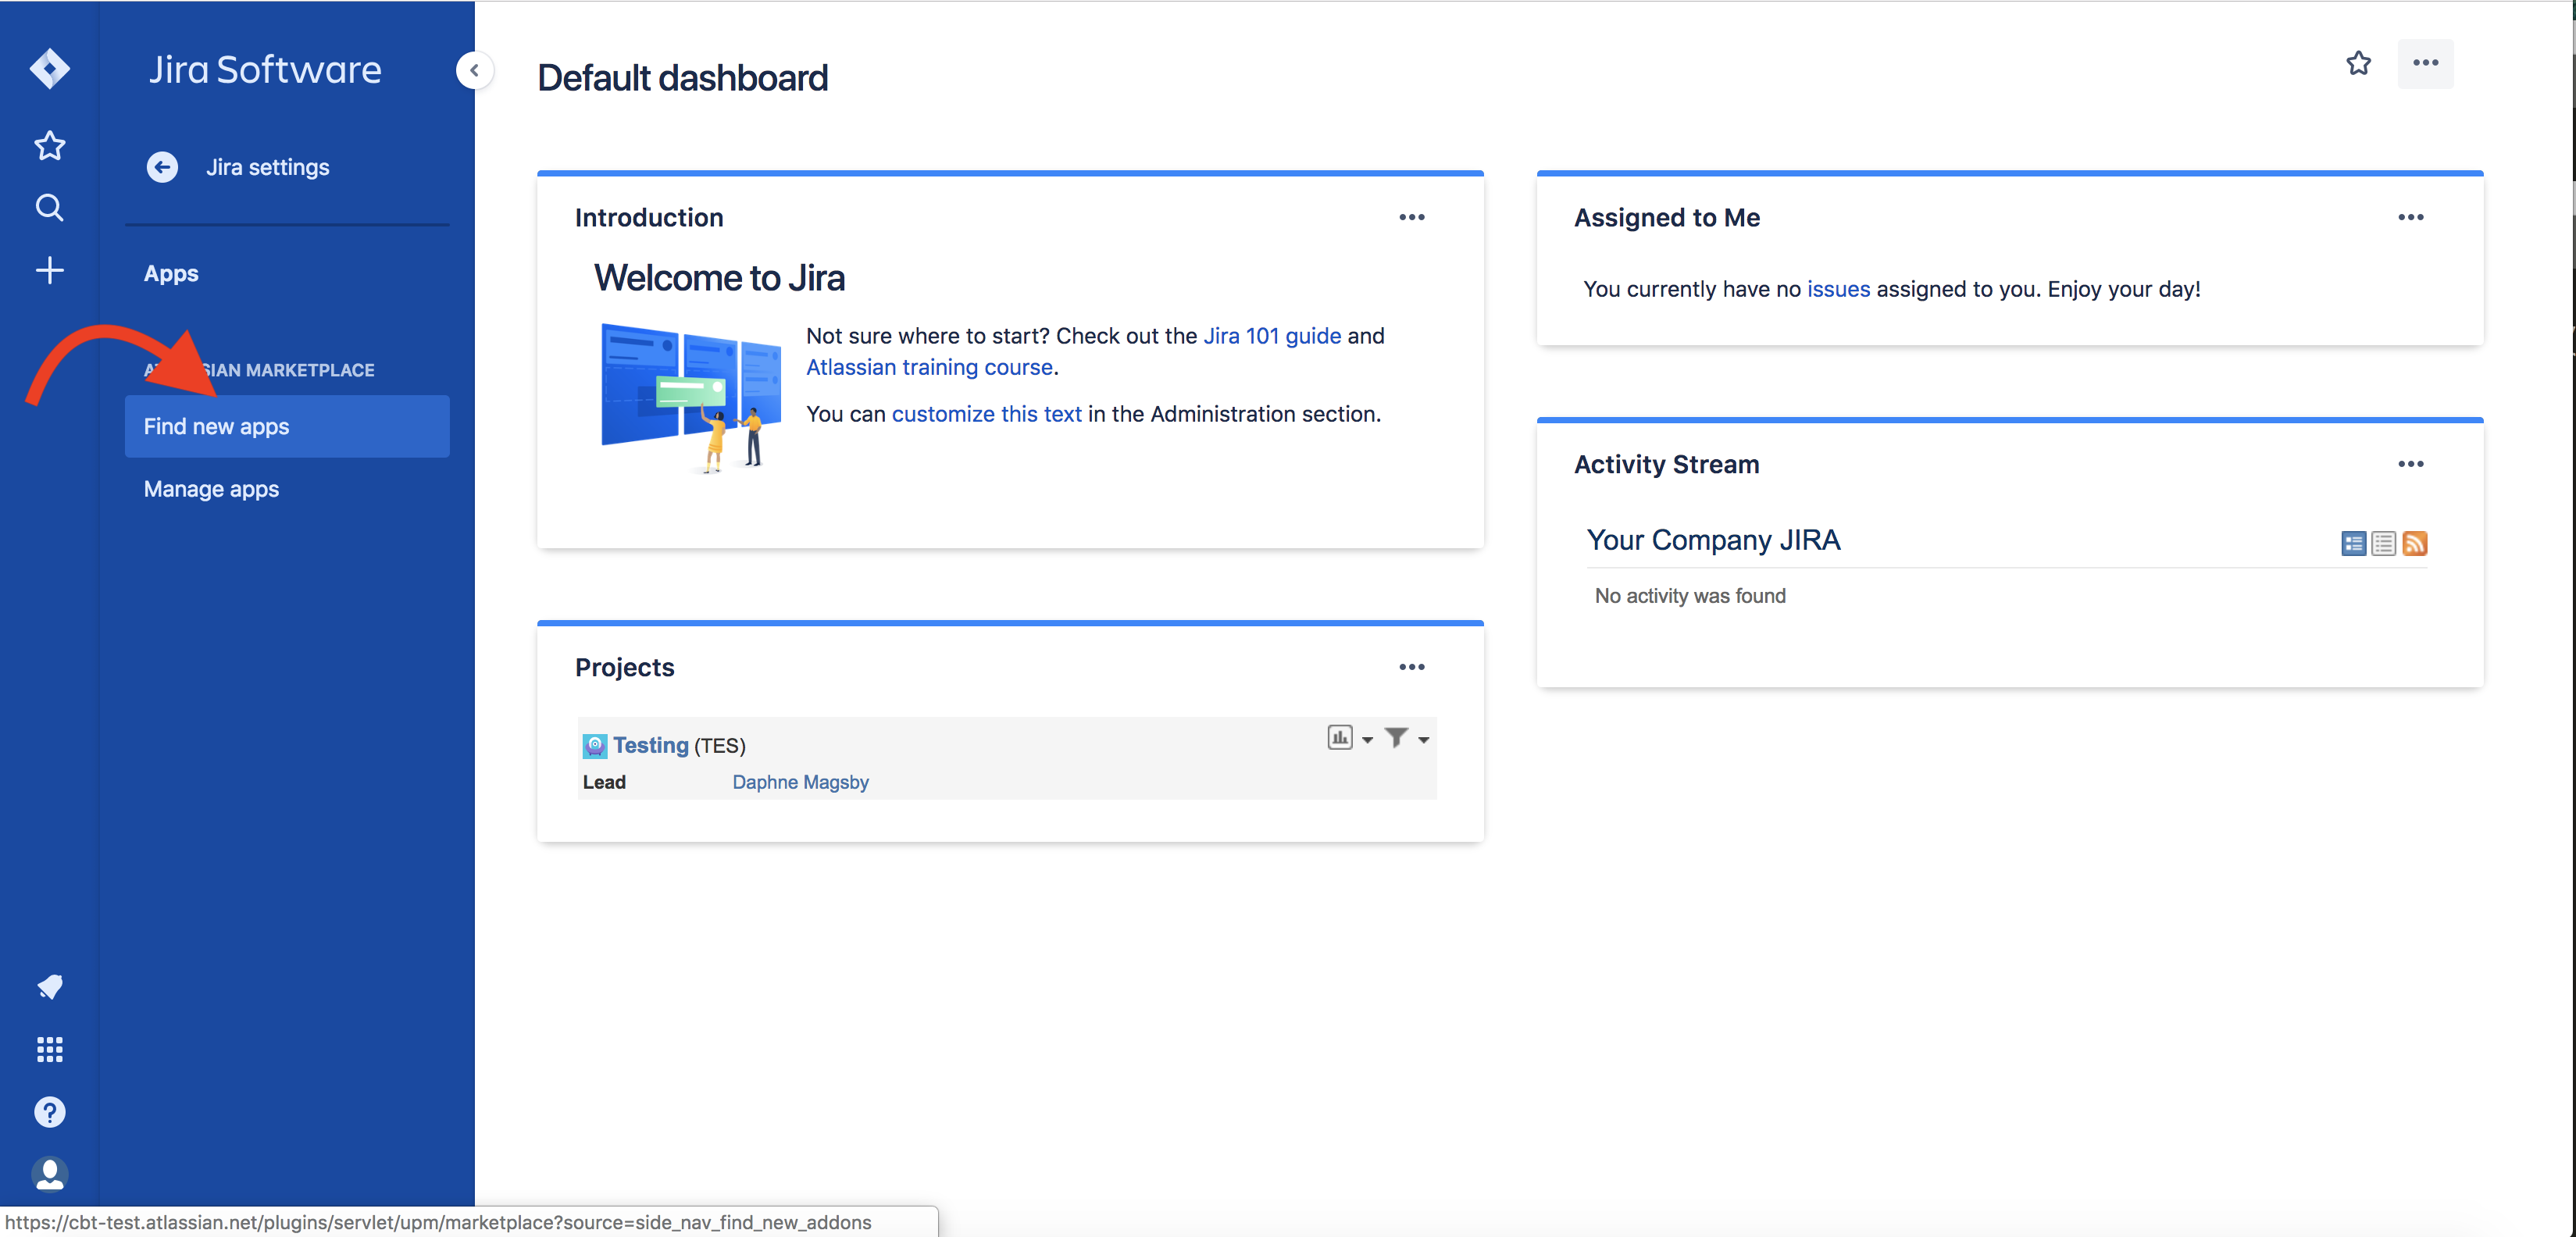
- While logged in to your Jira account, from the homepage, click Jira Settings, then Apps, then Find New Apps.
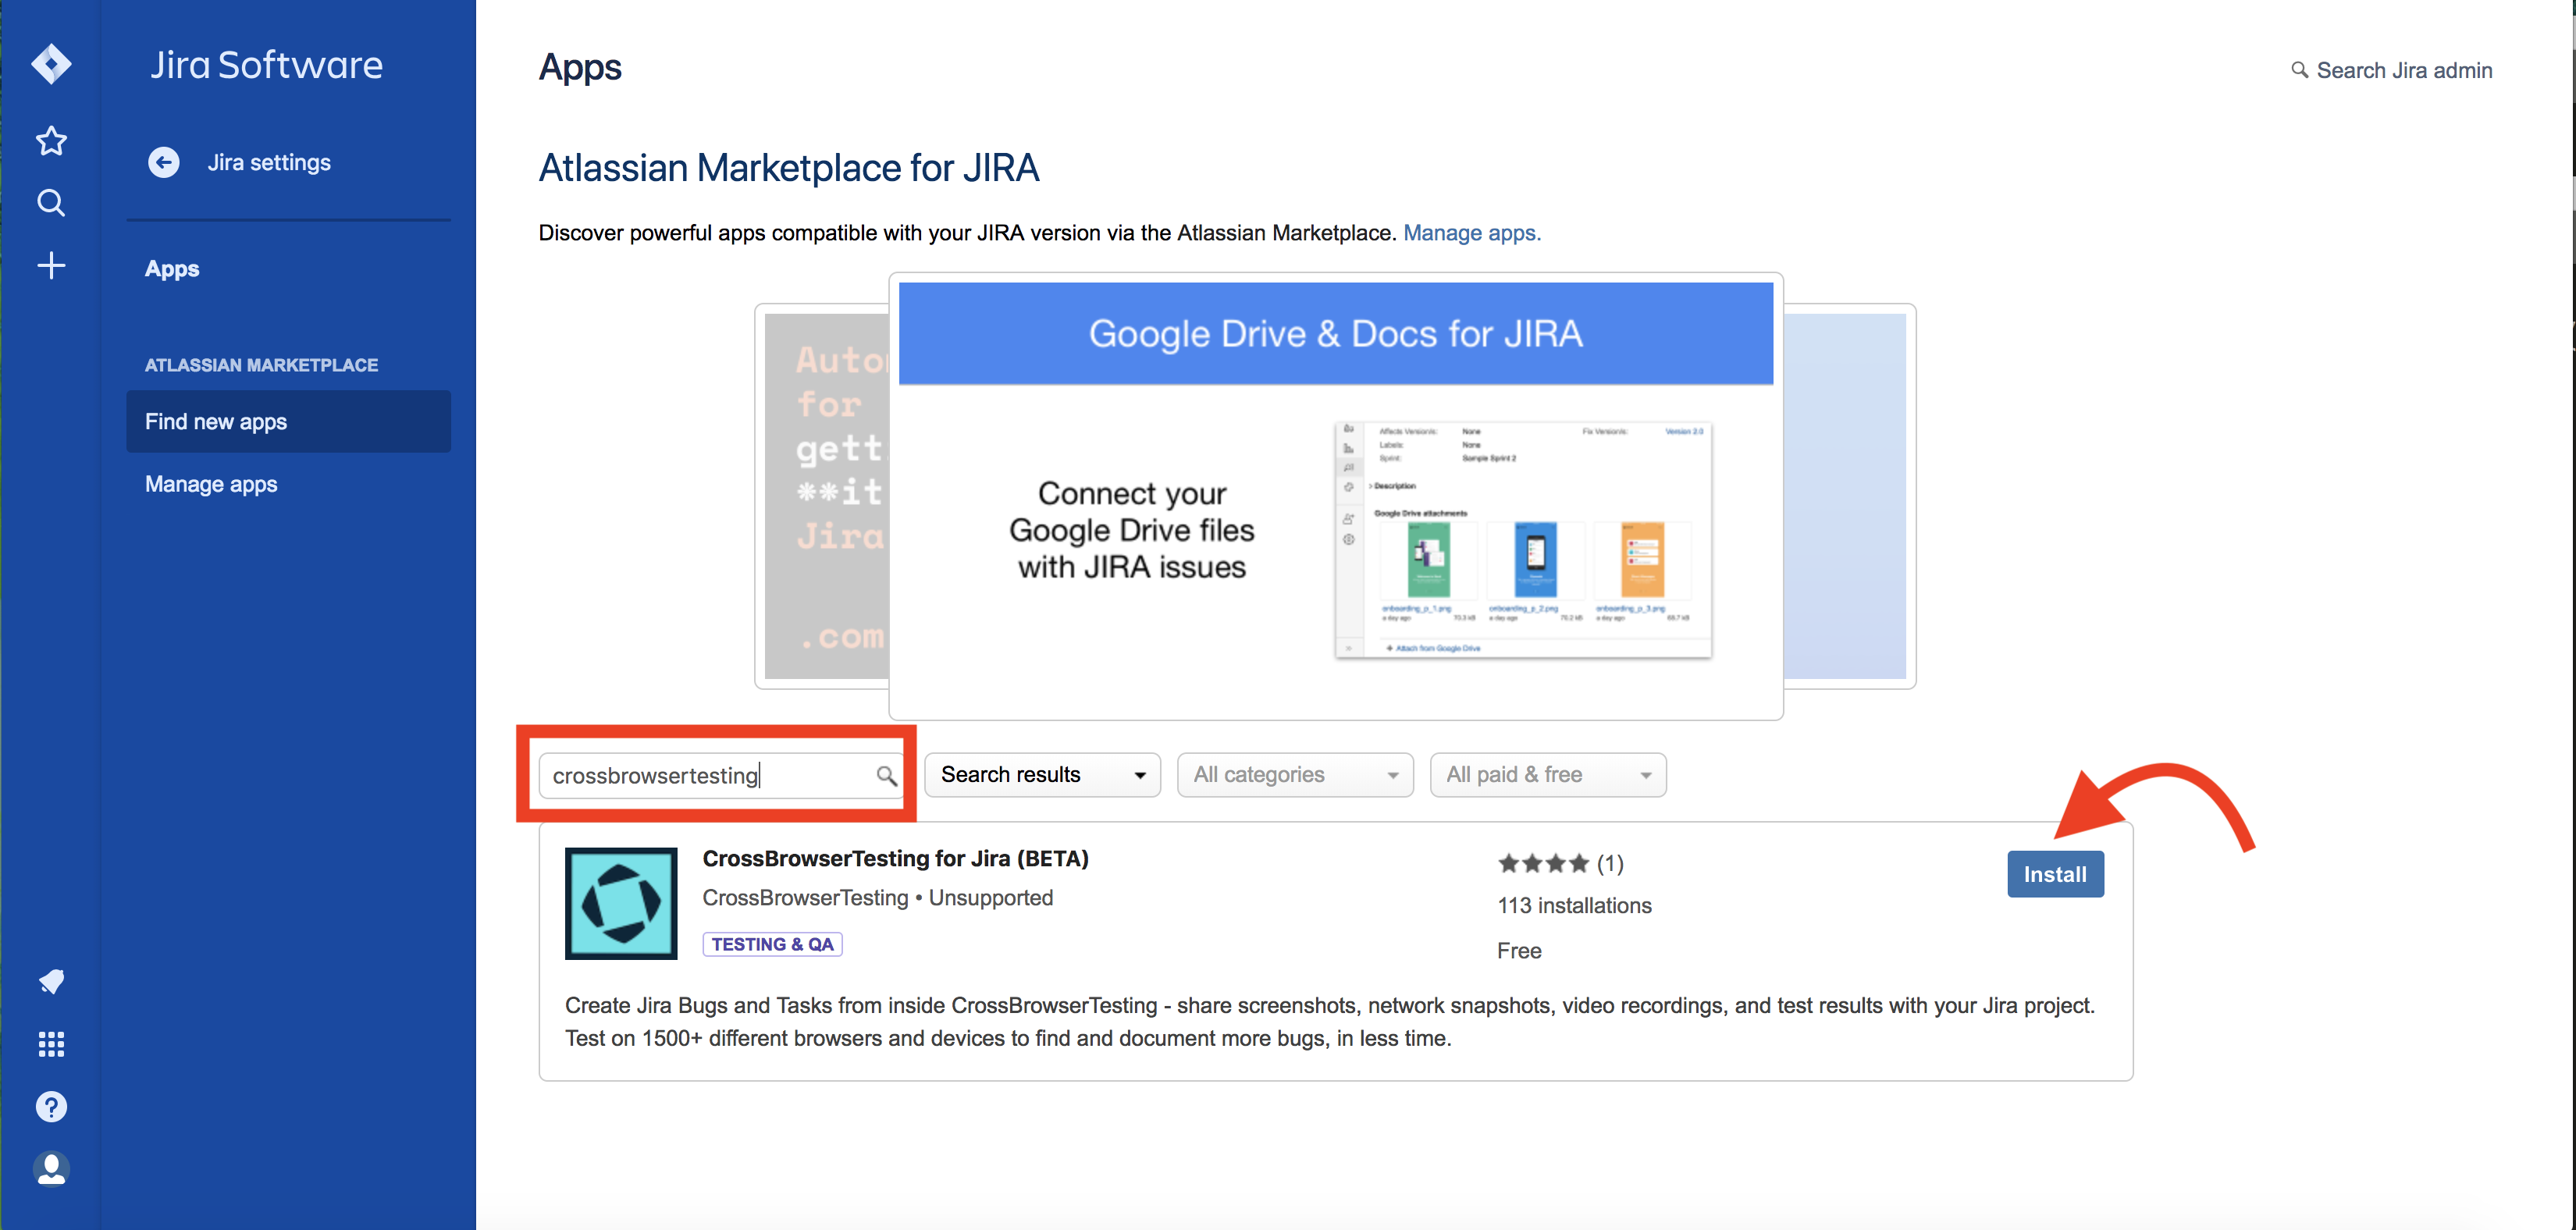
- In the Search the Marketplace field, type in 'CrossBrowserTesting' and hit Enter.
- Click Install and follow the instructions.
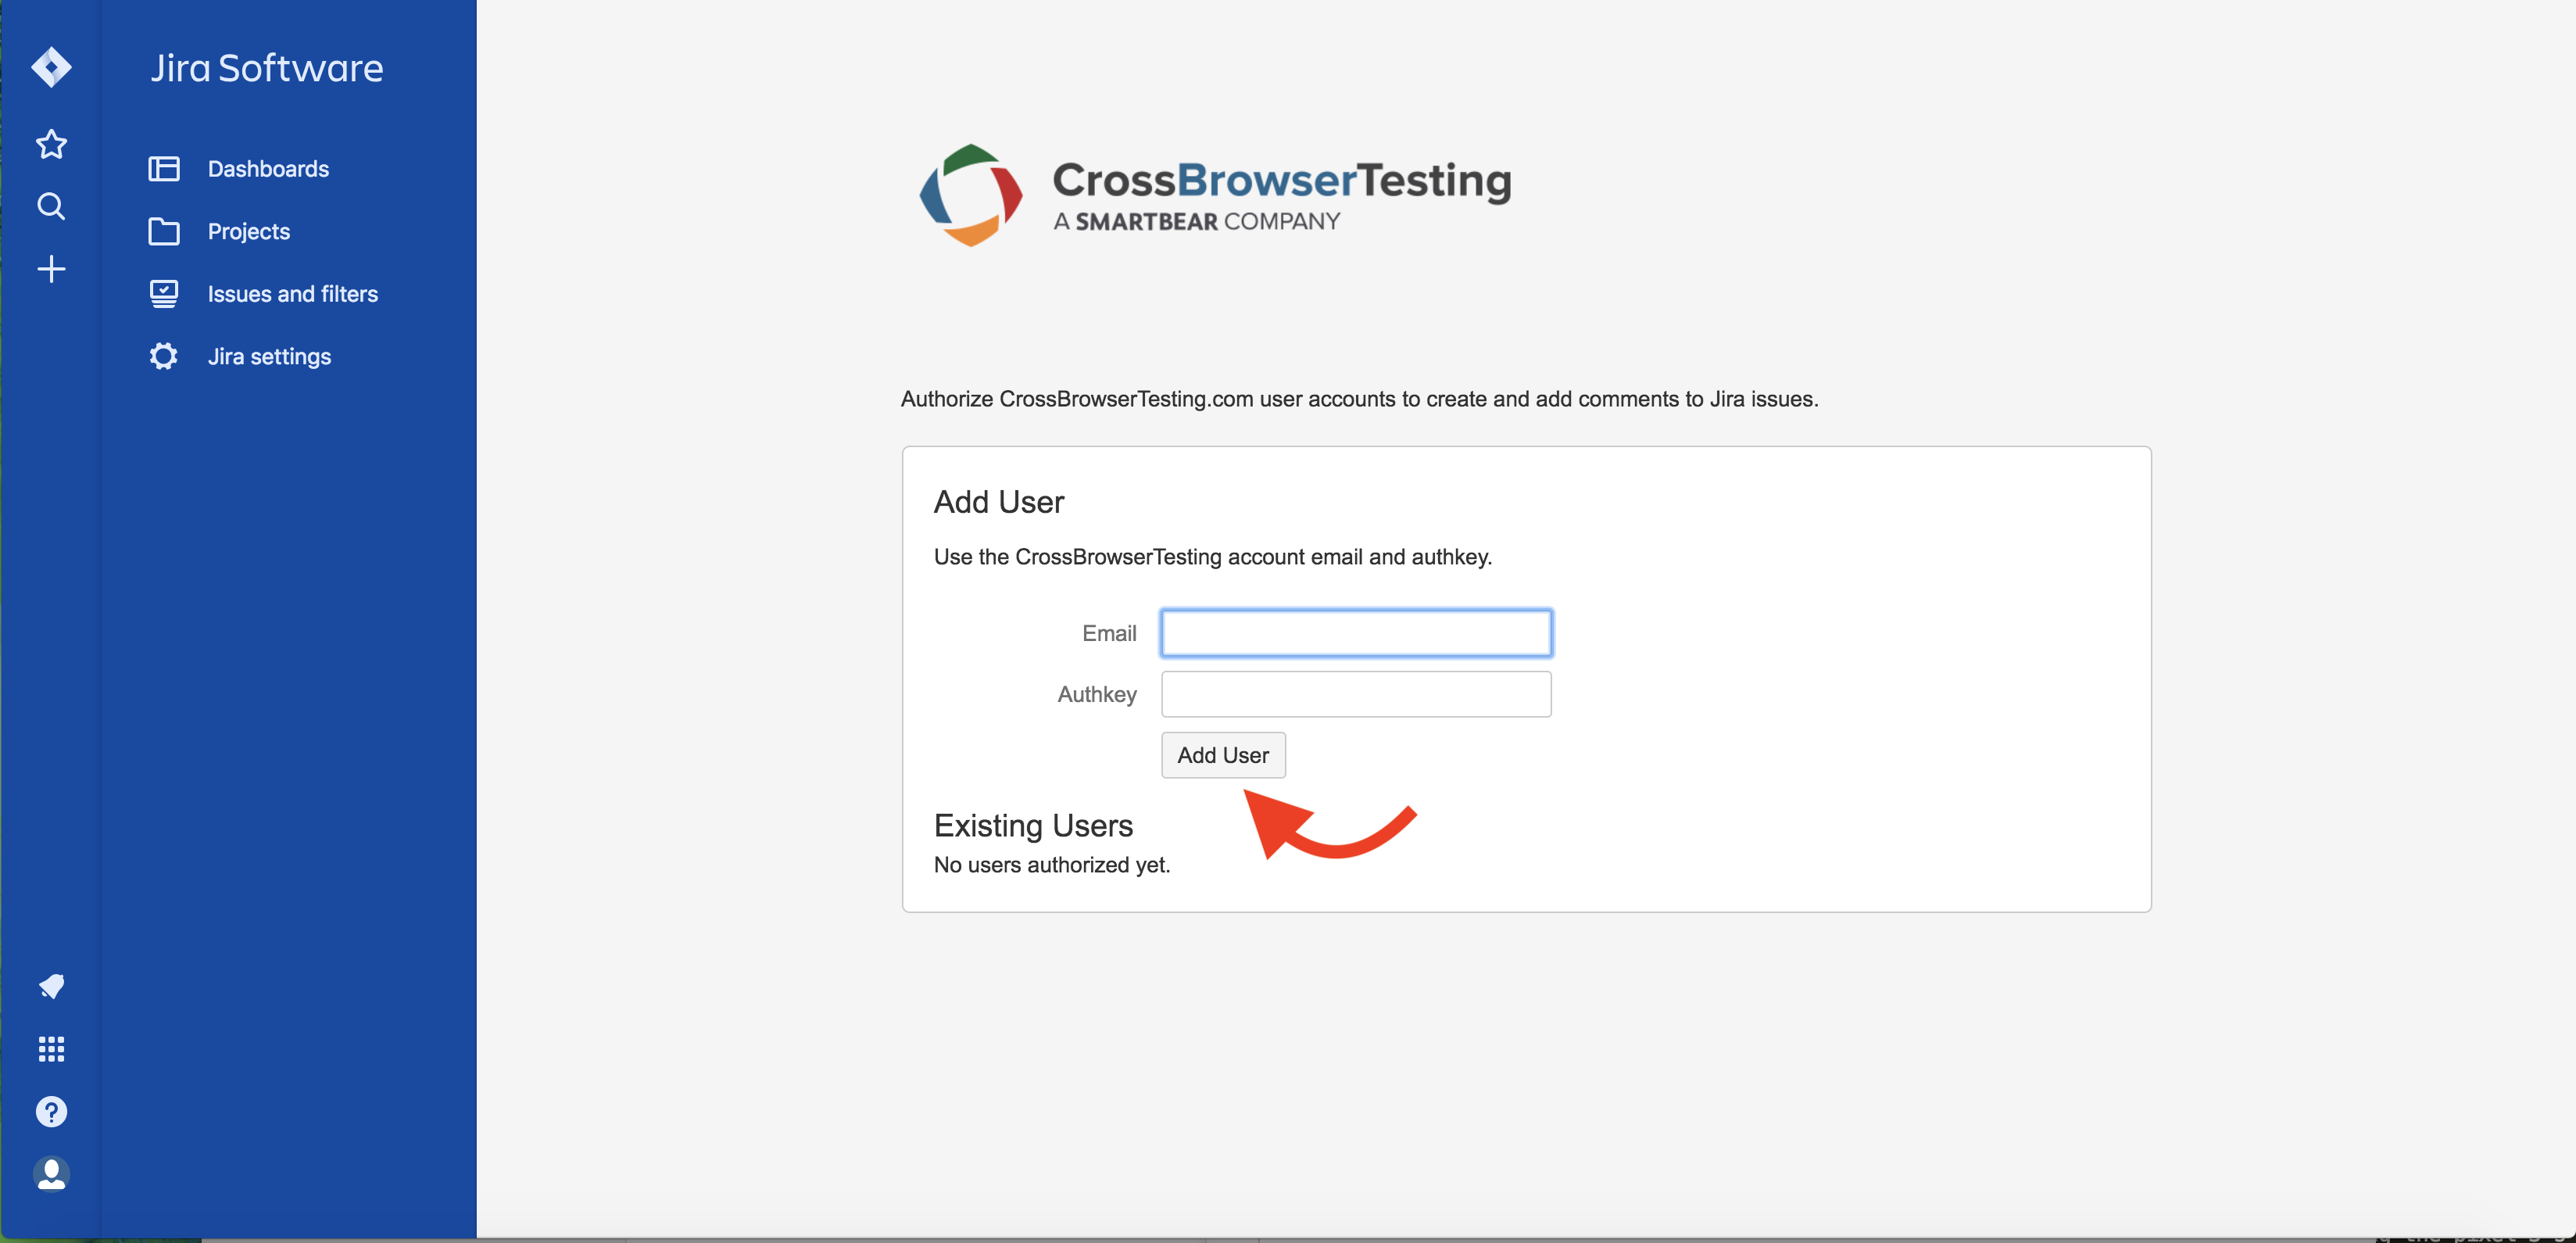
Once installed, click the Configure button and you should see the following screen:
Add your CrossBrowserTesting account email and authkey (you can find these on the Account Page when you are logged in). This will enable the user on our system to be able to post issues and comments directly to Jira projects from our test result screens. Add any additional CrossBrowserTesting account emails that should be authorized to post to Jira on the configure screen. You can also remove any users by clicking the x next their email under Existing Users.
Use the add-on
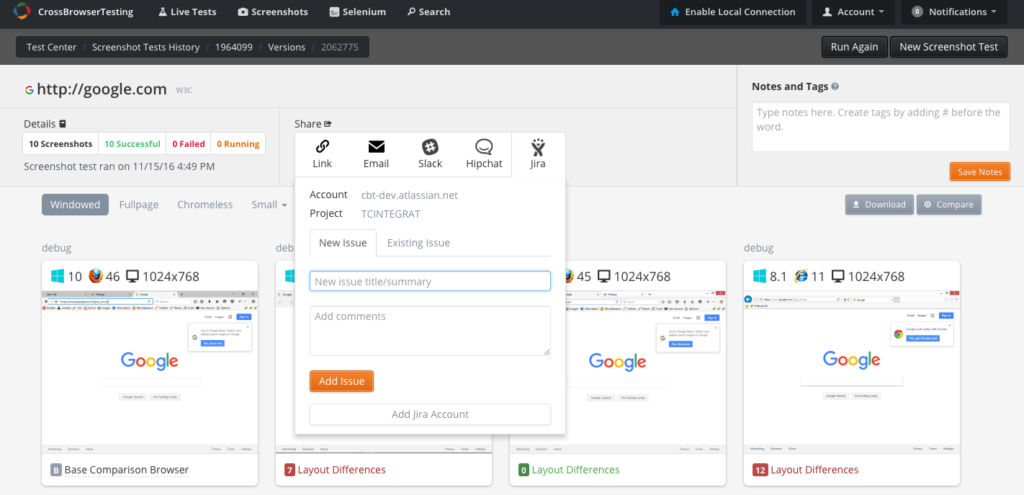
Once a user has been added the the Jira add-on in the step above, they will then be able to share a link to any results as a new issue or as a comment on an existing issue within the CrossBrowserTesting result pages:
Users will be able to choose from the Accounts, Projects, and either a new or existing issue. In the image above, we show where the new issue title can be created with comments.
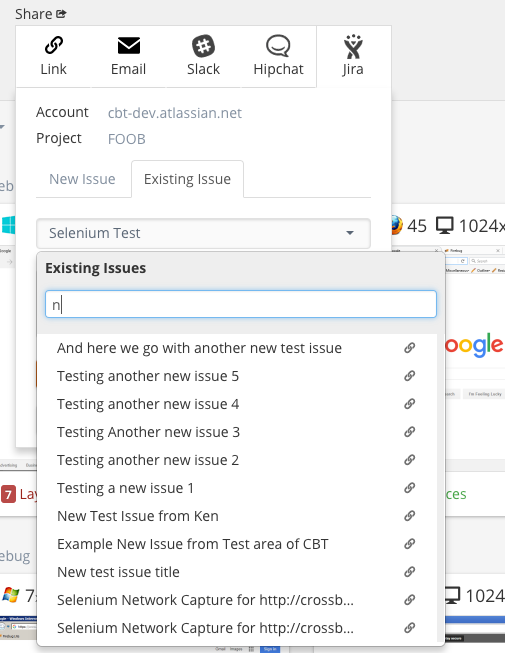
In the image below, we show how a user can choose from a list of existing issues and post these test results as a comment on an existing issue.
Lastly the user can click Send Comment or Add Issue on the respective options after entering custom comments and the public link and notes will be posted to the Jira project.

