CrossBrowserTesting has overhauled our account system to give you and your team more control over how you access the product, manage your subscription, and access your test results. We’ve introduced a role-based permission system that allows you to assign specific roles to members of your team so they can get their job done without barriers. This new feature fulfills a request that we get quite often, the ability for management accounts to not count against the number of users that can run tests. The documentation below will explain the new roles we’ve introduced, as well as how to get your team setup to use them.
Role Definitions
- Tester: A user with the tester role can start a test, either through the app, or with an API call. Users with the tester role are the only users that count against your licensed number of users. Removing the tester role from a user does not affect, hide, or delete previous results from tests the user ran while they had the tester role.
- Admin: A user with the admin role can invite users to the team, disable users, and assign/remove the tester and admin roles from other users.
- Billing: A user with the billing role can change anything related to the account’s subscription including cancelling the plan, upgrading, viewing receipts, updating the billing address, and more. Billing users can also assign/remove the billing role to/from other users under their account.
- Owner: A user with the owner role has all of the permissions that a user with both the billing and admin roles has. In addition, the owner role can only be assigned or removed by another owner. There must always be at least one active owner on the team.
Managing User Roles
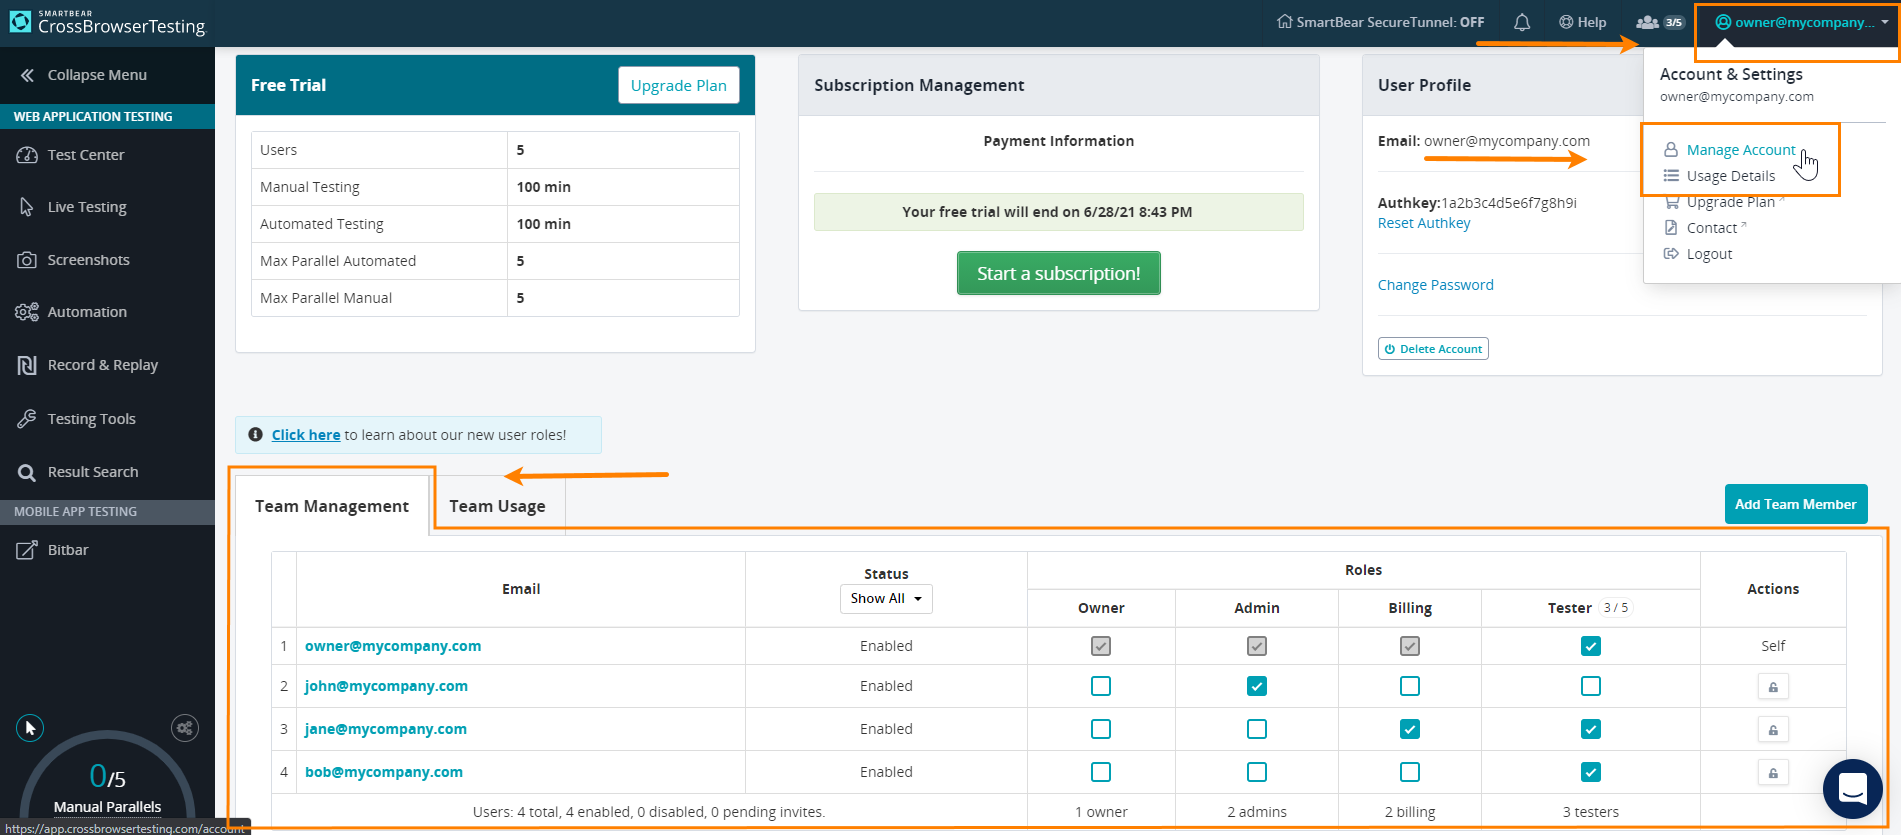
Assuming you have the correct role(s), you can find the Team Management panel on the Account Management Page in the CrossBrowserTesting app. This page can be accessed by going to https://app.crossbrowsertesting.com/account or choosing Manage Account from the user menu in the upper-right corner of the app.
Once you navigate to the Account Management page, you will be able to add and remove roles on other users under your account, assuming you have the correct permissions. Assigning a role is as simple as clicking the checkbox underneath the role you wish to modify. By hovering over the checkbox, you will see a short description of what the role does, or the reason you cannot modify the role.
Next to the Tester column header, you will see the number of active testers on your team, and the maximum number your plan allows you to assign. There is no limit to how many users can be assigned the Owner, Admin, or Billing roles.
On the far right of the table, you have the actions you can take against that user. This includes disabling an active account, re-enabling a disabled account, and modifying/canceling an invite to join the team. A disabled user will not be able to log in to the app or use their auth key for API calls until they are re-enabled.
When a new user is invited to the team, they will initially have no roles assigned to them. Using the Team Management tab, you can assign all the roles that user will need to take care of business and start testing your site. Once they’ve accepted your invite and setup their account, they will have all of the permissions necessary, without any further interaction needed from you!

