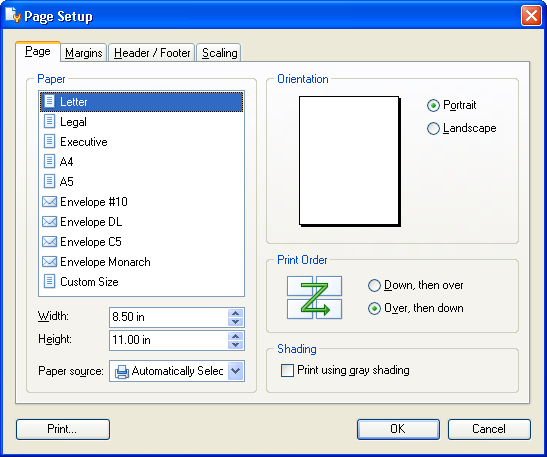
Use this dialog to set paper size, margins, layout, header/footer, and so on. To call the dialog, select  Page Setup from the Standard toolbar or from the File menu of the Print Preview form.

The dialog has four tabbed pages:
- Page allows you to select paper size, orientation, paper source, print order, and specify whether AQTime will print the report with shades.
- Margins. This page allows you to set the distance (margin) between the text and the edges of the page. Margins define the area available for printing. You can check the Horizontally or Vertically boxes to center data on the page. Else, they will have a top-left alignment. The Fix button on this page automatically sets correct values to margins if they have invalid sizes (for example, when the Top margin is less than the Header margin). This button is enabled only if margins have an invalid size.
- The Header\Footer page specifies the text and style of the page's header and footer (Note that the page's header is printed before the report title). Both header and footer are divided into three regions: Left, Center and Right. You can enter text for each region into the corresponding edit field. If Reversed on even pages is checked, AQTime exchanges the left and right regions on even pages. The font and background settings (see Background Palette Dialog) are the same for all three regions.
A panel below the Header and Footer sections is used to specify vertical alignment for the header and footer text. In addition, it includes several buttons that allow you to insert the machine or user name, page numbers in different formats and the current date/time into the header (footer).
- The Scale page allows you to change the scale of report data on the page. Adjust to specifies the precise scale. Fit to allows you to organize data among the specified number of pages (horizontal and vertical).
Pressing Print saves changes you have made and starts printing.
See Also
Print Preview Form
Print Preview - Print Dialog
Print Preview - Background Palette Dialog
