PingOne is an identity provider (IdP) that can be used to authenticate users with AlertSite. This topic explains how to configure single sign-on using PingOne.
Configure PingOne
First, get AlertSite SAML information that you will need to specify in PingOne:
-
If you use AlertSite UXM, navigate to > Settings > Single Sign-On .
If you use AlertSite 1.0, navigate to Account > Manage Account and click Single Sign-On.
-
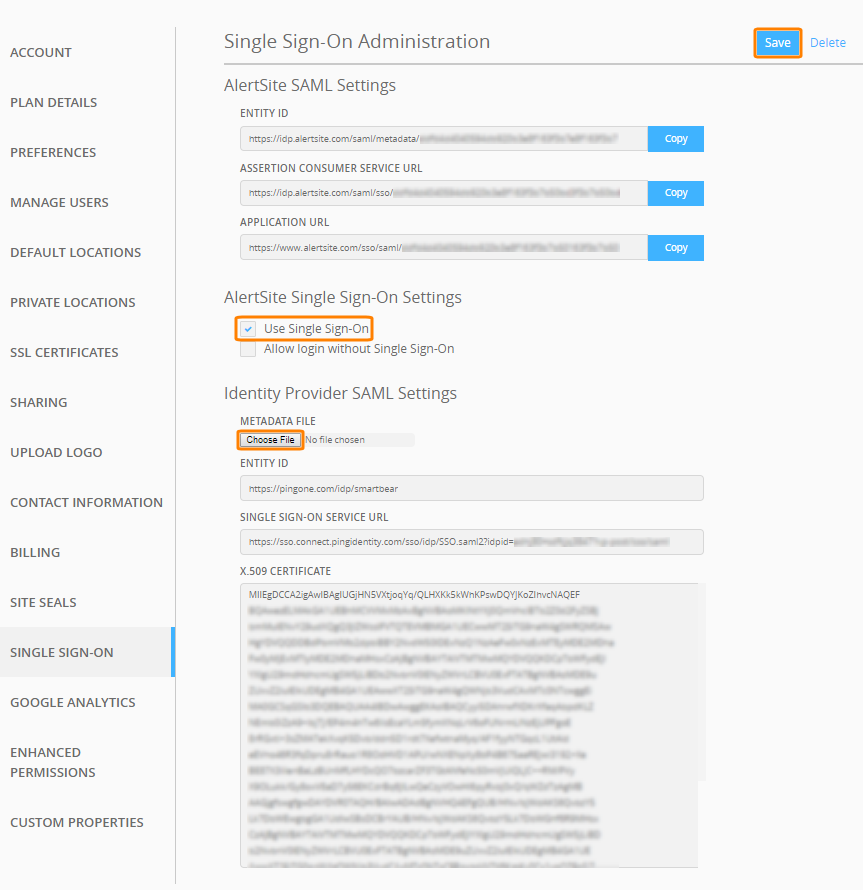
Copy the values displayed in the AlertSite SAML Settings section:
- Entity ID
- Assertion Consumer Service URL
- Application URL
Then, in PingOne, follow these steps:
-
Log in to your PingOne administrator account or create a new one.
-
On your user profile home page, switch to the Applications tab.
-
Click Add Application and select the New SAML Application option from the drop-down list.
-
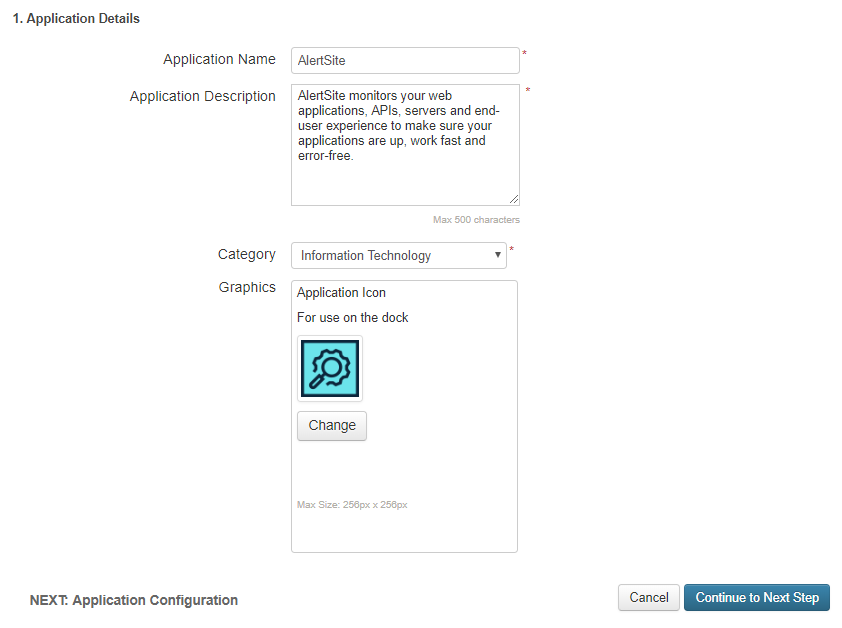
In the Application Details form, specify the following settings:
-
Application Name – Enter AlertSite.
-
Application Description – A short snippet of arbitrary information about the application.
-
Category – Select Information Technology.
-
Graphics – (Optional.) Upload the application logo. Right-click the image below and save it to your computer, and then upload it.

-
-
Click Continue to Next Step.
-
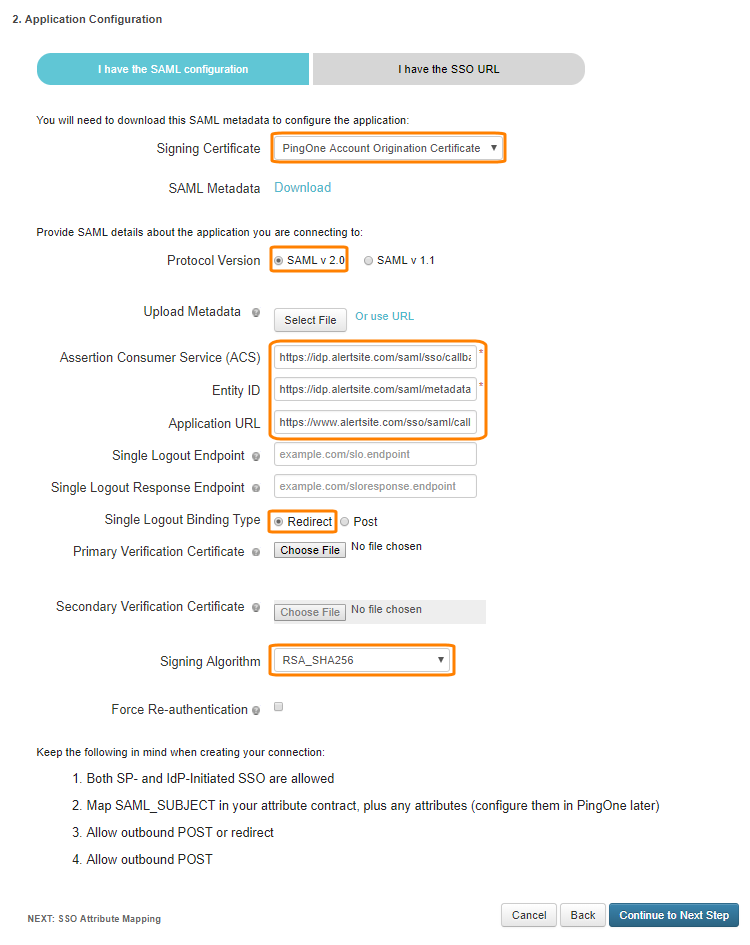
On the next page, click I have the SAML configuration. Then, you need to configure SAML as follows:
Option Value Signing Certificate
PingOne Account Origination Certificate
Protocol Version
SAML v 2.0
Assertion Consumer Service
Copy and paste the Assertion Customer Service URL value from AlertSite.
Entity ID
Copy and paste the Entity ID value from AlertSite.
Application URL
Copy and paste the Application URL value from AlertSite.
Single Logout Binding Type
Redirect
Signing Algorithm
RSA_SHA256
-
Click Continue to Next Step.
-
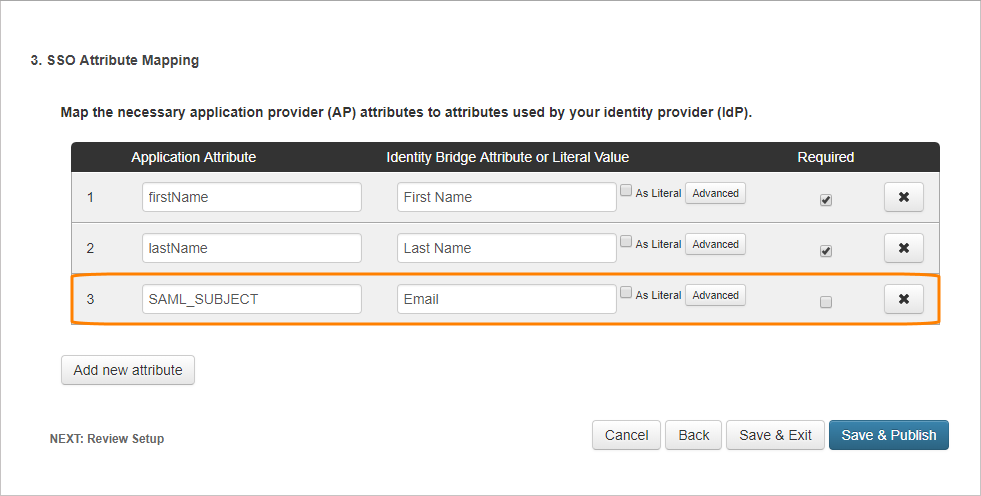
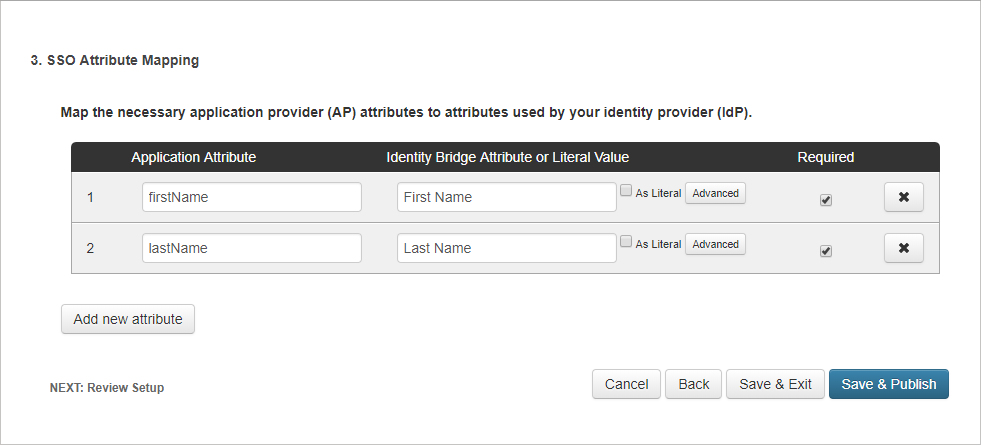
On the next page, click Add new attribute and add the following attribute mappings:
Application Attribute Identity Bridge Attribute or Literal Value Required firstNameFirst NameYes lastNameLast NameYes -
Click Save & Publish.
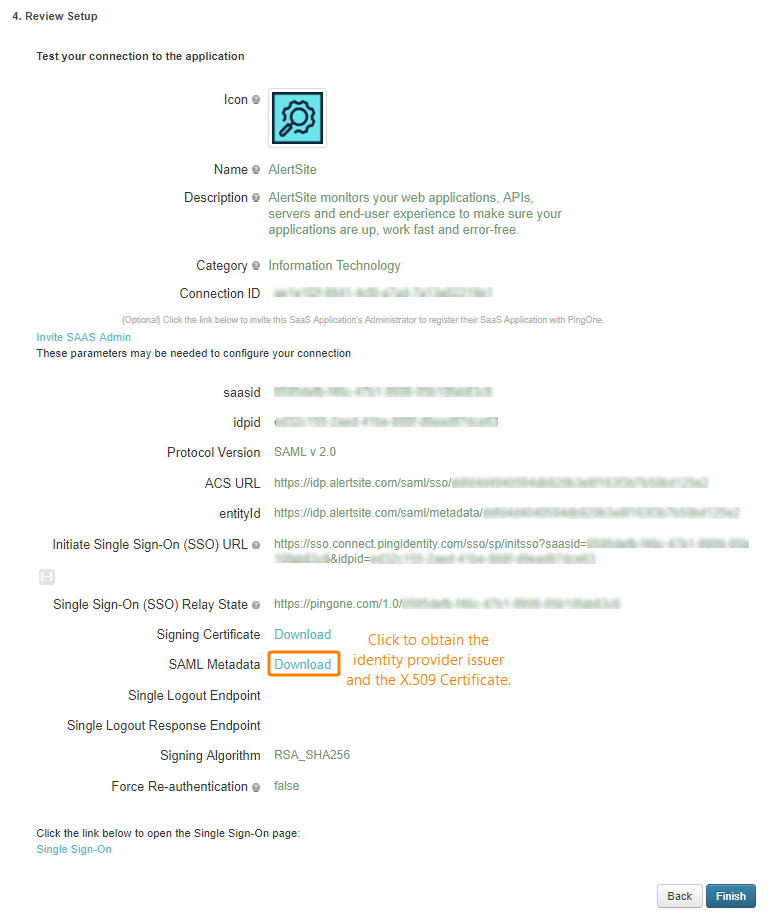
From the Review Setup page, download the SAML Metadata file. You will later need this file in AlertSite.
Configure AlertSite
AlertSite UXM
AlertSite 1.0
-
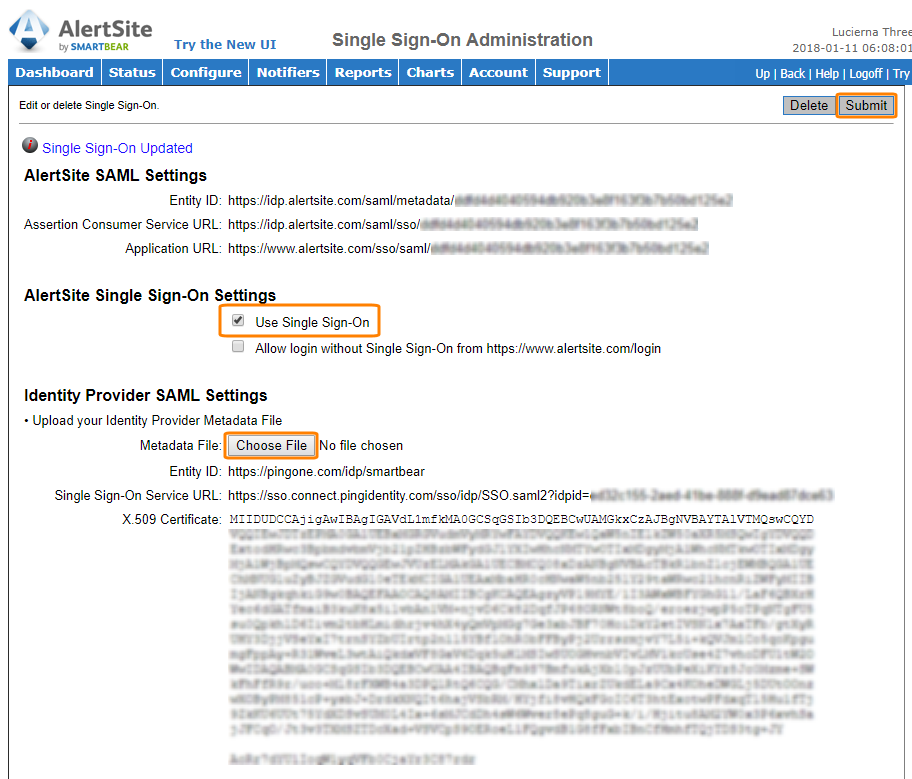
Navigate to Account > Manage Account and click Single Sign-On.
-
Select the Single Sign-On check box.
-
Under Identity Provider SAML Settings, upload the metadata file you previously downloaded from PingOne. Other settings will be populated automatically.
-
Click Submit in the top right corner.
Assign AlertSite Application to PingOne Users
To configure which PingOne-authenticated users will have access to AlertSite:
-
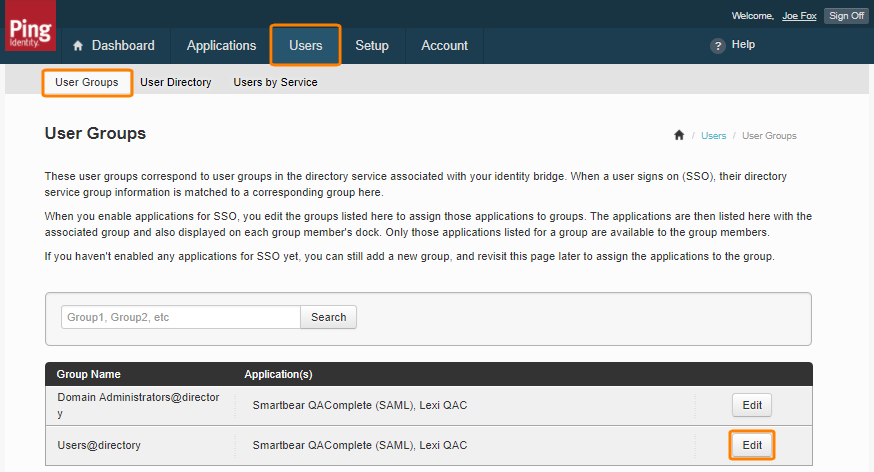
On the Users tab, switch to User Groups and click Edit next to the needed group.
-
Select AlertSite and click Save.
Test Single Sign-On
To test single sign-on initiated from PingOne:
-
Log out from AlertSite.
-
In PingOne, click AlertSite in the application list.
You will be redirected to AlertSite and will be logged in automatically.
To test single sign-on initiated from AlertSite:
-
Copy the Application URL value from the Single Sign-On settings in AlertSite. This will be the AlertSite login page for your company while SSO is enabled. It looks like:
https://www.alertsite.com/sso/saml/<ID>
-
Log out from AlertSite and from PingOne.
-
(Recommended.) Open a new browser tab in incognito mode.
-
Navigate to the URL you got on step 1.
-
You will be redirected to PingOne.
-
Log in to PingOne using your PingOne account.
You will be redirected to AlertSite and will be logged in.


 Define Custom Usernames