You can include TestLeft test code in unit tests and run them by using various unit testing frameworks. This topic describes how to run TestLeft tests with xUnit.net:
About
xUnit.net is a unit testing framework for .NET applications. TestLeft provides an xUnit project template for Visual Studio that simplifies creation of xUnit.net tests that run TestLeft code. You will be able to run such tests by using the xUnit.net Visual Studio runner.
Requirements
-
The xUnit project and test templates are available only for Visual Studio projects that target .NET Framework version 4.5 or higher.
Note: If your project targets an earlier version of .NET Framework, or if you use another unit testing framework, you can add TestLeft code to your unit tests and run them by using your unit testing framework manually, without using the templates. -
TestLeft xUnit templates include references to needed xUnit.net packages. When you build your TestLeft xUnit tests, Visual Studio will download and install needed packages automatically by using NuGet Package Manager.
Note: Enable the Allow NuGet to download missing packages and Automatically check for missing packages during build in Visual Studio options of NuGet Package Manager to enable downloading needed packages. To learn more, see the NuGet documentation.
Creating and Running a TestLeft Test
-
Add a TestLeft xUnit Test Project to your solution:
-
In Visual Studio’s Solution Explorer, right-click the solution and then click Add New Project.
-
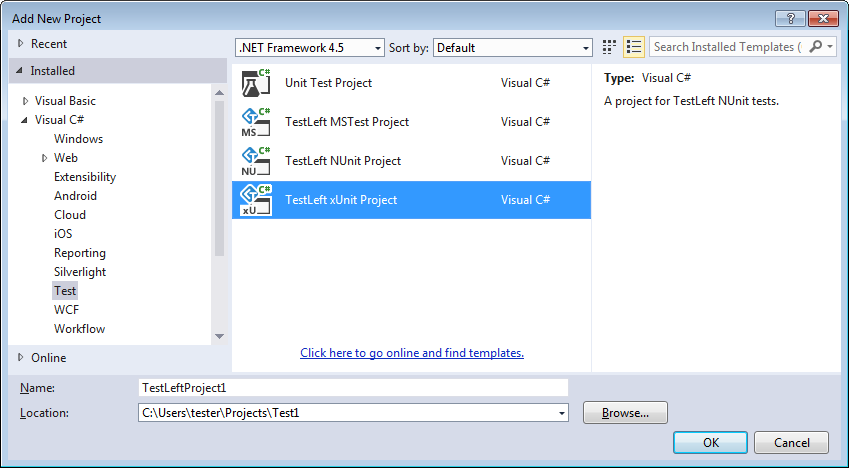
In the Add New Project dialog, select the Test category and then select the TestLeft xUnit Project type.
-
Click OK to add a project.
-
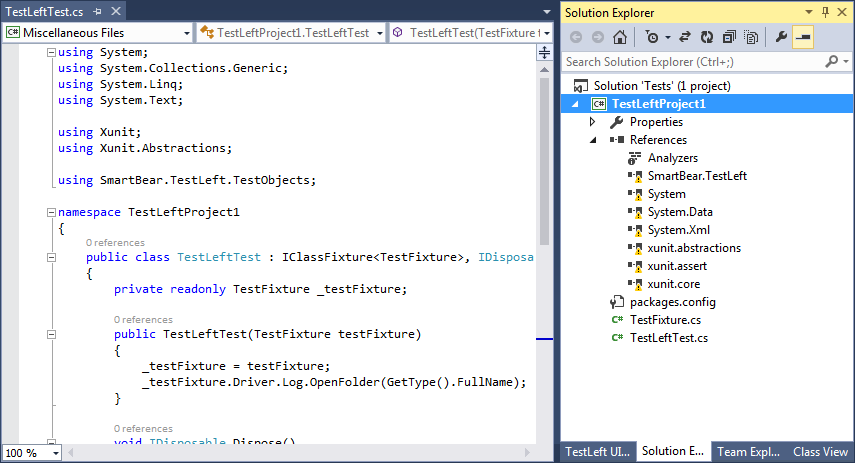
Visual Studio will add a TestLeft xUnit Project to your solution.
-
-
By default, the created project includes references to needed xUnit.net packages. Build the project. Visual Studio will download and install the packages automatically.
-
Write your test code.
Notes:
-
The project defines a sample test - HelloWorldTest. You can delete it if you do not need it or use it as a base to create your own tests.
-
The project also defines a
TestFixtureclass. Use that class to create tests. -
The xUnit TestLeft project includes a reference to the SmartBear.TestLeft.dll library. You do not have to add it.
To learn how to create test instructions, see Writing Test Code.
-
-
Build the project.
-
Select the needed test in the Test Explorer panel and run it.
Note: Tests created by using TestLeft xUnit templates do not save their test results automatically. To view the test log, in your TestLeft test code, add instructions that will export test results to an external file. See Saving Test Logs.
See Also
Running TestLeft Tests From Unit Testing Frameworks
Using TestLeft
Writing Test Code
 About
About
