
 Privilege Level
Privilege Level
Windows Vista, Windows 7, Windows Server 2008 and later operating systems provide a new security level, which is higher than that in previous versions of Windows. In order to test applications on these operating systems, TestExecute must have the same or higher privileges than those of the applications under test. However, some changes in the security model may cause the test engine to malfunction:
-
Even if you log in to the operating system using an administrator account, the applications that you will execute will not necessarily have administrator rights.
-
When TestExecute is launched from a user account, it will not have access to some application processes, since administrator privileges are required for this.
-
Even if TestExecute and your tested application are running under the same user account, they may have different security permissions under Windows 7, Windows Server 2008 R2 or later Windows versions. TestExecute can only “see” and interact with an application if it has the same or a higher level of security permissions than the application. For example, if TestExecute is run with user permissions and a tested application is run with administrator permissions, TestExecute will not be able to see the application’s windows and controls and to obtain properties of the application’s process.
To test your application, TestExecute must have the same or higher privileges than the application you are testing has:
-
If the tested application has user privileges, TestExecute can have either user or administrator privileges.
-
If the tested application has administrator privileges, TestExecute must also have administrator privileges.
The next sections explain how you can launch applications with administrator permissions.
Launching TestExecute With Administrator Permissions
There are several ways to run TestExecute as an administrator:
-
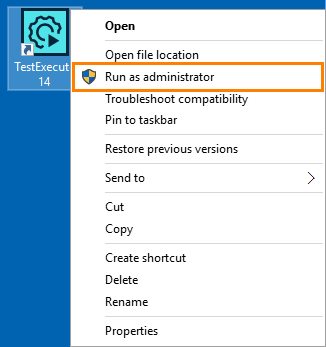
Right-click the TestExecute shortcut and select Run as administrator from the context menu:
-
Modify the TestExecute shortcut properties to run it as an administrator:
-
Right-click the shortcut and select Properties from the context menu.
-
On the Shortcut tabbed page, click the Advanced button. The Advanced Properties dialog will appear.
-
Select the Run as administrator check box and click OK.
-
Close the shortcut properties.
Now, every time you run TestExecute using this shortcut, you will run it as an administrator.
-
-
Modify the TestExecute.exe file properties to always run it as an administrator:
-
Locate the TestExecute.exe file in Windows Explorer or other file manager.
-
Right-click the file and select Properties from the context menu.
-
Switch to the Compatibility tabbed page.
-
Select the Run this program as an administrator check box and click OK.
Now every time time you run TestExecute – whether via a shortcut, from command line or any other way – it will be run as administrator.
 When launched with the Compatibility > Run this program as an administrator option, TestExecute may fail to recognize Edge as a web browser. To test websites in Edge while running TestExecute as administrator, launch TestExecute using one of the other methods described above.
 -
Disabling UAC Prompt
When you run an application with administrator privileges under Windows 7, Windows Server 2008 or later Windows versions, Windows displays a dialog box asking for your permission for the run. Due to certain limitations, the closing of this dialog box cannot be automated: when this dialog box is visible, the script run is automatically paused. So, you should close the dialog box manually or modify User Account Control settings so that Windows does not display the dialog. Note, however, that modifying the settings will impair the security:
-
Open Control Panel by clicking Start and then clicking Control Panel.
-
In the search box, type User Accounts and then select the User Accounts applet.
-
In the User Accounts window, click Turn User Account Control on or off.
Windows will display a dialog box asking for your permission to continue. Click Continue in the dialog.
-
Clear the Use User Account Control (UAC) to help protect your computer check box and press OK.
-
Close the User Accounts window.
-
Restart your computer.
From now on, Windows will not display confirmation dialogs when you launch an application with administrator privileges. Note once again that changing the settings in the described way will impair the security.
Launching Tested Applications
You can launch a tested application with administrator permissions in the same manner that was described in the previous section. Note, however, that when a tested application is launched from TestExecute, the application automatically gains the same privileges as TestExecute. So if you call the tested application by calling the TestedApps.RunAll or TestedApp.Run scripting method or by using the Run TestedApp keyword test operation, you do not need to modify the application’s properties.
TestExecute Features That Require Administrator Permissions
Using some of the testing features requires that TestExecute have administrator permissions:
-
Running the tested application in the RunAs mode, that is, under another user account.
-
Running the tested application in the Profile mode, that is, under a profiler.
-
Changing the system date and time using the
aqDateTime.SetSystemDateTimemethod. -
Shutting down or restarting the computer as a part of the test run.
-
AQtime integration and coverage testing.
The 32-bit executable of TestExecute is located in the <TestExecute>\Bin\ folder.
The 64-bit executable of TestExecute is located in the <TestExecute>\x64\Bin\ folder.
See Also
Working With TestExecute Under Limited User Accounts
TestExecute and Windows Firewall
Specifics of Using TestExecute on Various Windows Operating Systems