
Add users
Using API
To create a user by using the TestEngine API, you need to send the following request:
POST http:///api/v1/users
Body
A JSON object containing information about a new user:
userName |
String. Specifies the name of the new user. |
password |
String. Specifies the password of the new user. |
admin |
Boolean. Specify true to grant the new user administrator permissions. |
For example:
{
"userName": "john.smith",
"password": "p@ssw0rd",
"admin": false
}
 See details on SwaggerHub.
 Example
 Example
 Hide example
curl -H "Content-Type: application/json" -d @user.json -u user:password -X POST "http://localhost:8080/api/v1/users"
In this example:
-H "Content-Type: application/json"
Specifies the Content-Type header that tells TestEngine the type of the payload content.
-d @user.json
Specifies payload for the request. This example refers to the user.json file containing the required data.
-u user:password
Authenticates the request with the user’s credentials. This user must have admin permissions.
-X POST
Specifies the POST method.
"http://localhost:8080/api/v1/users"
The endpoint of the request.
-
Select the POST request to the /users resource:
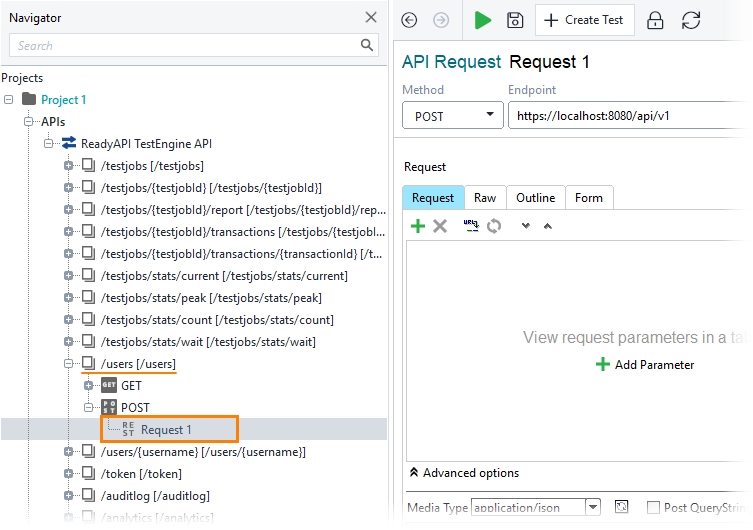
Click the image to enlarge it.
-
Specify payload for the request.
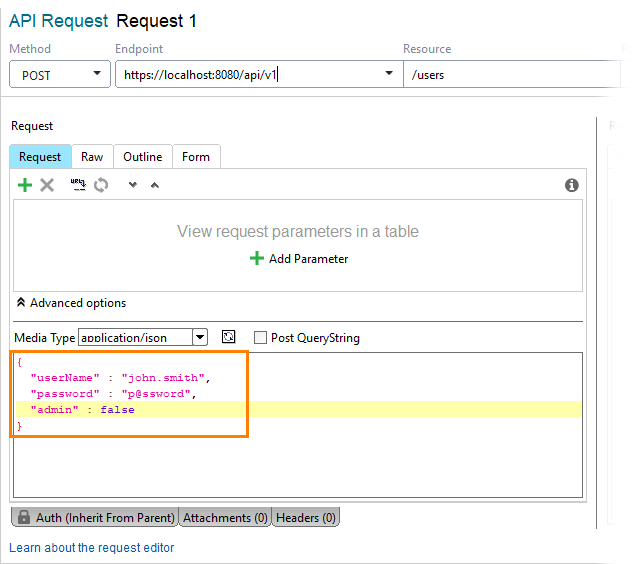
Click the image to enlarge it.
-
Open the Auth panel.
-
Select the Basic (Built-in) authorization type.
-
Specify admin credentials and select the Authenticate pre-emptively option:
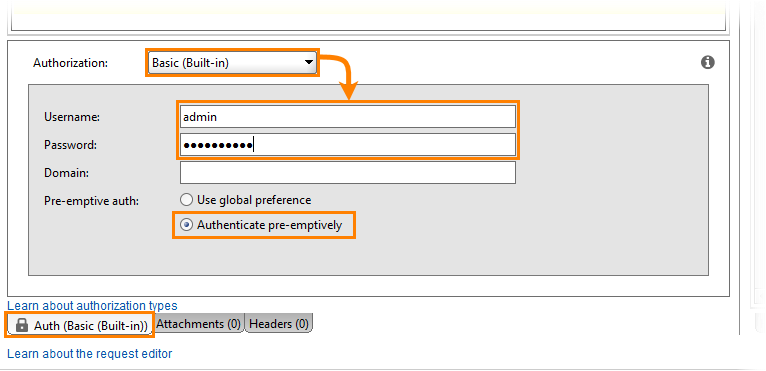
Click the image to enlarge it.
-
Send the request:

Click the image to enlarge it.
Using Web UI
-
Log in to the TestEngine web interface under a user account with administrator permissions.
-
Open the user menu and select Manage Users:

Click the image to enlarge it.
-
Click Add User:

Click the image to enlarge it.
-
Specify the username and password.
-
If you want to grant administrator permissions, select the Administrator option.
-
Click Save:
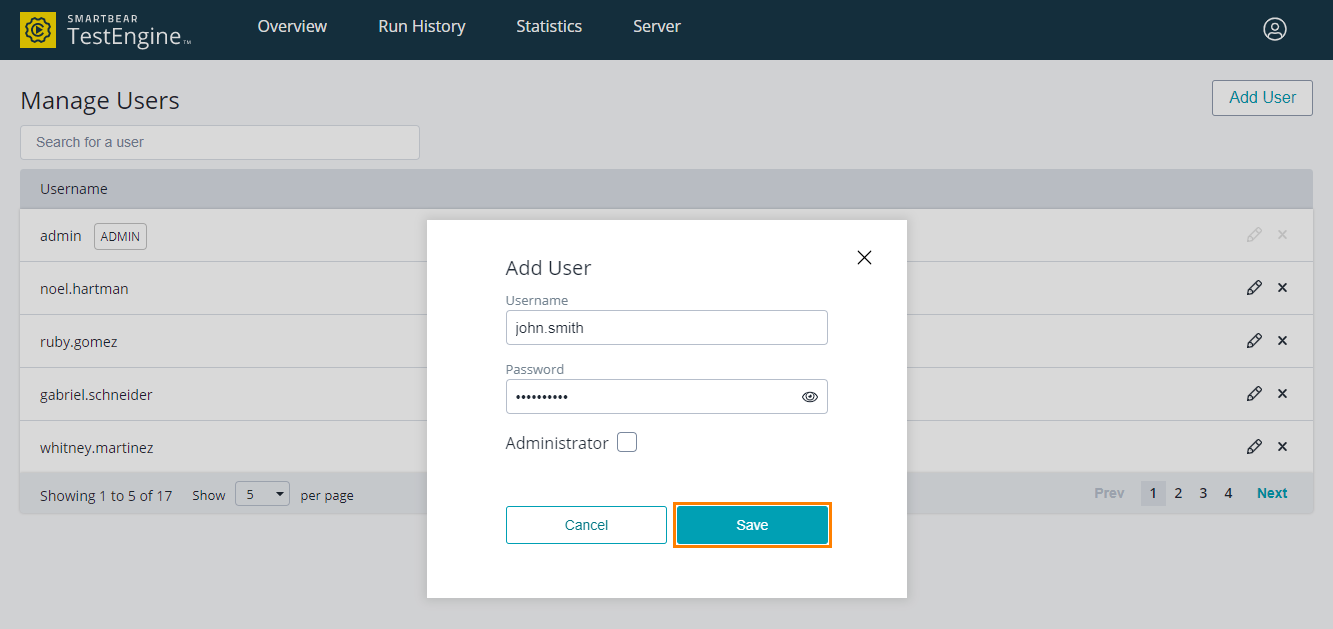
Click the image to enlarge it.
Deactivate users
Using API
To deactivate a user by using the TestEngine API, you need to send the following request:
DEACTIVATE http:///api/v1/users/{username}
{username}
The name of the user you want to deactivate.
 See details on SwaggerHub.
 Example
 Example
 Hide example
curl -u user:password -X DEACTIVATE "http://localhost:8080/api/v1/users/john.smith"
In this example:
-u user:password
Authenticates the request with the user’s credentials. This user must have admin permissions.
-X DEACTIVATE
Specifies the DEACTIVATE method.
"http://localhost:8080/api/v1/users/john.smith"
The endpoint of the request. In this example, “john.smith” is the name of the user to deactivate.
-
Select the DEACTIVATE request to the /users/{username} resource:
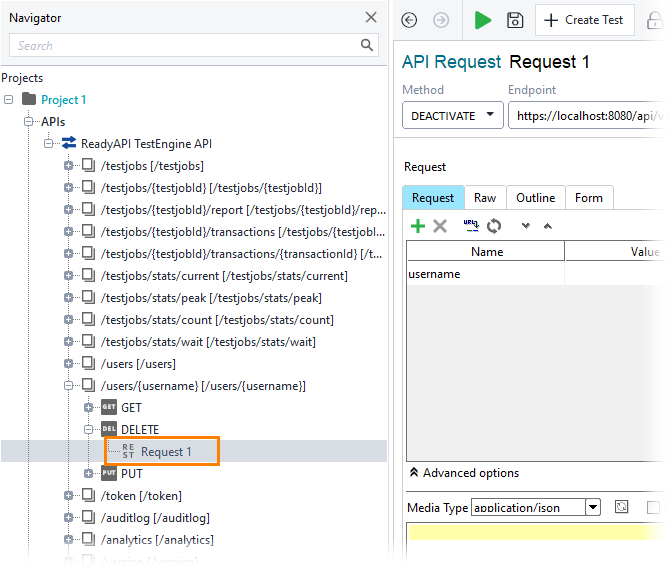
Click the image to enlarge it.
-
Specify the name of the user you want to deactivate as the value of the username parameter:
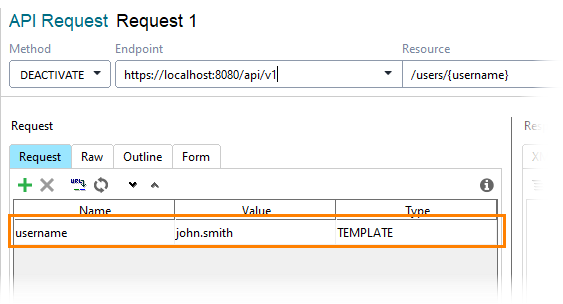
Click the image to enlarge it.
-
Open the Auth panel.
-
Select the Basic (Built-in) authorization type.
-
Specify admin credentials and select the Authenticate pre-emptively option:

Click the image to enlarge it.
-
Send the request:

Click the image to enlarge it.
Using Web UI
-
Log in to the TestEngine web interface under a user account with administrator permissions.
-
Open the user menu and select Manage Users:

Click the image to enlarge it.
-
Click  :
:

Click the image to enlarge it.
-
Click OK to confirm the deletion:
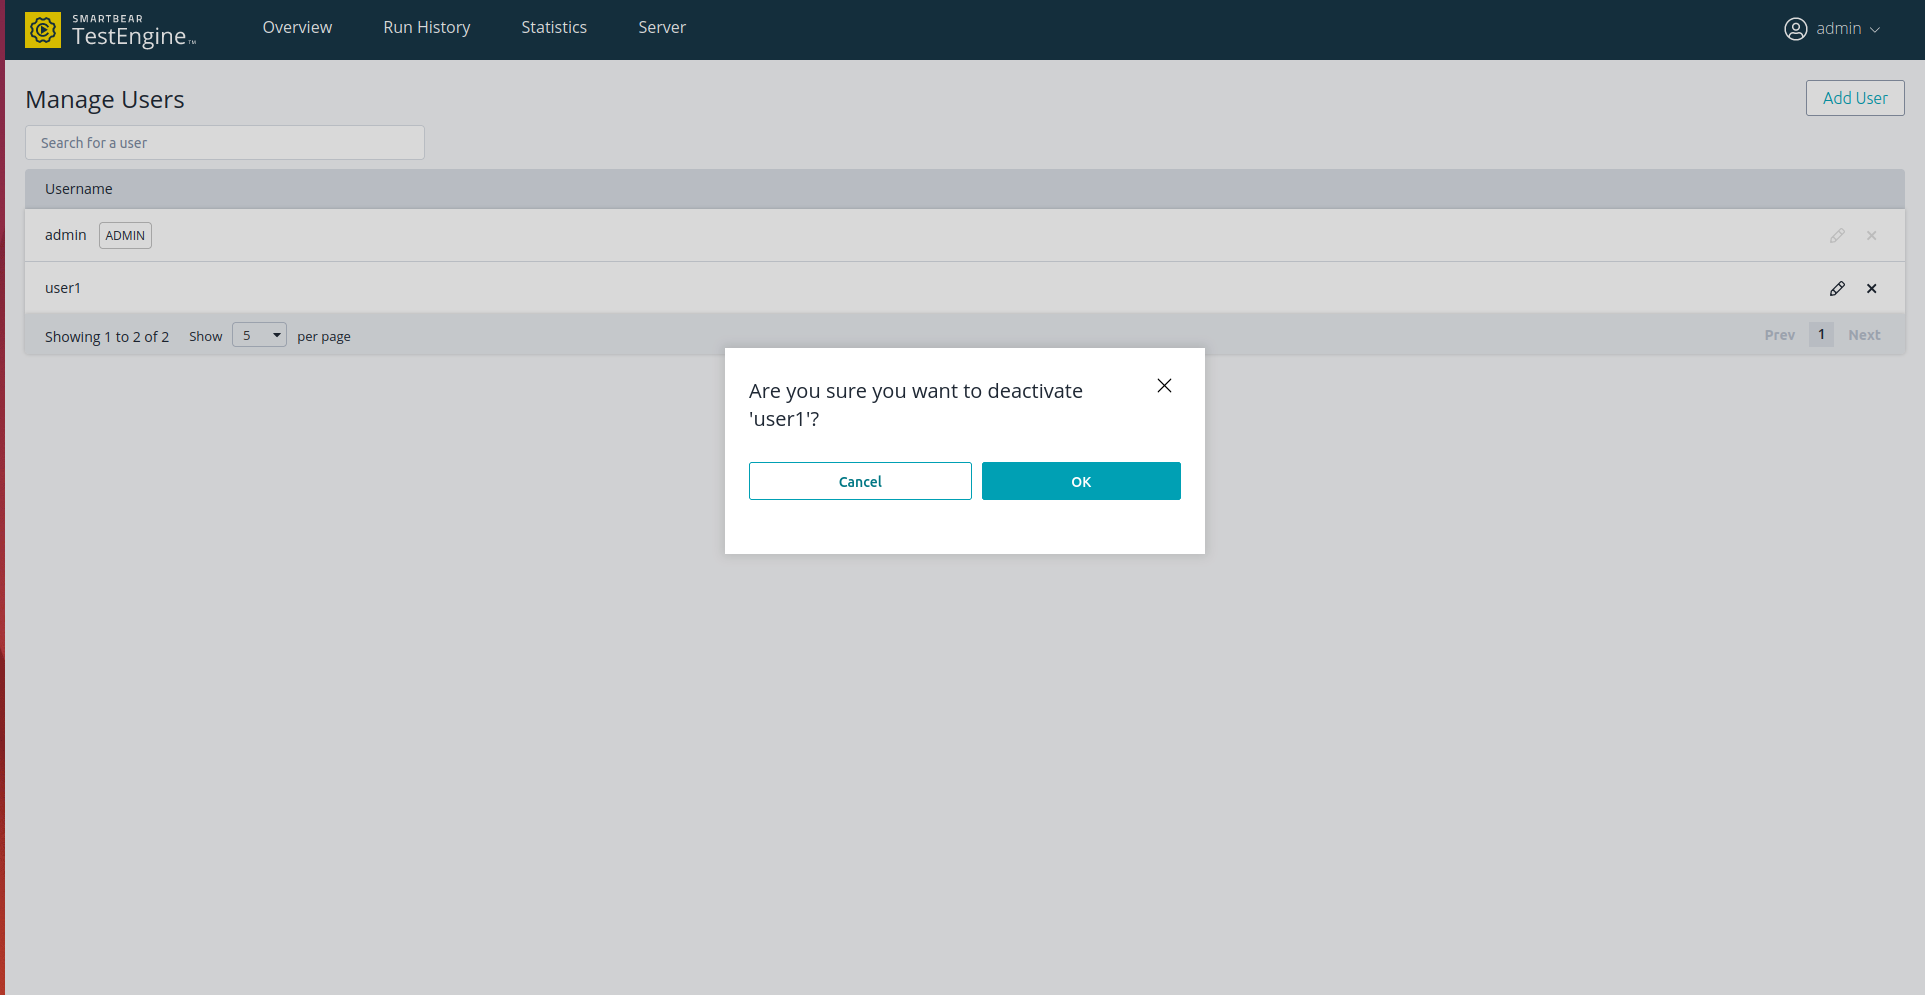
Click the image to enlarge it.
Edit user
Using API
To modify a user by using the TestEngine API, you need to send the following request:
PUT http:///api/v1/users/{username}
{username}
The name of the user you want to edit.
Body
A JSON object containing data of the user. Skip the elements you do not want to change:
password |
String. Specifies the new password of the user. |
admin |
Boolean. Specify true to grant the user administrator permissions. Otherwise, specify false. |
For example:
{
"password": "new-p@ssw0rd",
"admin": true
}
Authentication
The request must be authenticated by a TestEngine administrator.
--or--
The request must be authenticated by a TestEngine user to change their own password.
 See details on SwaggerHub.
 Example
 Example
 Hide example
curl -H "Content-Type: application/json" -d @user.json -u user:password -X PUT "http://localhost:8080/api/v1/users/john.smith"
In this example:
-H "Content-Type: application/json"
Specifies the Content-Type header that tells TestEngine the type of the payload content.
-d @user.json
Specifies payload for the request. This example refers to the user.json file containing the required data.
-u user:password
Authenticates the request with the user’s credentials. This user must have admin permissions.
-X PUT
Specifies the PUT method.
"http://localhost:8080/api/v1/users/john.smith"
The endpoint of the request. In this example, “john.smith” is the name of the user to be updated.
-
Select the PUT request to the /users/{username} resource:
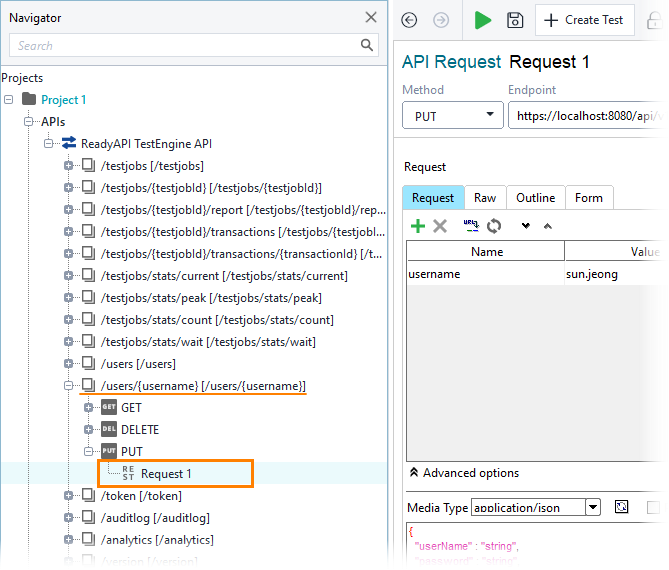
Click the image to enlarge it.
-
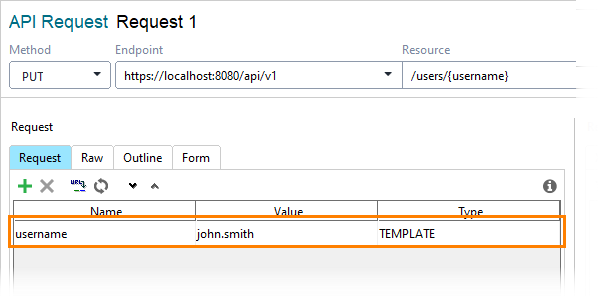
Specify the name of the user you want to modify as the value of the username parameter:
Click the image to enlarge it.
-
Specify payload for the request:

Click the image to enlarge it.
-
Open the Auth panel.
-
Select the Basic (Built-in) authorization type.
-
Specify admin credentials or the credentials of the user whose password you want to change. Select the Authenticate pre-emptively option:

Click the image to enlarge it.
-
Send the request:

Click the image to enlarge it.
Using Web UI
-
Log in to the TestEngine web interface under a user account with administrator permissions.
-
Open the user menu and select Manage Users:

Click the image to enlarge it.
-
Click  :
:

Click the image to enlarge it.
-
Change the password and/or the type of the user.
-
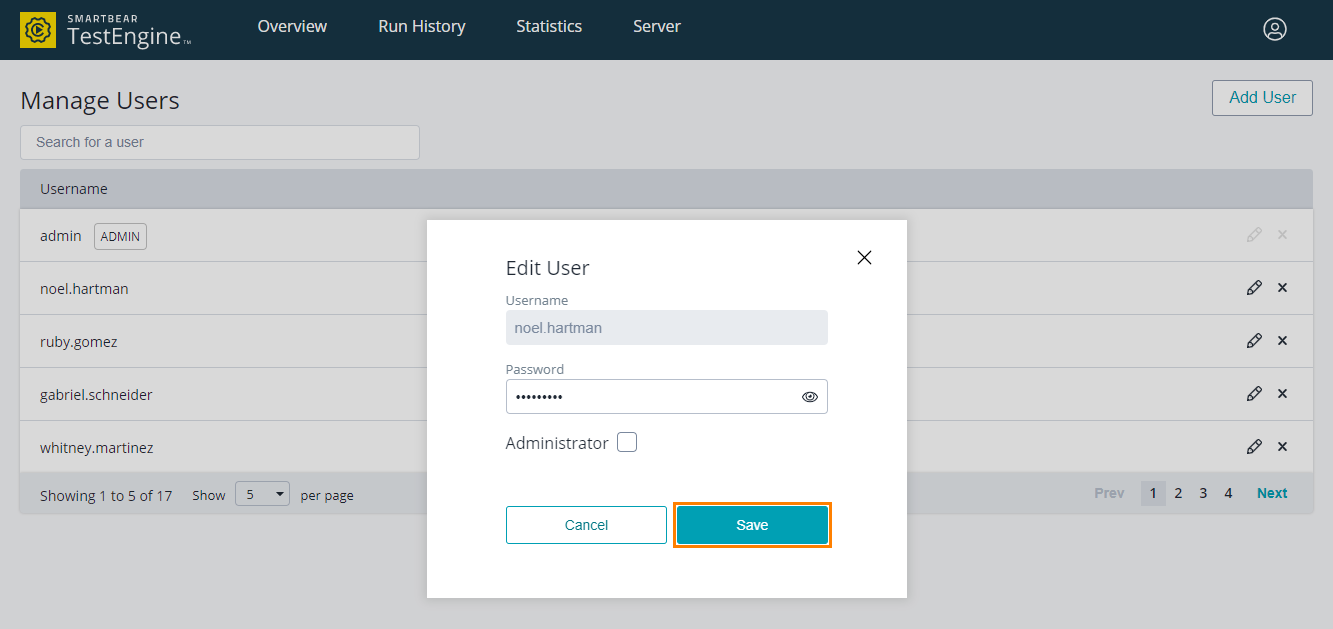
Click Save:
Click the image to enlarge it.
View users
Using API
To view TestEngine users, send the following request:
{username}
The name of the user information about whom you want to get.
Authentication
The request must be authenticated by a TestEngine administrator.
--or--
The request must be authenticated by a TestEngine user to get their own information.
 See details on SwaggerHub.
 Example
 Example
 Hide Example
curl -u user:password -X GET "http://localhost:8080/api/v1/users/john.smith"
In this example:
-u user:password
Authenticates the request with the user’s credentials. This user must have admin permissions or request its own data.
-X GET
Specifies the GET method.
"http://localhost:8080/api/v1/users/john.smith"
The endpoint of the request. In this example, “john.smith” is the name of the user to be updated.
-
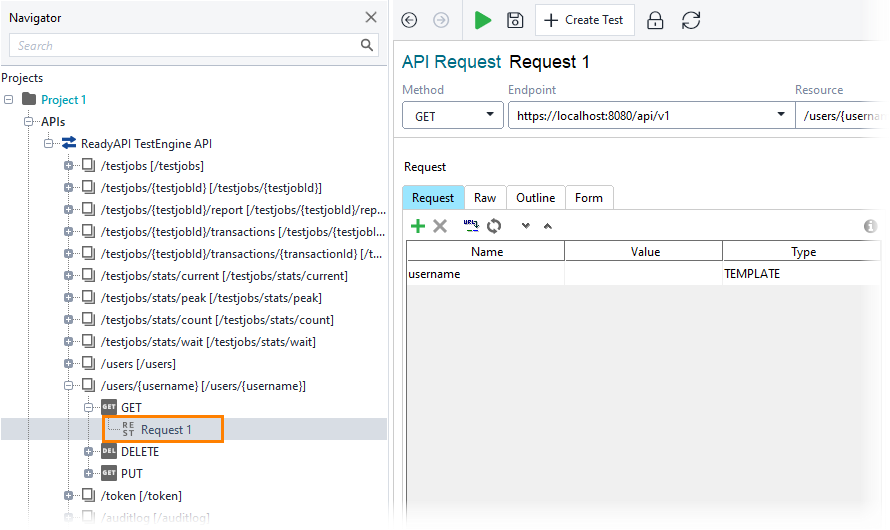
Select the GET request to the /users/ or /users/{username} resource:
Click the image to enlarge it.
-
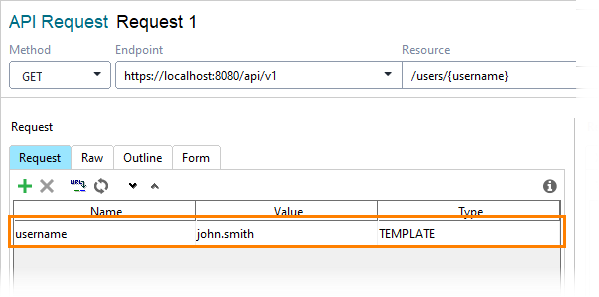
If you select the /users/{username} resource, specify the name of the user you want to get:
Click the image to enlarge it.
-
Open the Auth panel.
-
Select the Basic (Built-in) authorization type.
-
Specify admin credentials or the credentials of the user whose data you want to get. Select the Authenticate pre-emptively option:

Click the image to enlarge it.
-
Send the request:

Click the image to enlarge it.
The address and port of your TestEngine installation.
The address and port of your TestEngine installation.
The address and port of your TestEngine installation.
The address and port of your TestEngine installation.
The address and port of your TestEngine installation.
See Also
Administrative Tasks


 Example


