
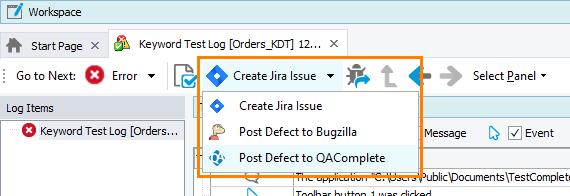
You can create bug reports and send them to your SmartBear QAComplete database directly from TestComplete. To do that, open a test log and then select  Post Defect to QAComplete from the test log’s toolbar:
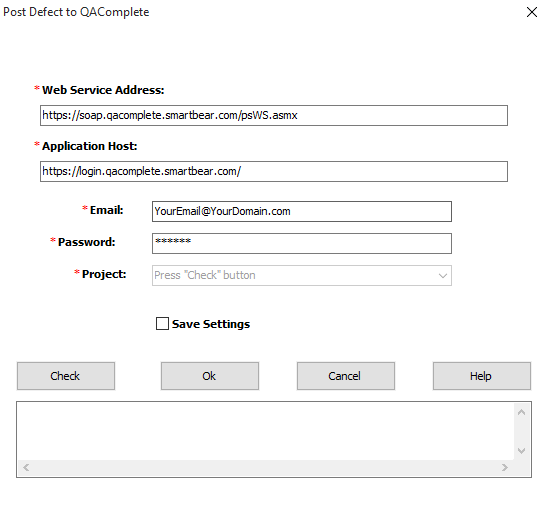
The Post Defect to QAComplete dialog will pop up.
-
On the first page of the dialog, specify the connection settings to your QAComplete project.
-
For QAComplete SaaS Customers (Software as a Service)
Enter the following information:
-
Web Service Address: http://soap.qacomplete.smartbear.com/psWS.asmx
-
Application Host: http://login.qacomplete.smartbear.com/
-
Email: The email address you use to log into SmartBear QAComplete
-
Password: The password you use to log into SmartBear QAComplete
-
-
For QAComplete Enterprise Customers
The information in the dialog will differ. Please verify your unique information with your IT department. It may be similar to this:
-
Web Service Address: http://[Your_Server_Name]/psws/psws.asmx
-
Application Host: http://[Your_Server_Name]
-
Email: The email address you use to log into SmartBear QAComplete
-
Password: The password you use to log into SmartBear QAComplete
-
-
- After you specify these settings, click Check to populate the Project drop-down list. You will see "Projects are loaded successfully" in the message area, and your projects will appear in the drop-down list. Select the desired project for the new defect.
- Select Save Settings so that you do not have to re-type this information when you create your next defect.
-
Click OK to continue.
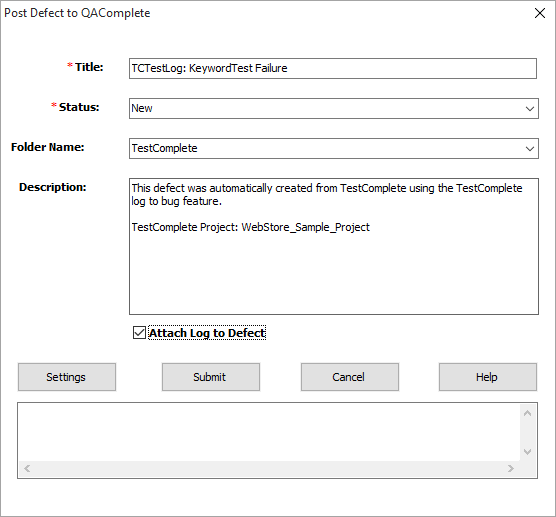
This will open the next page of the dialog:
-
On this page, you can specify the defect properties.
- Enter the Title of your defect.
- Select the Status from the drop-down list.
- If you use Folders, select the target folder for the defect.
- You can also change the default content of the Description in the edit box as needed.
- If you would like the TestComplete log attached to the defect in SmartBear QAComplete, select the Attach Log to Defect check box.
- Click Settings if you need to return to the previous screen to make changes.
After you specify the needed data, click Submit to send the defect to your SmartBear QAComplete database.
-
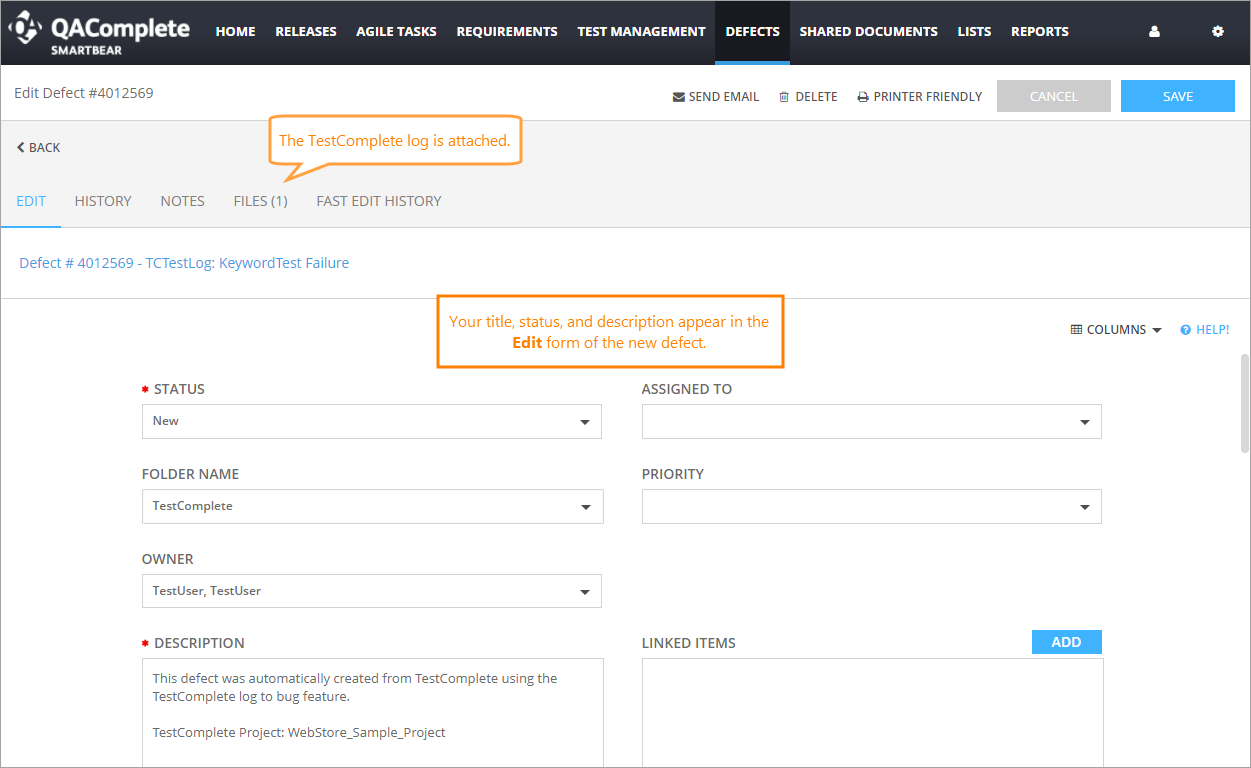
The defect will be added to QAComplete and the window will show you the defect number:
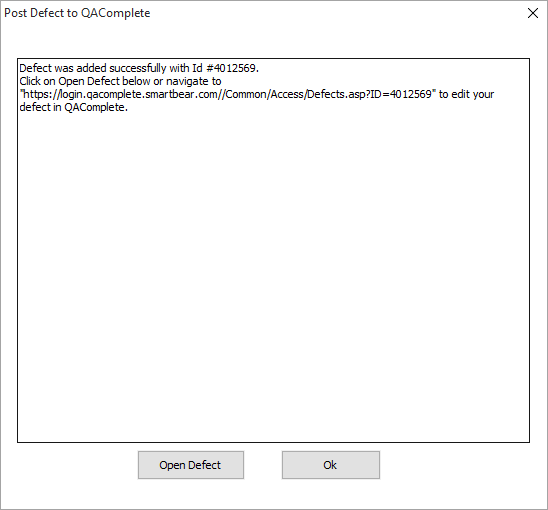
Click OK to close the window and return to TestComplete.
Alternately, if you wish to go directly into QAComplete to view or edit the defect, click Open Defect. This opens SmartBear QAComplete, allows you to log in, and takes you directly to the new defect.
See Also
Integration With QAComplete
Exporting TestComplete Tests to QAComplete