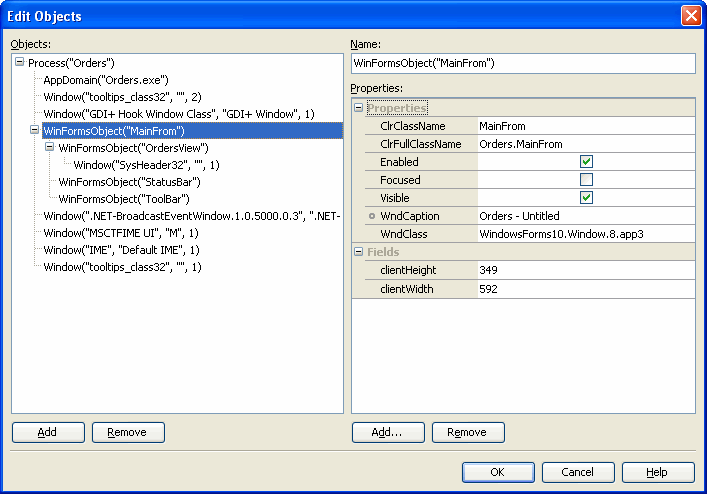
The Edit Objects dialog lets you completely modify the object stored in the project’s Stores > Objects collection:
- Add and remove child objects of the stored object.
- Modify the object’s name.
- Change the set of object properties and fields.
- Modify values of object properties and fields (unless they are read-only).
To call the dialog, select the objects collection in the Objects editor and click the Edit button.

The Object tree on the left of the dialog displays the stored object and all its child nodes. The name of an object currently selected in the object tree is displayed in the Name field, and the Properties list on the left holds properties of the selected object.
To add an object that is not currently stored in the objects collection, select its parent object and press the Add button under the object tree. A new node named New Object will appear under the selected one. You can then specify the object name, add properties of this object and specify their values.
To change the name of the selected object, enter the new name in the Name field.
To add an object property that is not stored in the given collection, click the Add button under the Properties list and specify the name and type of the desired property in the resulting Add Property dialog.
To modify the property or field value, select it in the Properties list and enter the new value.
To remove the selected object property or field from the object’s collection, click the Remove button under the Properties list.
To remove the selected object from the object tree, press the Remove button under the object tree.
To save the changes you have made in the dialog, press OK. Cancel will close the dialog discarding any changes.
