You may need to update baseline data used by an Excel checkpoint in order for the checkpoint to pass.
From the Test Log
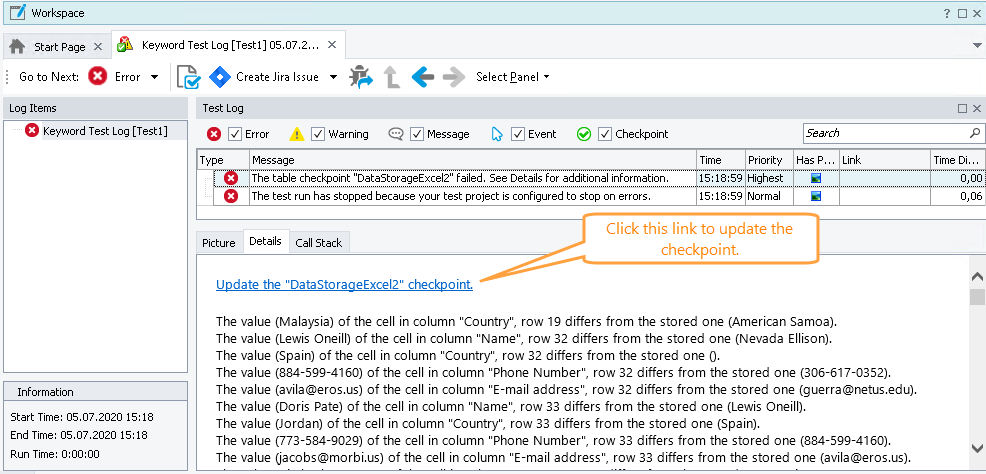
If an Excel checkpoint fails, you can easily update its baseline data from the test log:
-
Select the
 "checkpoint failed" message.
 -
Open the Details panel of the message.
-
Click the Update the <Checkpoint_Name> checkpoint data link at the bottom of the panel.
-
In the confirmation message, click Yes. TestComplete will replace the stored text data with the actual contents of the Excel file.
From the Table Element Editor
 |
It is available for comparison of Excel sheets only. |
-
Make sure that the object whose data the checkpoint verifies currently exists in the system.
-
Open the Table element that stores baseline data used by the checkpoint:
-
In the Project Explorer, expand the Stores > Tables node and locate the Table element that stores the data you want to update.
-
Double-click the desired Table element or right-click the element and select Edit from the context menu.
– or –
-
If you call the checkpoint from a keyword test, right-click the corresponding Table Checkpoint operation in the test and choose Edit Checkpoint Data from the context menu.
-
-
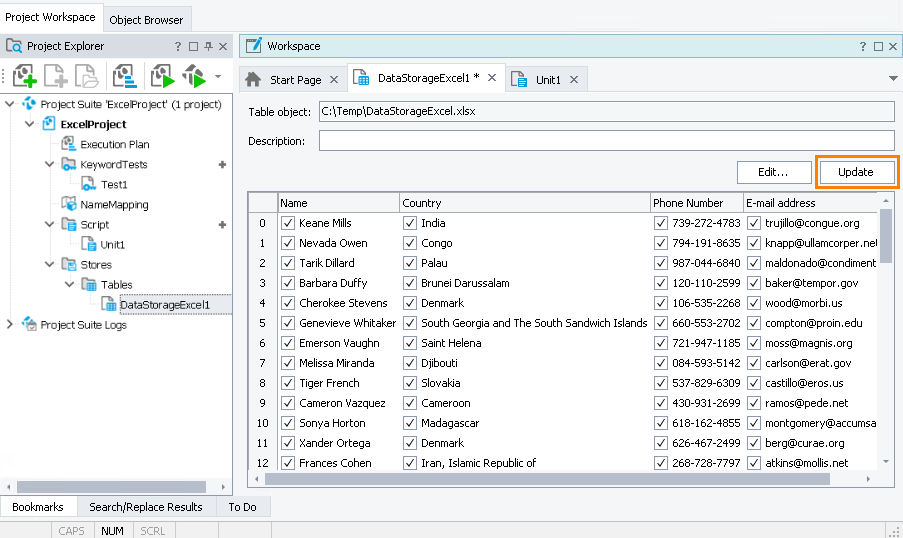
TestComplete will open the element in the Table Element editor. The editor displays the baseline data that will be used for verification.
-
To update the data, click Update at the top of the editor.
TestComplete will retrieve the actual data from the Excel sheet and store it to the Table element.


