TestComplete can monitor performance counters for applications or for computers (both local and remote). The approaches used to add performance counters for applications and computers are slightly different. The sections below provide more information on this.
Prerequisites
-
You need to add counters before running your automated tests.
-
You must configure the monitored computer and the TestComplete computer as explained in Enabling Performance Monitoring.
Adding Performance Counters for an Application
-
Important: Run the application you want to monitor. TestComplete can get the counters only from running applications.
-
Select Tools > Current Project Properties from the TestComplete main menu.
-
Select the Performance Counters category on the left.
-
In the subsequent options window, click Add. This will open the Add Counter wizard.
-
On the first page of the Add Counter wizard:
-
Specify the name or IP of the computer on which the application is running in the Tested Host field.
If the application is running on the local computer where TestComplete is running, specify the localhost name in the Tested Host field.
If the application is running on another computer in your network, specify the computer name or IP address in the Tested Host field, or click the ellipsis button in this field and select the desired host in the subsequent Select Host dialog.
-
Select Use custom counter and then click Next.
-
-
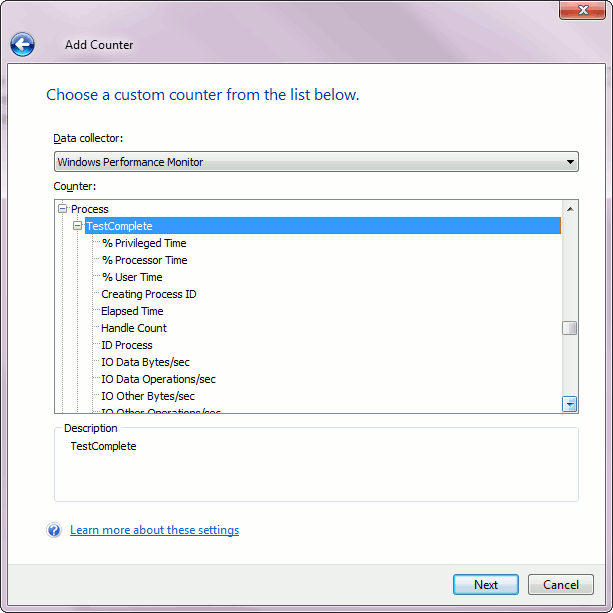
The next page of the wizard displays a tree-like list of the available counters. Expand the Process list item. Its child items correspond to processes running in the system.
Find the item that corresponds to your application and expand it. You will see a list of counters available for the application.

Choose the desired counter from the list and click Next.
Note: If your application is not running at the moment of counter creation, close the wizard, launch the application and repeat the procedure from the beginning. -
On the last page of the wizard, select the title and color to be used for the selected counter in the graph.
-
Click Finish to close the Add Counter wizard.
After you have closed the wizard, the counter is automatically added to the counters list shown in the Performance Counters section of project properties.
Adding Performance Counters for a Computer
-
Select Tools > Current Project Properties from the TestComplete main menu.
-
Select the Performance Counters category on the left.
-
In the subsequent options window, click Add. This will open the Add Counter wizard.
-
In the Add Counter wizard:
-
Specify the computer name or IP in the Tested Host field. As an alternative, you can click the ellipsis button in the Tested Host field and select the desired host in the ensuing Select Host dialog.
If you want to monitor the local computer where TestComplete is running, specify the localhost name in the Tested Host field.
-
To monitor typical performance parameters of a specified computer (CPU, memory or disk usage), click Use standard counter. To monitor a distinct parameter of a computer, click Use custom counter.
-
Click Next.
-
On the ensuing wizard page, select the counter you want to monitor from the list. Click Next.
-
On the last page of the wizard, select the title and color to be used for the selected counter in the graph.
-
Click Finish to close the Add Counter wizard.
-
After you have closed the wizard, the counter is automatically added to the counters list shown in the Performance Counters section of project properties.
See Also
Monitoring Tested Application Performance
Monitoring Tested Application Performance - Basic Concepts
Enabling Performance Monitoring
Generic Test Log - Performance Counters Panel

 Prerequisites