This page refers to key-based licenses — a legacy license type used in TestComplete until version 15.48. For information on the current, ID-based license type, see SmartBear ID-based Licenses.
About
Floating User licenses permit running TestComplete by multiple concurrent users. The license is controlled by the License Manager utility. You typically install it on a computer that has no TestComplete or TestExecute installed on it.
You activate a Floating User license once – on the License Manager computer. There is no need to activate it on each workstation that TestComplete will run on.
1. Download and install the License Manager utility
1. Select a computer for the License Manager utility
The License Manager is a lightweight utility that can run on any (even ”weak“) computer. The minimal system requirements look like these:
- Windows 7 SP1 or later operating system (both Client and Server editions are supported)
- 2 GB of RAM
- 200 MB hard drive space
- 1024 × 800 or higher resolution monitor
- Network interface (see below)
 After you activate your license on some computer, it becomes bound to that computer. To move your license to another machine, you will have to deactivate the license. You may need to contact the SmartBear Sales Team. To save time and to avoid unnecessary moves of the license in the future, we recommend that you select a License Manager computer carefully. There are some important requirements to the network settings and availability of that computer:
2. Download and install the utility
You can download the utility from the SmartBear website:
 downloads.smartbear.com/SmartBearLicenseManager.exe
To install the utility, simply run the downloaded executable and follow the instructions you will see on screen. The installation is easy and straightforward.
2. Activate the license
License activation includes the data exchange between the License Manager and SmartBear licensing servers. If the computer where you installed the License Manager has access to the Web and to the licensing servers, the license will be activated automatically. Else, you can activate it manually.
Automatic activation
-
Start the License Manager: click the operating system’s Windows button and select SmartBear > Activate or Deactivate License from the All Programs list.
-
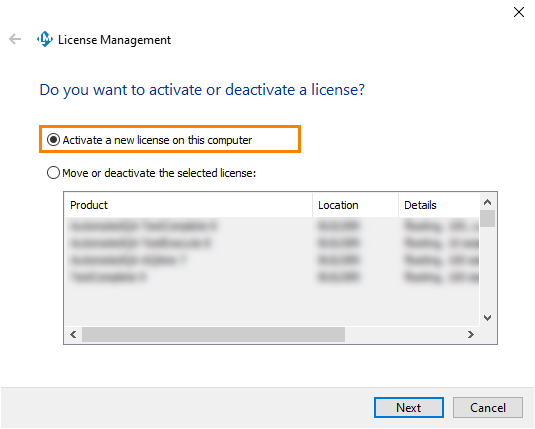
On the first page of the wizard, select Activate a new license on this computer.

If your computer has an Internet connection and has access to the SmartBear licensing websites (
https://ls1.smartbear.comorhttps://ls2.smartbear.com, port443), the wizard will choose automatic activation. -
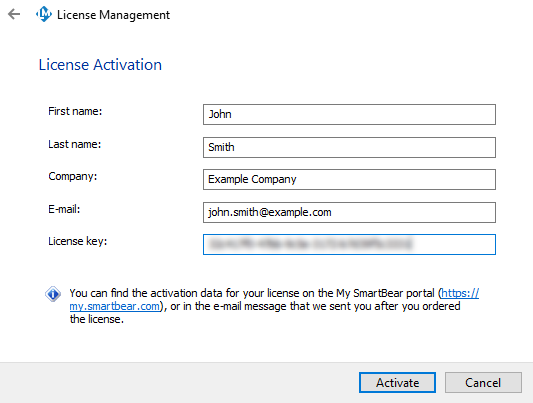
On the next page of the wizard, specify the information needed for activation: the username, company name, email and license key:

Notes:
-
You can find the license key on the TestComplete product page of the My SmartBear section of our website (https://my.smartbear.com) or in the email message that we sent you after you requested the license.
-
The
 TestComplete Platform, Modules (Desktop, Web, Mobile), and add-ons can have separate licenses. You need to repeat the activation steps for each license key you have.
 -
As for other activation data, you can either enter your username, company name, and email, or enter those of the license holder. We recommend that you enter your data.
After you have specified the activation data, click Next to continue.
-
-
If your computer connects to the Internet through a proxy server, on the next page of the wizard, enter the proxy authentication settings. Ask your system administrator for assistance if needed.
-
Click Activate. The wizard will activate your license.
-
If the activation is performed successfully, you will see the final page of the wizard informing you that the activation is over. You can then close the License Management wizard.
If the activation fails, the wizard will display an error message explaining the problem.
Manual activation
You use manual activation when the License Manager has no access to the SmartBear licensing website. It implies that you exchange data between them manually. For complete information, see Manual Activation Procedure.
(Optional) Check if activation was successful
-
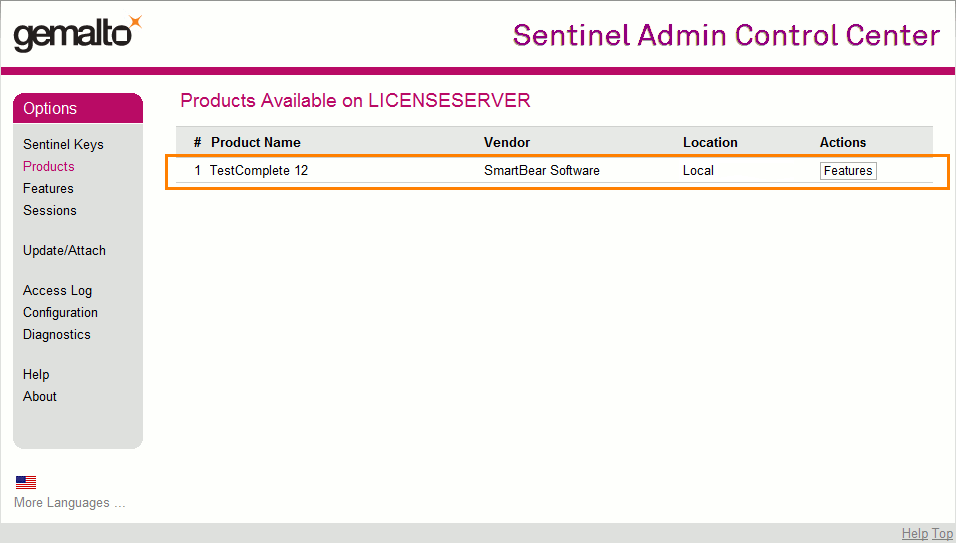
After the activation is over, you can check whether the license has been activated successfully. To do this, open the following URL on your License Manager computer:
 http://localhost:1947/_int_/products.html
The activated license will be on the list:
-
To check if a license is available to your TestComplete instances, do the following on the computers where TestComplete is installed:
-
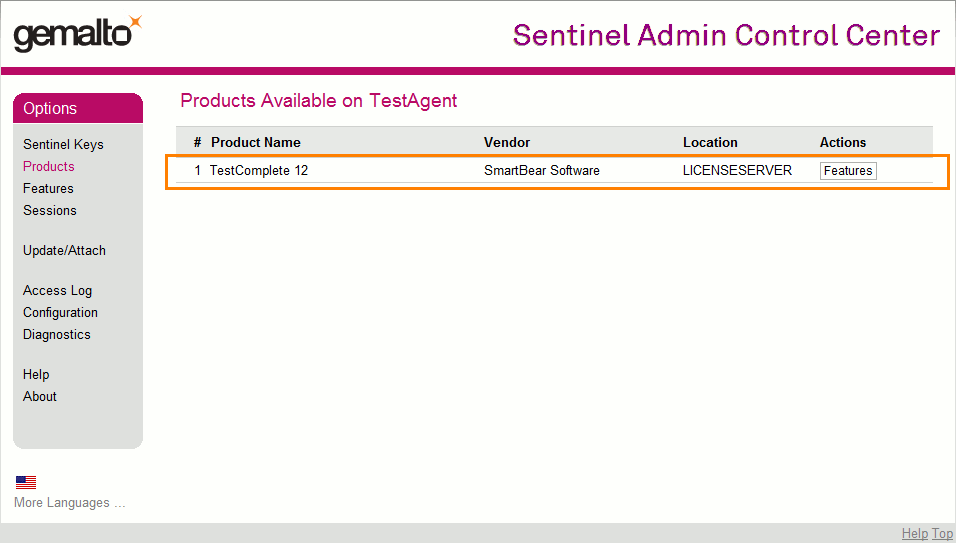
On your TestComplete workstation, open the following URL in a browser —
-
Find your Floating User license in the list. Look at the Location column. It should point to the License Manager machine where you activated the license:
If the license is not in the list, then, probably, your TestComplete workstations cannot access the License Manager computer. You may need to check the licensing settings on your computer or to ask system administrators to check the settings of proxies and firewalls running in your system. See Fixing Typical Issues With Floating User Licenses.
-
3. Run TestComplete instances
After you activate the license, it becomes available for TestComplete instances running in your network. Simply start TestComplete, and it will search for the License Manager in your networks. If it finds the License Manager, it will consume a license from it automatically. If TestComplete fails to find the License Manager, it will show an error message.
4. Configure connections
You may want to configure the License Manager settings to control the license usage in a better way. For example, you may want to specify users who are allowed to consume licenses from your License Manager. Or, if you have several License Managers in your organization, you may want to specify the Manager for connecting to your TestComplete instance.
For information on these and other typical tasks, see Working With License Manager.
5. Activate more licenses
In some cases, you may want to activate multiple licenses on the same License Manager. You do this in the same way that was described above. When you do this, the License Manager tries to merge license data, if possible. See Activating Additional Licenses. If merging is not allowed, it will show an error message.
If the “new” license permits the usage of different product features in comparison with the “existing” license, then you will have to enable the “new” features on your TestComplete workstations after the license activation. For example, imagine you are activating a Web-module license over the Platform+Desktop license. Then, on every computer where you are going to create web tests –
-
Start TestComplete and open the File > Install Extensions dialog.
-
In the dialog, enable the Web testing extensions and save the changes.
Troubleshooting
If you have encountered any issues during the license activation, you can try to fix them manually using instructions from the following topic —
 Fixing Typical Issues With Floating User Licenses
You can try resolving the problem by using the Licensing Troubleshooter on our web site:
See Also
About Licensing System
Manual Activation Procedure
Activating Additional Licenses
Activating Licenses

 View requirements
