 |
Information in this topic applies to desktop and web applications. |
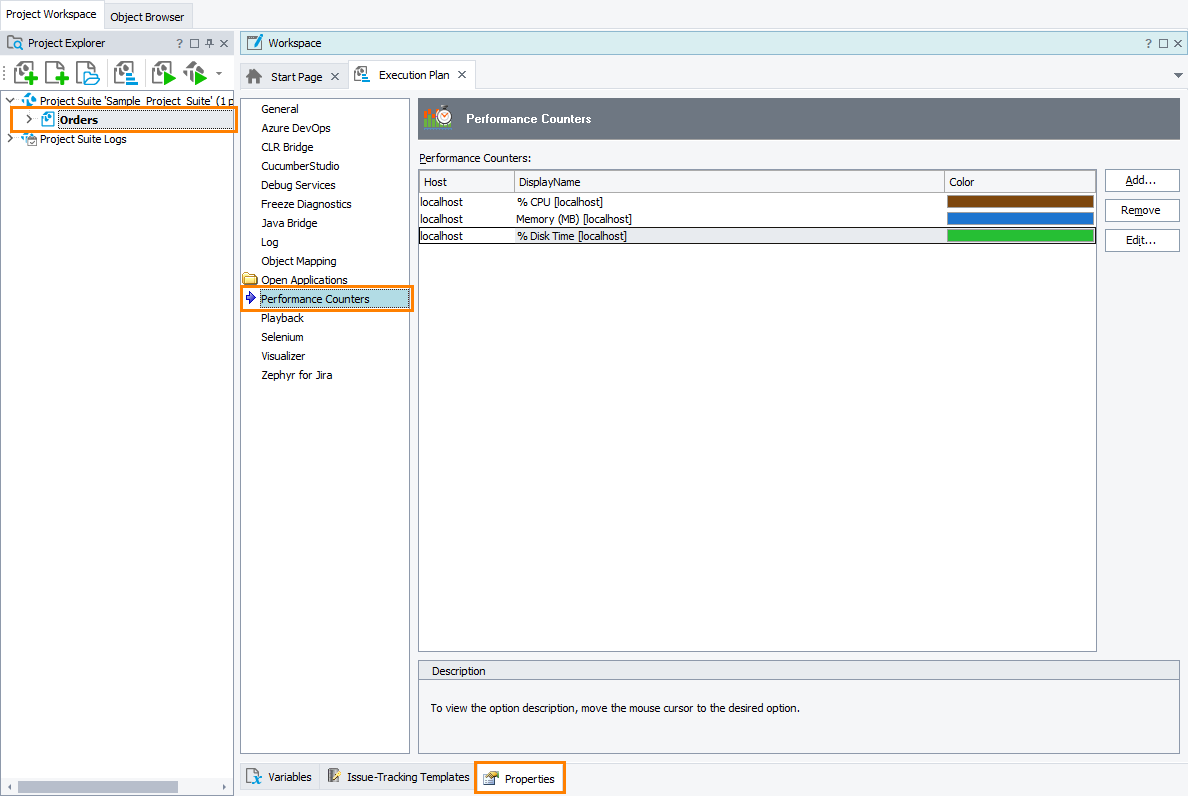
The Performance Counters project settings specify a list of performance counters to be monitored during the test run. The values of the monitored counters are shown in the Performance Counters page of the Test Log window after the test run is over.
To view or modify Performance Counters settings, do the following:
- Open the Properties page of the project editor.
- Select Performance Counters in the list on the left of the page.
To add a counter
Click Add in the Performance Counters options window. This will open the Add Counter wizard.
In the Add Counter wizard:
-
Specify the server name or IP in the Tested Host field. As an alternative, you can click the ellipsis button in the Tested Host field and select the desired host in the ensuing Select Host dialog.
-
To monitor typical performance parameters of a host machine (CPU, memory or disk usage), click Use standard counter.
-
To monitor a distinct parameter of a host, click Use custom counter.
-
Click Next.
-
On the ensuing wizard page, select the counter you want to monitor from the list. Click Next.
-
On the last page of the wizard, select the title and color to be used for the selected counter in the graph.
-
Click Finish to close the Add Counter wizard.
After you have closed the wizard, the counter is automatically added to the counters list shown in the Performance Counters section of project properties.
| Note: | You need to include the counter into the counter list before running your tests. |
To specify a server for monitoring
You specify the server to be monitored when adding a counter to the counters list (see above).
To modify server counters
To modify parameters of an existing custom counter (the series color, tested host and others), follow the steps below:
-
Select the counter you want to modify and click Edit.
-
This will open the Edit Counter wizard (which is analogous to the Add Counter wizard), where you can change the parameters of the needed custom counter.
To delete server counters
To cancel monitoring of a certain custom counter, choose the counter you want to delete and click Remove.
 |
If you modify a counter’s parameters or delete a desired counter from the list, the changes will be reflected in the test results only after you run the test. |
See Also
Adding Performance Counters
Generic Test Log - Performance Counters Panel
Project Properties

