
 The object-driven testing (ODT) functionality is deprecated. Do not use it to create new tests. It will be removed from the product in one of the future releases. As an alternative, you can create custom classes in your scripts. For more information, see Alternatives to the ODT functionality.
Our example has been designed specifically to demonstrate how TestComplete should walk down the object hierarchy. This will be achieved by calling object methods during the "walk" automatically and if it is necessary by filtering data that participates in testing (see Controlling Object-Driven Tests). Almost all of the objects' methods in the example are intended to be auto-called. A check-box is displayed for each method. This check-box is used to control if and how to auto-call the given method.
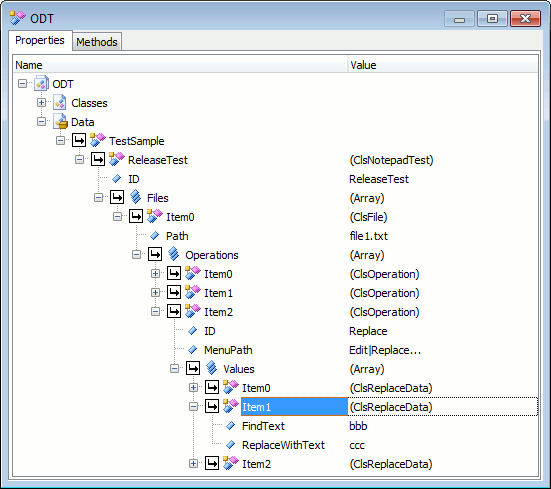
Now let's return to our object hierarchy to make the needed changes in the specifications of methods. For simplicity, we will only describe our actions for the object tree branch that corresponds to the first test file. For the other file branches, similar changes should be made.
- Select the
ReleaseTestobject variable and switch to the Methods page. It will list theInitmethod the object got from its class,ClsNotepadTest. By default, upon creating an object all check-boxes displayed to the left of all of the object's methods are disabled. This means that neither of the methods will be used in the automatic walking down the object hierarchy. When you click such a check-box for the first time, it becomes marked with an ordinary tick ( ), which indicates that the method will be called only after all the methods of the object's child objects are called. Clicking the check-box for the second time turns the icon to
  . This means that the method will be called before calling any of the methods that belong to the object's child objects. This is what we need for the Init method. Now we can switch back to the Properties page.
 - Select the first item (
Item0) of theFilesarray and switch to the Methods page. It will list theLoadandCheckmethods theItem0object got from its class,ClsFile. Click the check-boxes displayed to the left of the methods to mark them with because we need to run these methods before calling methods of the object's children. Return to the Properties page. - Select the first item (
Item0) of theOperationsarray and switch to the Methods page. Make sure theCheckmethod is marked with or (we need this to engage the method in walking down the object hierarchy). Return to the Properties page. - Expand the node of the second item (
Item1) of theOperationsarray. - Expand the node of the
Valuesarray. - Select the first item of this array and switch to the Methods page. Make sure the
FindandCheckmethods are marked with or (we need this to engage the methods in walking down the object hierarchy). Return to the Properties page. - Expand the node of the third item (
Item2) of theOperationsarray. - Expand the node of the
Valuesarray. - The
ReplaceandCheckmethods in the first item of this array should be marked with or as well. - Make sure to disable the
Executemethod in each item of theOperationsarray because we are not going to use these methods when walking down the object hierarchy.
A check-box is also displayed for each object and array property. The check box specifies if the given object (array) with all of its child objects is included in the automatic walking down the object hierarchy. To illustrate how this works, we will exclude both the second and the third file branches from the "walk". To do this, we will uncheck the check-boxes of the corresponding object nodes (the Item1 and Item2 items in the Files array) and leave the other nodes that are displayed on the Properties page checked.

To initiate walking down the entire object hierarchy, we simply need to call the following code from script or from the Run Code Snippet operation:
JavaScript, JScript
VBScript
DelphiScript
C++Script, C#Script
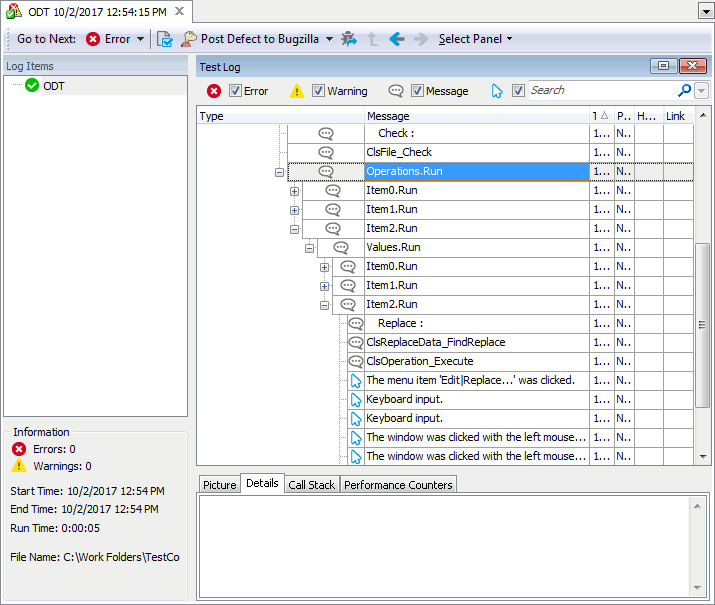
The structure of test results upon running such code will resemble the structure of objects used in the "walk". TestComplete does this automatically.
Filtration is one more tool used to exclude unwanted objects from the "walk". It is performed at class level. There is a "funnel" button for each simple property (not an object property or an array property) of a class. Clicking such a button displays a list of values: the default value of the chosen property plus all the values of this property in all the objects of the given class. If you uncheck a value in this list, you will exclude the class instances in which this property has this value. It can be useful if you need to exclude objects with the same property value from several object branches at once.
For instance, let's exclude all the objects of the ClsOperation class in which the MenuPath property is set to Edit|Time/Date.
- Click the
 button on the left of the
 MenuPathproperty of theClsOperationclass.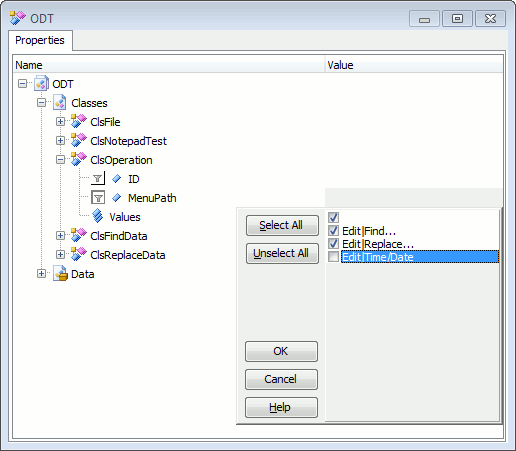
- In the resulting dialog's list, disable the Edit|Time/Date item and enable all the other items.
- Click OK to close the dialog.
- Now, if you open the
ReleaseTestobject in the ODT or Data editor, you will see that the objects in whichMenuPathis set to Edit|Time/Date are marked with a "red funnel" icon. This means that all of these objects are excluded from walking down the object tree.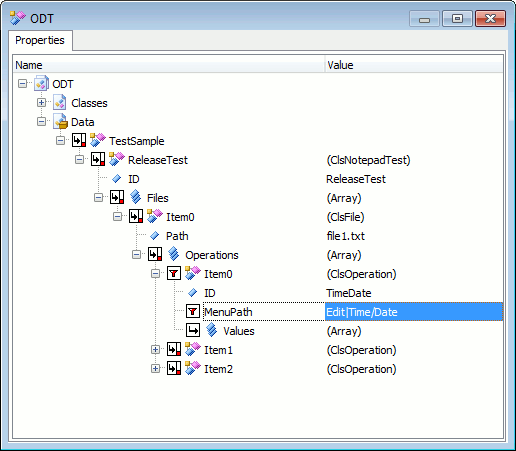
 Prev
Prev