About
Currently, you can explore the hierarchy of your tested applications running in mobile device clouds, locate objects there, and write script instructions that will simulate user actions over them manually.
Note: Recording user actions on cloud mobile devices will be implemented in one of the future TestComplete releases.
Before creating tests
Make sure that all requirements and prerequisites are met:
1. Plan your test
-
Decide on the purpose of your test.
-
Consider what steps your test should contain and over which application parts these steps are to be performed.
-
Think of what the outcome of the steps will be and how your test will verify the outcome.
2. Connect to the mobile device cloud and start a testing session
For your tests to be able to access your mobile application running in a device cloud, connect to the cloud, install the application to the target device, and open a testing session for it:
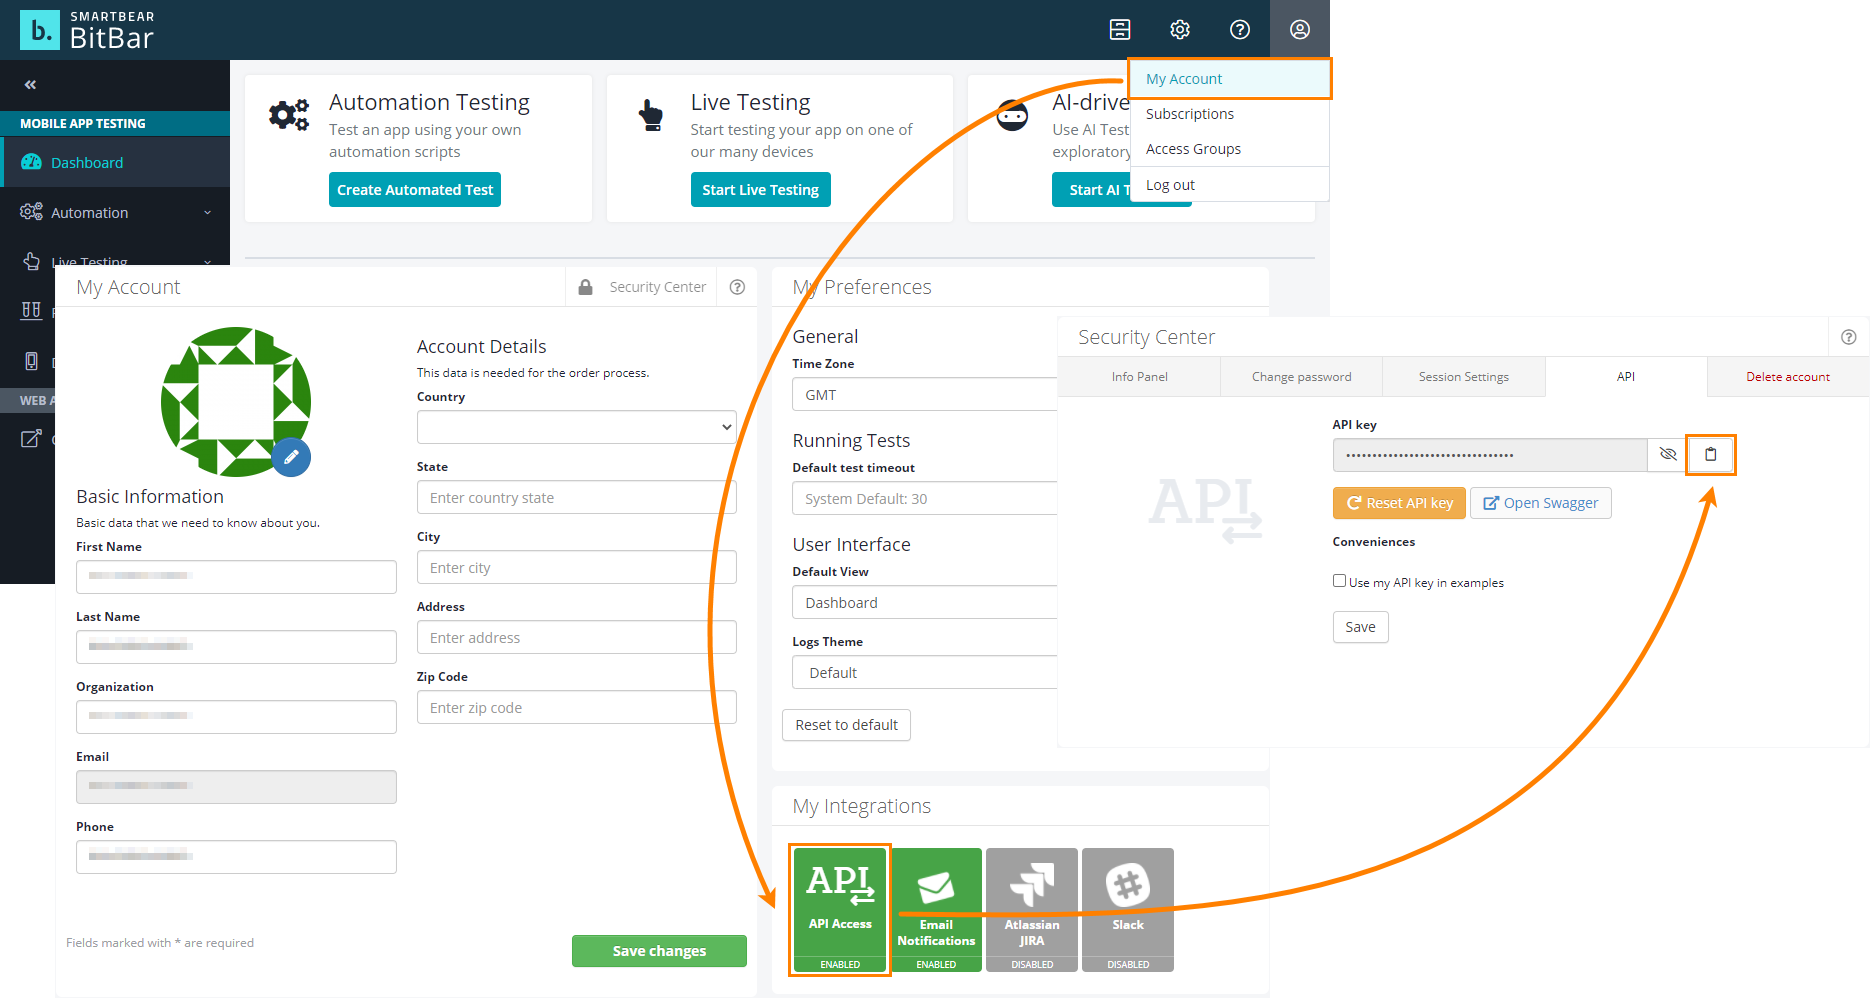
In the BitBar device cloud
-
In TestComplete, open the Object Browser.
-
In the object tree, right-click the top-level Mobile item and then click Connect to Device. TestComplete will open the Connect to Device dialog.
-
If the current TestComplete project does not have a BitBar API key specified, to connect to the BitBar device cloud dialog, enter the API key.
-
On the Parameters tab, select the mobile device and a tested application for which you want to open a testing session.
The Found devices list contains all the devices that are available for you in BitBar and that match the search criteria. If needed, you can filter the list by using the Device Type, OS Version, Resolution and Quick Search filters. Select the device to which you want to connect.
-
In the Application drop-down list box, select a mobile application for which you want to open a testing session. The application file must be either stored in the BitBar Files Library or added to the Tested Applications of the current TestComplete project. In the latter case, click Upload to BitBar to upload the application file to the BitBar Files Library and then select it in the list.
-
If needed, on the Custom parameters tab, you can specify additional capabilities to be used for the testing session. Specify the capabilities in the JSON format. For example:
JSON
{
"bitbar_project": "Automated tests",
"bitbar_description": "Testing the Orders app"
}The dialog will validate the JSON code as you are typing it.
For the list of available capabilities, see the BitBar Documentation - Desired Capabilities.
-
Click OK.
In a private mobile device cloud
-
In TestComplete, open the Object Browser.
-
In the object tree, right-click the top-level Mobile item and then click Connect to Device.
-
In the resulting Connect to Device dialog, click Local Appium.
-
In the Parameters editor, enter the capabilities that describe a testing session you want to open, in the JSON format. The dialog will validate the JSON code as you are typing.
For information on all available capabilities, see Appium Desired Capabilities.
-
Click OK.
3. Explore the application and find tested objects
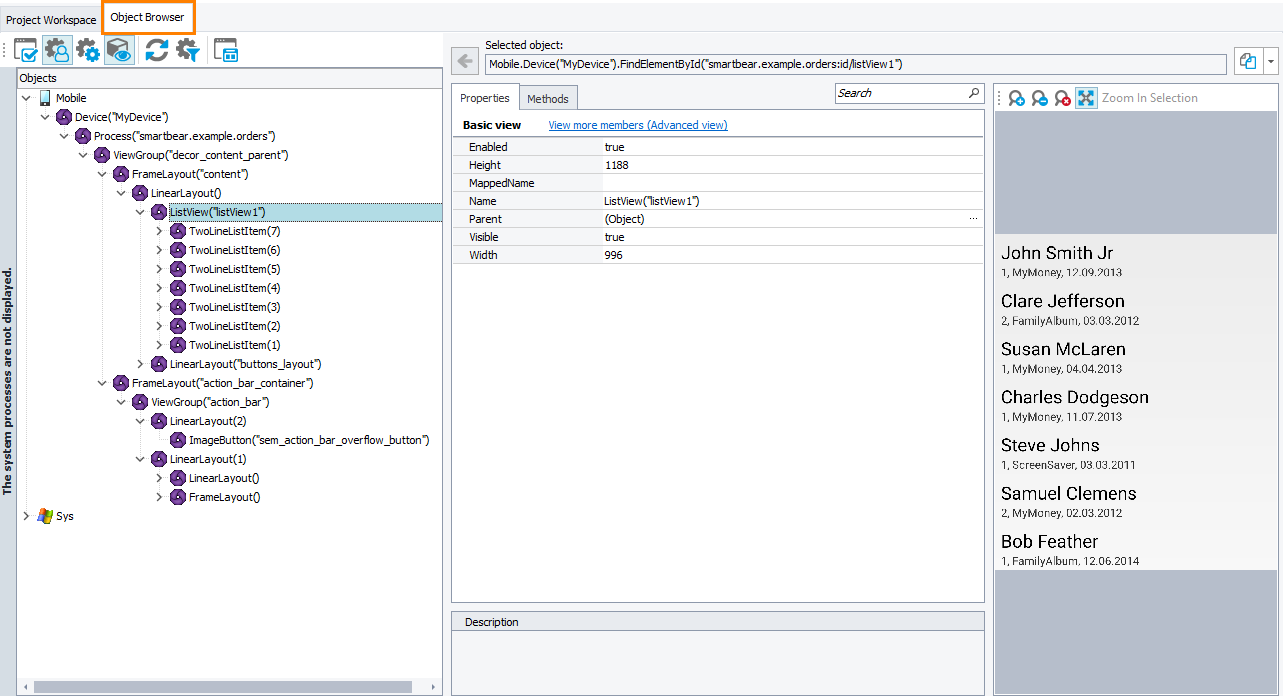
After TestComplete connects to a testing session in your mobile device cloud, you can access your tested mobile application from TestComplete. You can explore your application and its object hierarchy in the Object Browser:
-
In the Object Browser, expand the
Mobilenode. -
Select the
Deviceobject that corresponds to your mobile device on which the testing session has been started (if several mobile devices are available). -
Explore child items of the
Devicenode. They correspond to your tested mobile application and to controls in it. -
Find an object over which you want to simulate a user action or whose data you want to get (for example, its caption).
Note: The Object Browser shows the image of selected objects that makes the search easier.
-
View properties and methods available for the selected object to the right of the object tree.
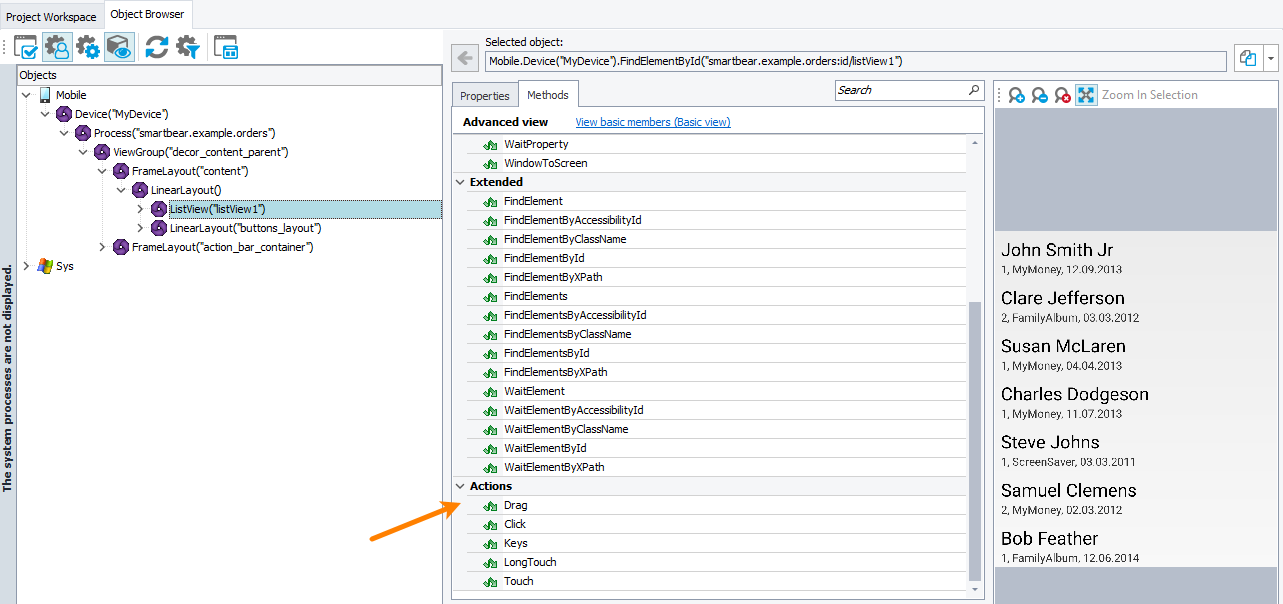
By default, the Object Browser shows only the basic set of properties and methods. To view all the available properties and methods, click View more members (Advanced view).
 Note the unique identifier that TestComplete assigns to all objects automatically and that you can use to get the object in your tests. You can view it above the list of methods and properties.
4. Create test instructions to simulate user actions over tested objects
In keyword tests
-
Find your tested object.
Before you simulate any user actions over your tested application, you have to find the tested object in your application. To do it, use the identifier that TestComplete assigns to all objects it recognizes in a tested application (you can find it in the Object Browser, see above).
-
Add operations that will simulate user actions over the object:
-
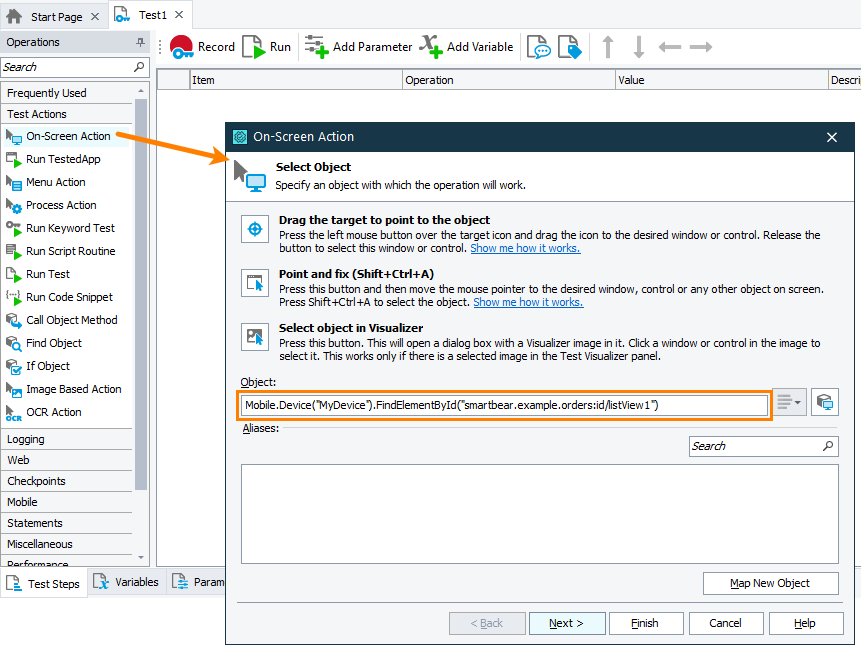
In your keyword test, on the left of the test editor, expand the Test Action category and find the On-Screen Action operation there.
-
Add the operation to the test, for example, by dragging it.
-
TestComplete will show a wizard asking you to specify the target test object. Paste the object identifier from the Object Browser:
-
Follow the wizard instructions to choose the method you want to call or the property whose value you want to get.
-
-
The same way, add more test instructions.
In script tests
-
Find the tested object.
Before you simulate any user actions over your tested application, you have to find the tested object in your application. The easiest way to do it is to use the identifier that TestComplete assigns to all objects it recognizes in a tested application (you can find it in the Object Browser, see above).
You can also write your own code to locate the needed object. For this, you can use various
FindElementmethods: -
Write test instructions.
After you get your tested object in your test, write the code that will simulate tested actions over the object. You can simulate the following actions:
-
Click -
Touch -
LongTouch -
Keys -
Drag
For example:
JavaScript
function Test()
{
…
var device = Mobile.Device("MyDevice");
var list = device.FindElementById("smartbear.example.orders:id/listView1");
var listItem = list.FindElementByClassName("android.widget.TwoLineListItem");
listItem.Touch();
…
}Python
def Test():
…
device = Mobile.Device("MyDevice")
list = device.FindElementById("smartbear.example.orders:id/listView1")
listItem = list.FindElementByClassName("android.widget.TwoLineListItem")
listItem.Touch()
…VBScript
Sub Test
…
Set device = Mobile.Device("MyDevice")
Set list = device.FindElementById("smartbear.example.orders:id/listView1")
Set listItem = list.FindElementByClassName("android.widget.TwoLineListItem")
listItem.Touch
…
End SubDelphiScript
procedure Test();
var device, list, listitem;
begin
…
device := Mobile.Device('MyDevice');
list := device.FindElementById('smartbear.example.orders:id/listView1');
listItem := list.FindElementByClassName('android.widget.TwoLineListItem');
listItem.Touch();
…
end;C++Script, C#Script
procedure Test();
{
…
var device = Mobile["Device"]("MyDevice");
var list = device["FindElementById"]("smartbear.example.orders:id/listView1");
var listItem = list["FindElementByClassName"]("android.widget.TwoLineListItem");
listItem["Touch"]();
…
} -
5. Validate the test actions outcome
Add instructions that will verify the results of simulated user actions, for example, by comparing your tested application's actual state with an expected state. You can do it in the following way:
-
To check the object state, you can use its properties. Get the property value and compare it with the expected value. To perform the comparison, you can use the
if…thenstatement or the If Then operation, or you can use a property checkpoint. -
To compare the object image with a baseline image, you can use a region checkpoint.
6. Close the session and disconnect from the server
If needed, you can close your current testing session and disconnect from the mobile device cloud. To do this, use the Mobile.Device(<Device_Name>).Disconnect method. To call the method from a keyword test, you can use the Call Object Method, Run Code Snippet, or Run Script Routine operation.

 Requirements
 Learn how to get the API key
 to copy your API key to the clipboard.


