Use the Push dialog to push changes from your local repository to the remote repository. The dialog is displayed when you do any of the following:
- Select File > Source Control > Push from the TestComplete main menu.
- Right-click within the Project Explorer and choose Source Control > Push from the context menu.
- Click
 Push on the Source Control toolbar (if the toolbar is hidden, right-click the main menu and select Source Control in the ensuing context menu to show the toolbar).
Depending on the value of the Use TortoiseGit client option, TestComplete will display either the built-in Push dialog (if the option is disabled), or the Push dialog of the TortoiseGit client (if the option is enabled).
|
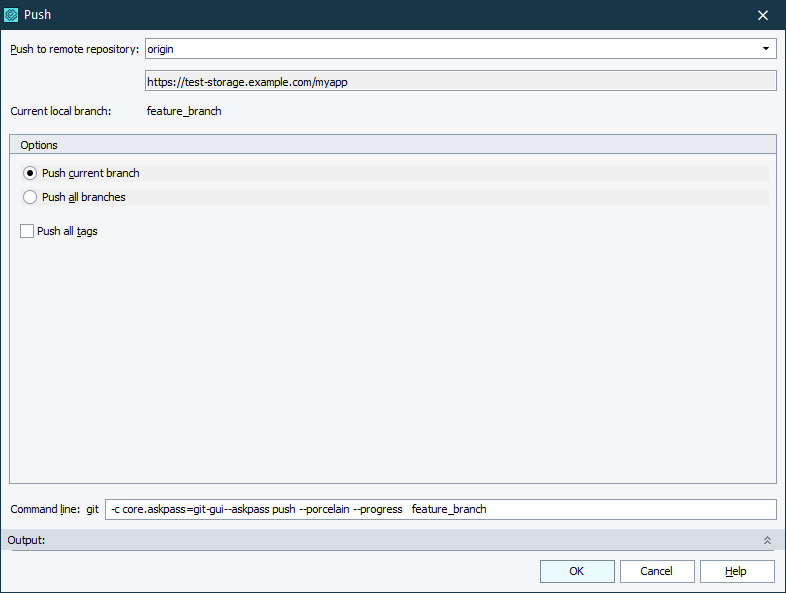
TestComplete Push dialog |
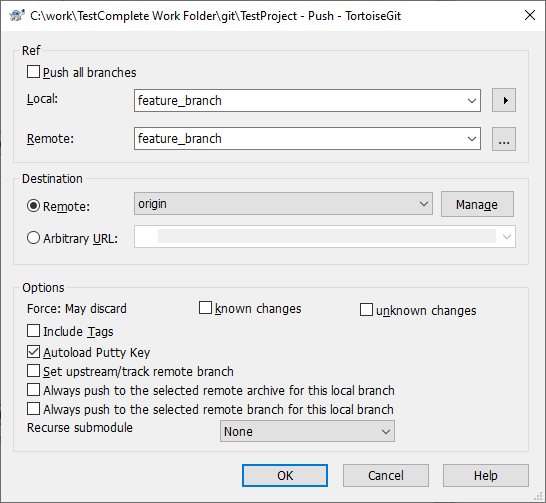
TortoiseGit Push dialog |
This topic describes the built-in Push dialog of TestComplete. The Push dialog of the TortoiseGit client has similar functions. For detailed information about the TortoiseGit Push dialog, please see TortoiseGit documentation.
In the Push to remote repository drop-down list, select the name of the remote repository to which the changes will be uploaded. The field below shows the actual path or URL of the selected remote repository.
To upload changes only from the current local branch, select Push current branch. To upload changes from all local branches, select Push all branches.
To upload all local tags along with the changes, enable the Push all tags option.
The Command line field shows the actual text of the command that TestComplete will call to push changes. You may specify any additional command-line options in this field.
The Output field shows the output from the Git command-line utility (git.exe). This data is helpful to diagnose a problem in case of an error. The Output field is collapsed by default.
Click OK to upload your changes to the specified remote repository. Cancel will close the dialog without performing any actions.


