 The object-driven testing (ODT) functionality is deprecated. Do not use it to create new tests. It will be removed from the product in one of the future releases. As an alternative, you can create custom classes in your scripts. For more information, see Alternatives to the ODT functionality.
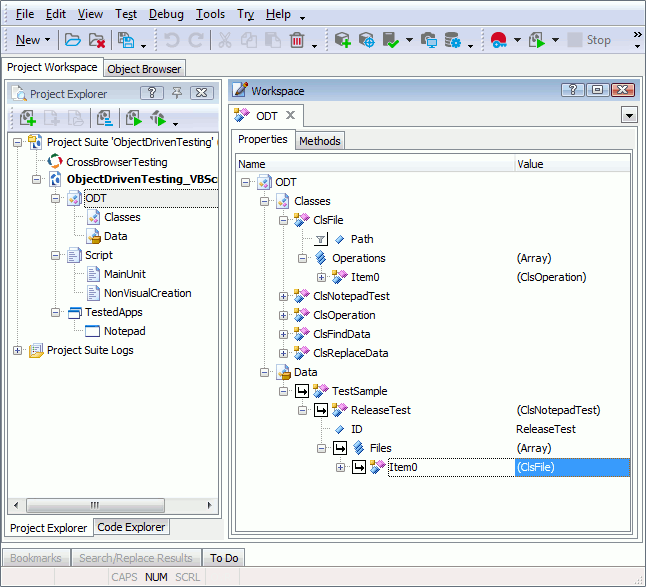
Use the ODT editor to visually configure classes and objects for object-driven tests. To open the editor in the Workspace panel, do any of the following:
- Right-click the ODT project item in the Project Explorer panel and select Edit from the context menu.
- Double-click the ODT project item in the Project Explorer panel.

The editor represents a tree view. The root item of the tree, ODT contains two child items: Classes and Data. These items exist by default. In turn, the Classes item holds all of the classes whose instances can be created. The Data item holds a collection of data groups. Each group holds one or more variables that can be addressed from scripts and keyword tests. A variable can store an ordinary value (integer, string, etc.), an array or an object.
The ODT editor lets you perform all visual configuration operations that are needed for your object-driven test. If you only want to set up classes or objects, use the Classes or Data editor respectively.
The following topics provide more information on working in the editor:
 How to Create, Rename and Delete Classes
 How to Create, Rename and Delete Data Groups
 How to Create, Rename and Delete Variables and Specify Variable Values
 How to Create, Modify and Delete Properties
 How to Create, Modify and Delete Methods
