Now, we will modify the test so that the On-Screen Action operation which enables the MasterCard option button can enable the other Card option buttons during the test run.
Before doing this, we will create a new project variable. To create the variable:
-
Double-click the project node in the Project Explorer. TestComplete will open the project editor in the Workspace panel.
-
Switch to the Variables page of the project editor.
-
Click
 Add Variable on the Temporary section toolbar. TestComplete will add a new row to the Variables table.
 -
In the Name cell, specify RadioButtonName.
Now, we can modify mapping settings of the MasterCard option button. To do this:
-
Switch to the Keyword Test editor.
-
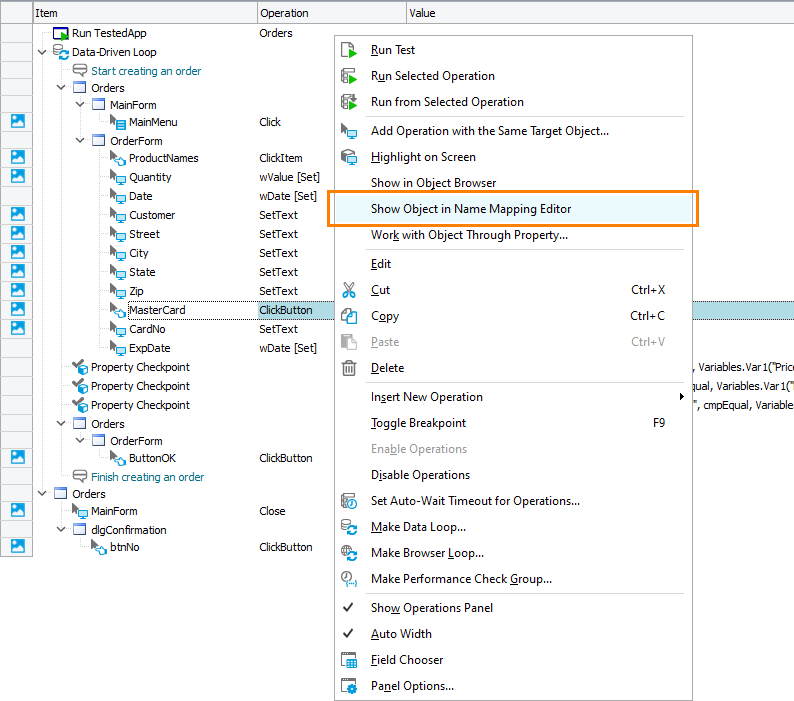
Right-click the operation that enables the MasterCard option button and choose Show Object in Name Mapping Editor from the context menu.
This will open the Name Mapping editor and highlight the alias defined for the MasterCard option button.
-
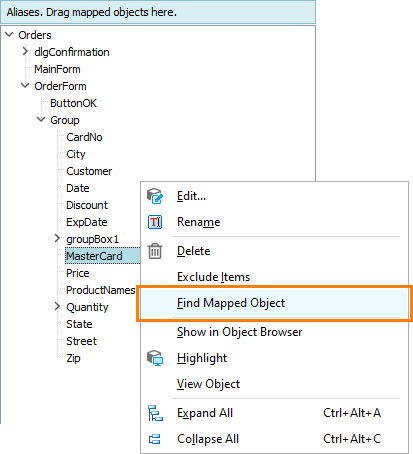
Right-click this alias and choose Find Mapped Object from the context menu.

The corresponding mapped object will be highlighted in the Mapped Objects tree.
-
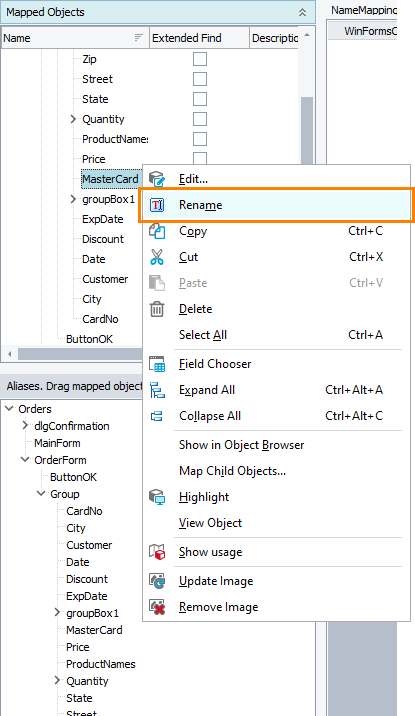
Right-click this object, choose Rename from the context menu and type CardSelector in the ensuing in-place editor.

TestComplete will ask you whether to use the specified name to rename aliases created for this object or not. Click Yes in the dialog.
-
After that, TestComplete will ask you whether to correct the keyword test using the new name of the mapped object or not. Click Yes in the dialog.
-
Now, we can modify the identification property value for the
CardSelectormapped object. To do this:-
In the Properties panel of the Name Mapping editor, click the ellipsis button in the
WinFormsControlNameproperty value cell. The Edit Property Value dialog will appear. -
In the dialog, select Project Variable from the Mode drop-down list and specify the previously created RadioButtonName variable in the Type box.
-
Click OK to close the dialog.
-
As we specified the value of the mapped object’s WinFormsControlName property by using the project variable, we can modify the property value from the recorded test. To do this, we will add the Set Variable Value operation which will assign values to the project variable during the test execution by using data from the DBTableVar1 variable.
-
Double-click the Test1 node in the Project Explorer panel. The Keyword Test editor with the recorded test will be opened.
-
Expand the Statements category in the Operations list on the left of the keyword test editor.
-
Drag the Set Variable Value operation from the Operations list to the test and drop it above the On-Screen Action operation that enables the Card option buttons.
After you release the mouse button, TestComplete will display a wizard where you can specify parameters of the added operation.
-
On the first page of the wizard, you can choose a variable whose value will be set with the operation. Select the RadioButtonName project variable and click Next to continue.
-
On the next page, you can specify the parameter containing the value to be assigned to the variable you chose on the Select Variable page:
-
In the Mode box, select Table Data.
-
In the Value box, select Credit Card.
-
-
Click Finish to close the dialog. TestComplete will append the operation to the test.
Save the changes made to the test by selecting File > Save All from the TestComplete main menu.
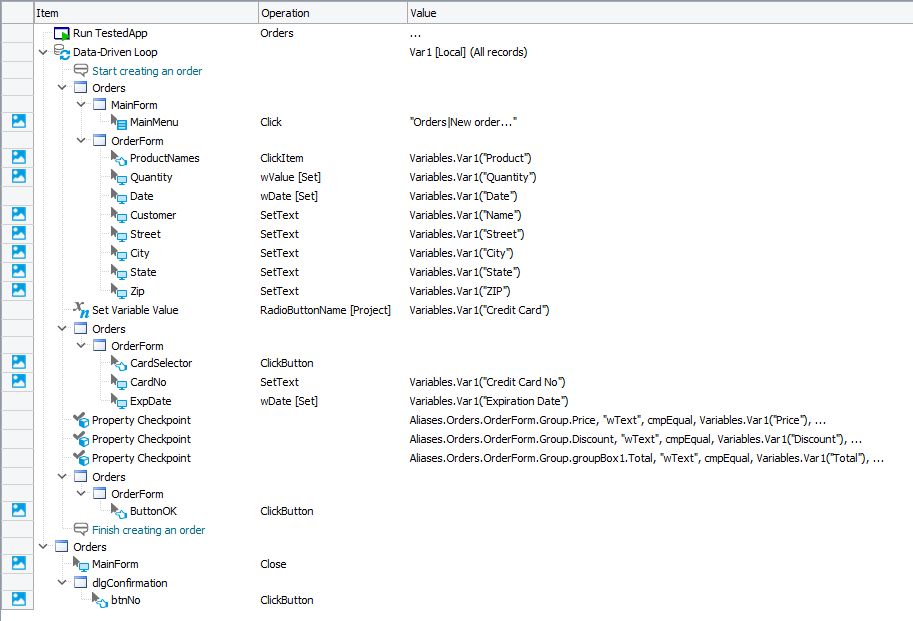
Thus, the data-driven test will look like this:


 Prev
Prev