
 |
This functionality is obsolete. We do not recommend using it to run TestComplete tests as part of a build. Starting from version 14.20, to run TestComplete tests as part of a build, you can use the TestComplete test adapter. To learn more, see Integration With Azure DevOps and Team Foundation Server. |
If you use XAML builds in your team project, create a XAML build that will place your TestComplete test files to the needed output folder.
Requirements
A computer where a team build is created and configured must have one of the following versions of Visual Studio with the Team Explorer component installed:
-
Visual Studio 2019 (Community, Enterprise or Professional).
-
Visual Studio 2017 (Community, Enterprise or Professional).
-
Visual Studio 2015 (Community, Enterprise, Professional, or Test Professional).
-
Visual Studio 2013 (Community, Ultimate, Premium or Professional).
-
Visual Studio 2012 (Ultimate, Premium or Professional).
-
Visual Studio 2010 (Ultimate, Premium, or Professional).
The Visual Studio version to be used depends on your version of Team System Server. See the Requirements and compatibility article in the MSDN library.
Important: To create XAML build definitions in Visual Studio 2015–2019, you must have a XAML build controller installed and configured. To learn more, see the Continuous integration and deployment section in the MSDN library.
Configuring a Build Definition
-
In Visual Studio, open the Team Explorer panel (if it is hidden, select View | Team Explorer from Visual Studio’s main menu to display the panel) and connect to your team project.
-
In Team Explorer, click Builds, and then click a build definition you want to configure to run TestComplete tests or click New Build Definition to create a new definition.
-
If needed, in the General tab of the window, specify the build definition name and description.
-
In the Trigger tab, if needed, you can specify the event that will initiate the build. By default, team builds are run manually.
-
In the Source Settings tab, configure your build definition to get the needed files from your source control:
If You Use Team Foundation Version Control
-
Map the source control directories that store your Visual Studio test project and TestComplete projects to the appropriate local directories on the build computer:
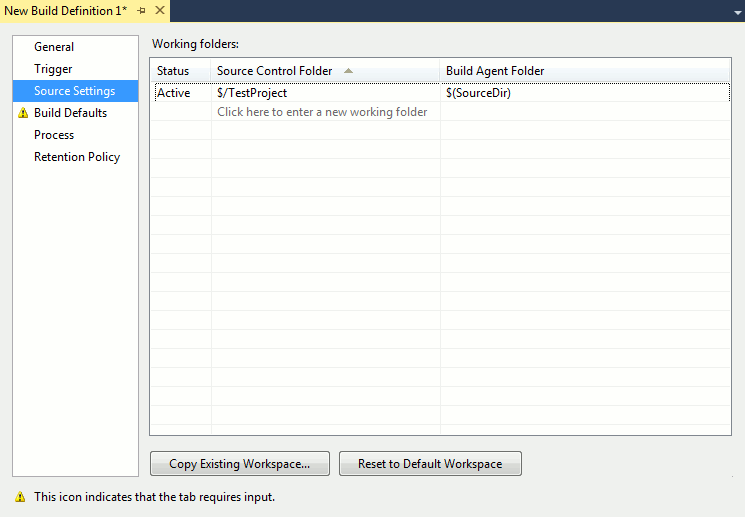
Note: Keep in mind that the test project stores the relative path to the TestComplete project. When mapping the TestComplete source control path, make sure to select a local folder on the build agent to keep the relative path specified in the test project valid.
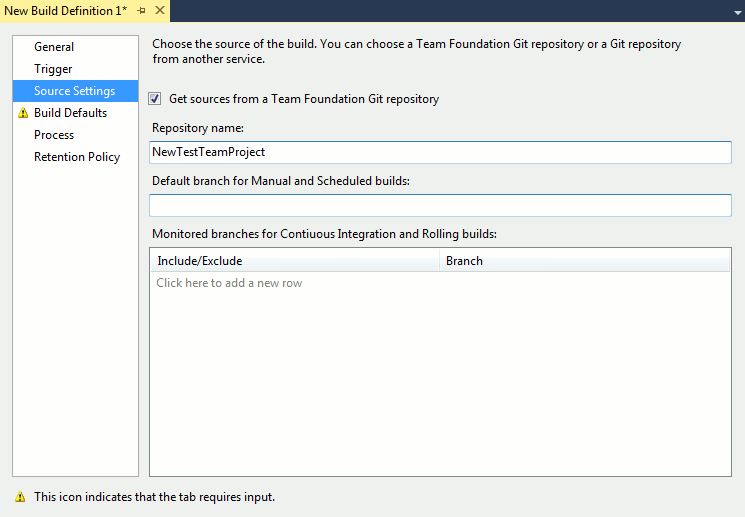
If You Use Git
-
Specify the Git repository and the branches that store your team project files.
-
-
In the Build Defaults tab, specify the build controller that will be used to process the team build:
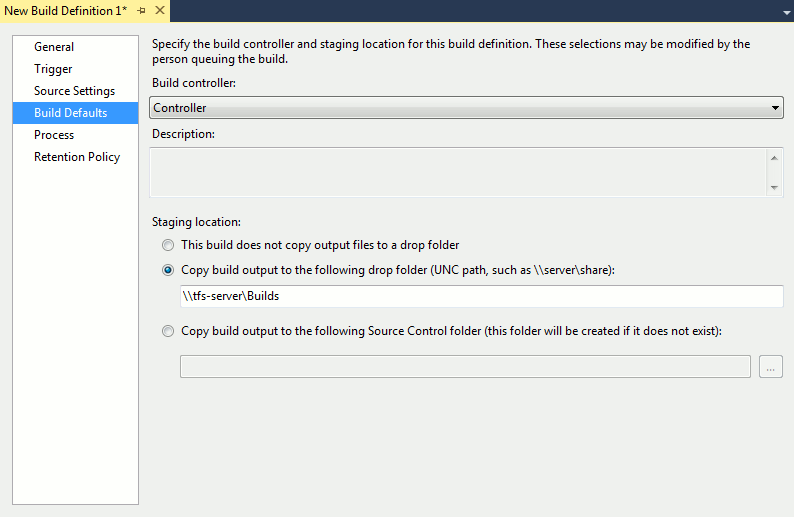
In the Staging location section of the tab, specify the way the build process will store the output files and logs:
-
To copy output files and logs to a shared folder on the build server, click Copy build output to the following drop folder and specify the UNC path to the target folder. Make sure that the Build Server can access the folder.
-
To copy output files and logs to a folder in the version control, click Copy build output to the following Source Control folder and specify the path to the folder.
-
-
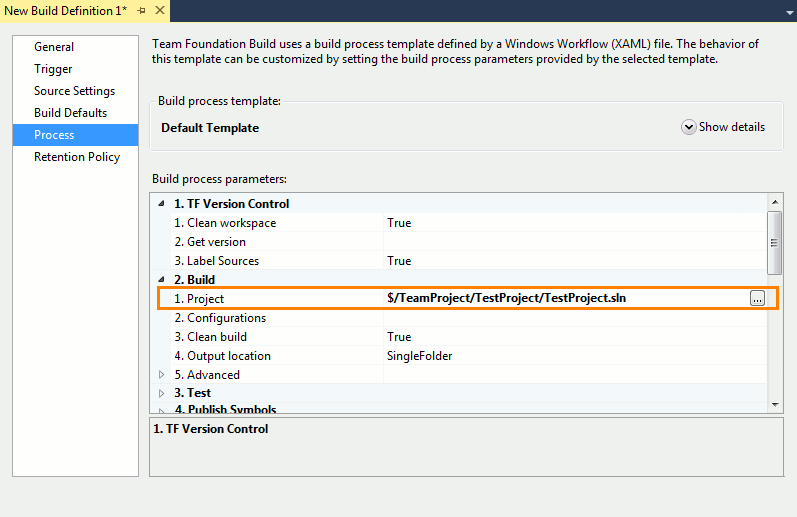
In the Process tab, specify the details of the build process:
In the Build process parameters table, expand the Build node.
In the Project box, specify the Visual Studio test project containing your TestComplete tests:
-
Save the changes. Your build definition will be displayed on the Builds page in Team Explorer.
Creating a Build Instance
To run the created build definition from Team Explorer, right-click the created build definition and then click Queue Build.
To run the created build definition from the Build & Release hub of your team project’s web portal, switch to the XAML tab, click the ellipsis button of the definition and then click Queue New Build.
In the resulting dialog, configure the build run and start the build.
After the build is complete, create a release for it.
 Prev
Prev
See Also
Creating a Build Containing TestComplete Tests
Defining a Release Process