
In TestComplete, you can run functional and security API tests created with ReadyAPI or SoapUI testing tools.
This topic explains how to add an API test to your TestComplete project and run it.
Prerequisites
-
In ReadyAPI or SoapUI, create your API tests. Copy your ReadyAPI or SoapUI test project to your test computer.
-
Make sure that both the computer where you will run the tests and TestComplete meet the requirements described in the Requirements topic.
-
In the TestComplete ReadyAPI Options dialog, specify the path to the folder where ReadyAPI or SoapUI testing tools are installed.
1. Add Your API Test to a TestComplete Project
-
Open your TestComplete project or create a new one.
-
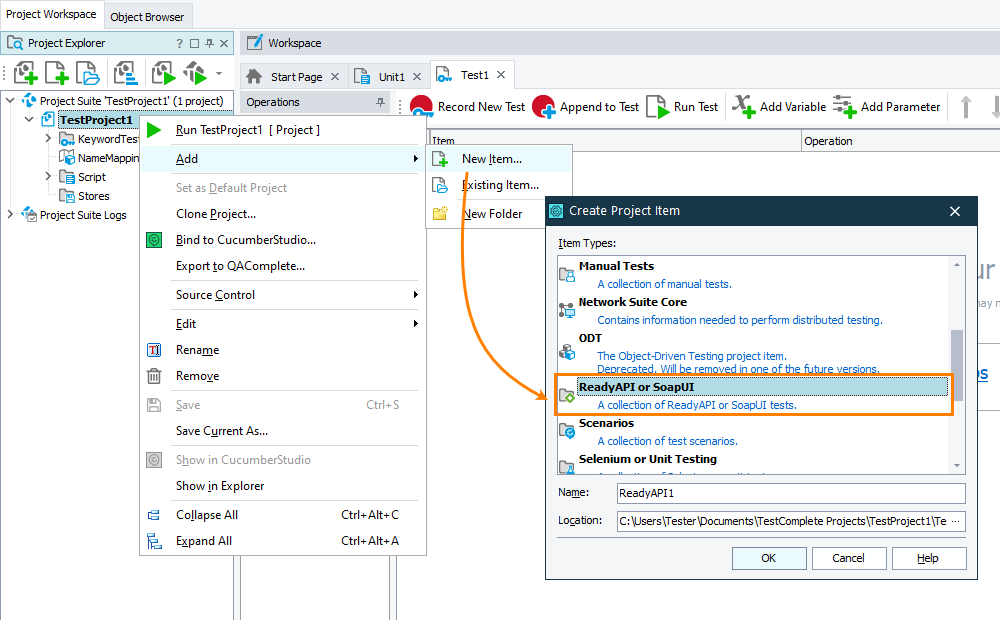
Add the ReadyAPI or SoapUI collection to the project. See Adding and Removing Project Items and Their Child Elements.
-
To run a functional API test, add a SoapUI test item to the collection.
To run a security API test, add a Secure Test item to the collection.
2. Configure the API Test
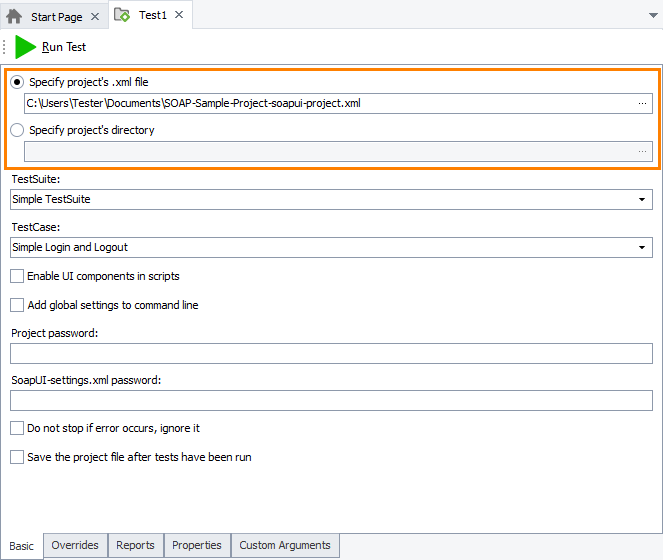
Open the added test item in the ReadyAPI Test editor and configure the item to run the needed test:
-
Specify a ReadyAPI or SoapUI project (.xml) or a composite project to run.
-
If needed, select a test suite, test case or a security test to run.
-
Specify other test parameters, if needed.
For a description of the test parameters you can configure in the editors, see ReadyAPI Test Editor.
3. Run the Test Item
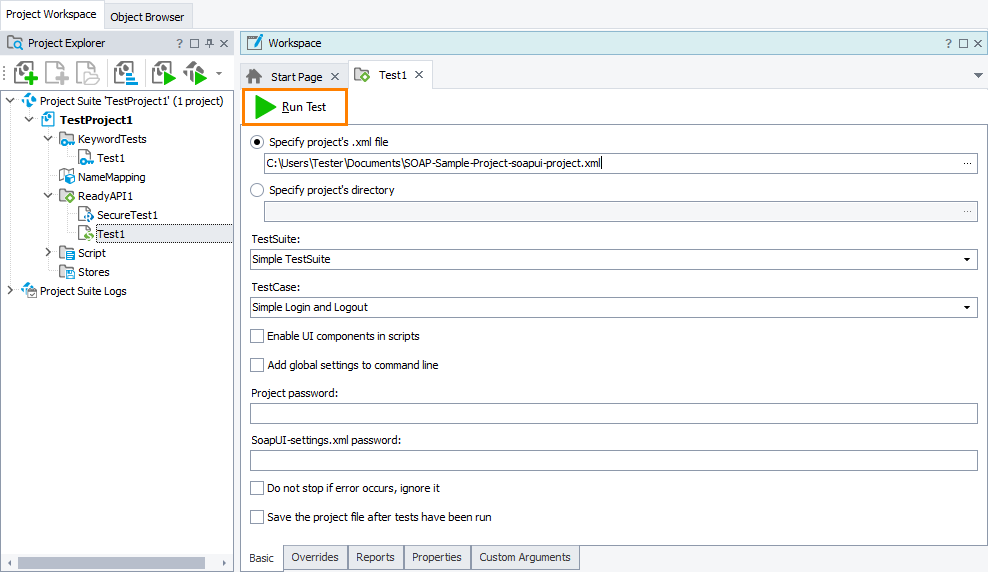
To run the test from the TestComplete IDE
Open the needed tests in the ReadyAPI Test editor and click  Run Test on the editor’s toolbar.
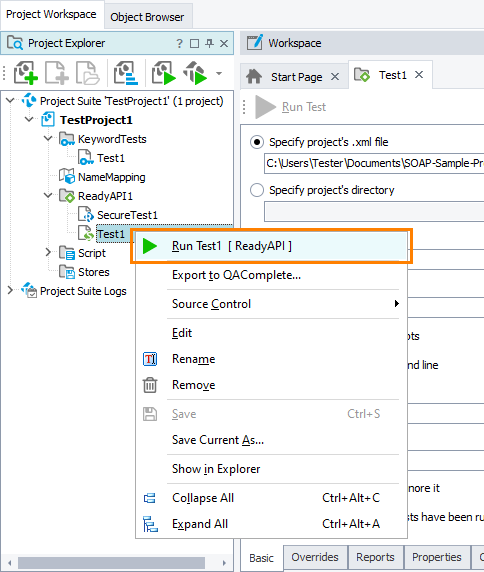
– or –
Right-click the needed test in the Project Explorer and then click Run Test_Name.
To run the test from script
Call the ReadyAPIorSoapUICollection_Name.Test_Name.Execute method:
JavaScript, JScript
ReadyAPI1.Test1.Execute();
Python
ReadyAPI1.Test1.Execute();
VBScript
Call ReadyAPI1.Test1.Execute
DelphiScript
ReadyAPI1.Test1.Execute;
C#Script
ReadyAPI1["Test1"]["Execute"]();
In the example, ReadyAPI1 is the name of the ReadyAPI or SoapUI collection to which the Test1 test belongs.
To run the test from a keyword test
Use the Run Test operation to execute your API test:
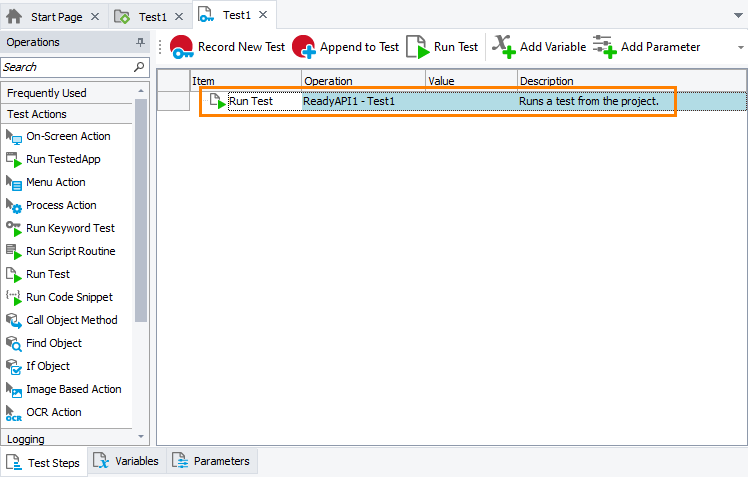
To run the test as the project's test item
-
Right-click your project in the Project Explorer and then click Edit | Test Items. This will open the Test Items page of the project editor.
-
Drag the needed API test to the Test Items editor.
-
Save the changes.
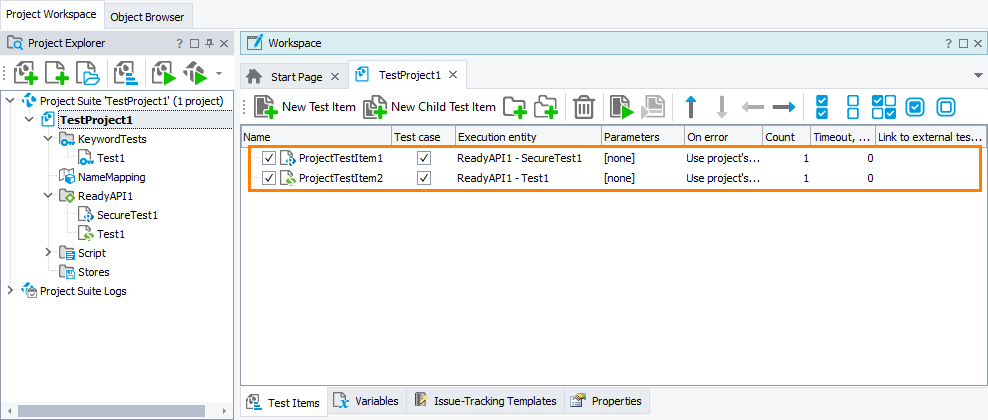
When you run the project, TestComplete will run the API test.
To run the test from another project
The easiest way to run the API test created in another project is to add an existing API test to your project, and then run it. Adding an existing API test does not create a copy of this test, it just adds a test reference to the project.
To add an existing API test to your project, do the following:
-
Add the ReadyAPI or SoapUI collection to the project. See Adding and Removing Project Items and Their Child Elements.
-
Right-click the ReadyAPI or SoapUI project item and choose Add | Existing Item from the context menu.
-
In the displayed standard Open File dialog, specify the API test file.
Now, TestComplete will add the API test to your project, and you can run this test as described above.
Viewing Test Results
After the test run is over, you can view the results of your API test. For information on ReadyAPI and SoapUI test results, see ReadyAPI Test Logs.
See Also
Integration With ReadyAPI and SoapUI
Execute Method
Tests, Test Items, and Test Cases