 |
This approach to running TestComplete tests as part of a release pipeline is obsolete. We do not recommend using it. Starting from version 14.20, to run TestComplete tests as part of a build, you can use the TestComplete test adapter. To learn more, see Integration With Azure DevOps and Team Foundation Server. |
After you create a build that builds a Visual Studio test project containing TestComplete tests and places the test files in the needed location, you can add these TestComplete tests to your release pipeline:
Requirements
You must have access to your team project:
-
To access the project from Visual Studio Team Explorer, you must have Microsoft Visual Studio 2015–2019 (Community, Enterprise or Professional) with the Team Explorer component.
– or –
-
To access the project directly from your web browser by using Web Portal:
-
For Azure DevOps Services (formerly known as Visual Studio Team Services or VSTS):
https://dev.azure.com/<Your_Azure_Account_Name>/<Project_Name>– or –
https://<Your_VSO_Account_Name>.visualstudio.com/<Project_Name>(if your organization has not moved to thedev.azure.comdomain yet) -
For On-Premises Azure DevOps Server and Team Foundation Server:
http://<Your_Server_Name>:8080/tfs/<Collection_Name>/<Project_Name>
You can find information on Web Portal at docs.microsoft.com/en-us/azure/devops/project/navigation/.
-
Configure a Release Definition
-
Open the web portal of your team project. You can navigate to it directly in your web browser, or you can open it from Team Explorer in Visual Studio.
-
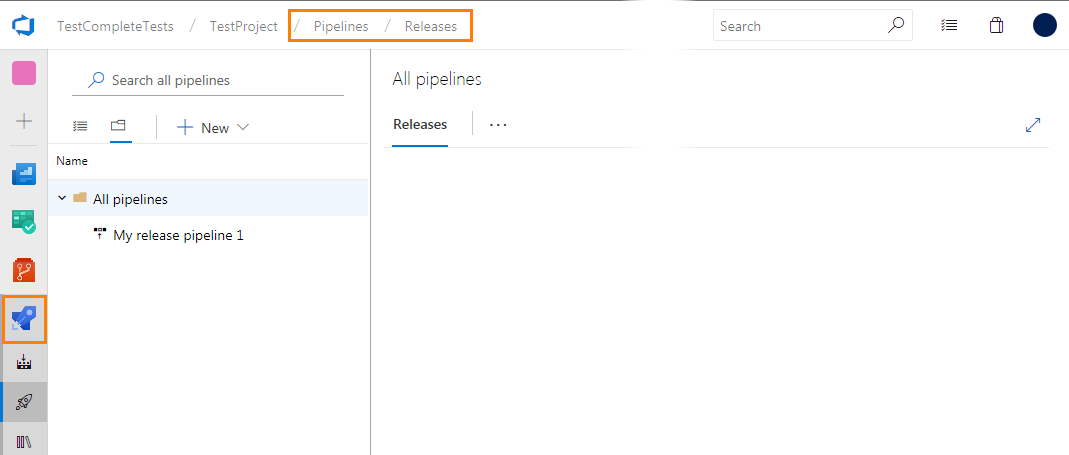
If you use Azure DevOps Services, Azure DevOps Server 2019 or Team Foundation Server 2018, navigate to the Pipelines > Releases page.
If you use Team Foundation Server 2015 Update 2–2017, navigate to the Build & Release > Releases page.
-
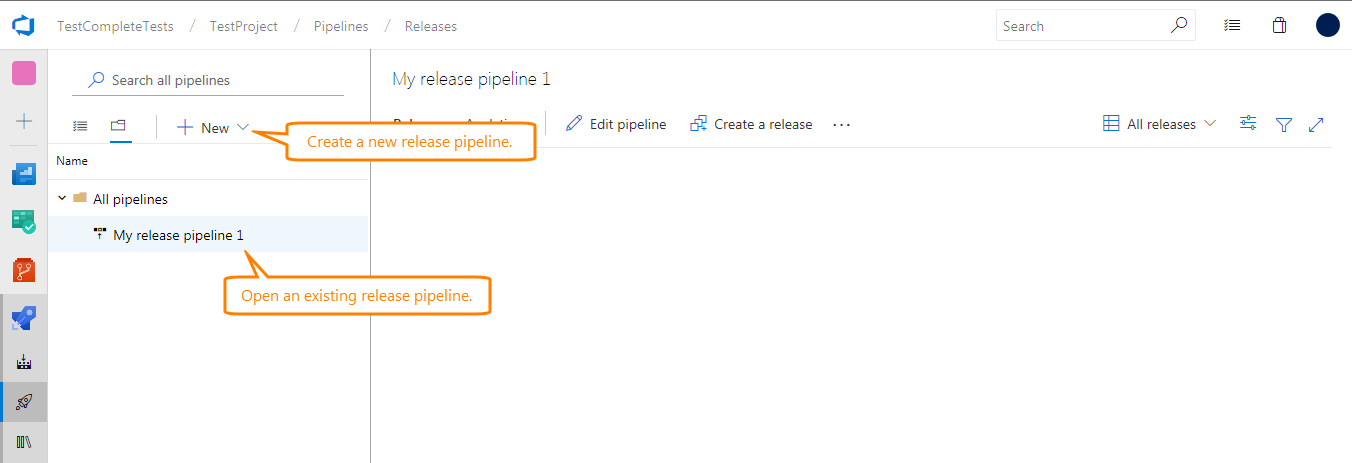
Select an existing release pipeline and open it for editing or create a new pipeline:
-
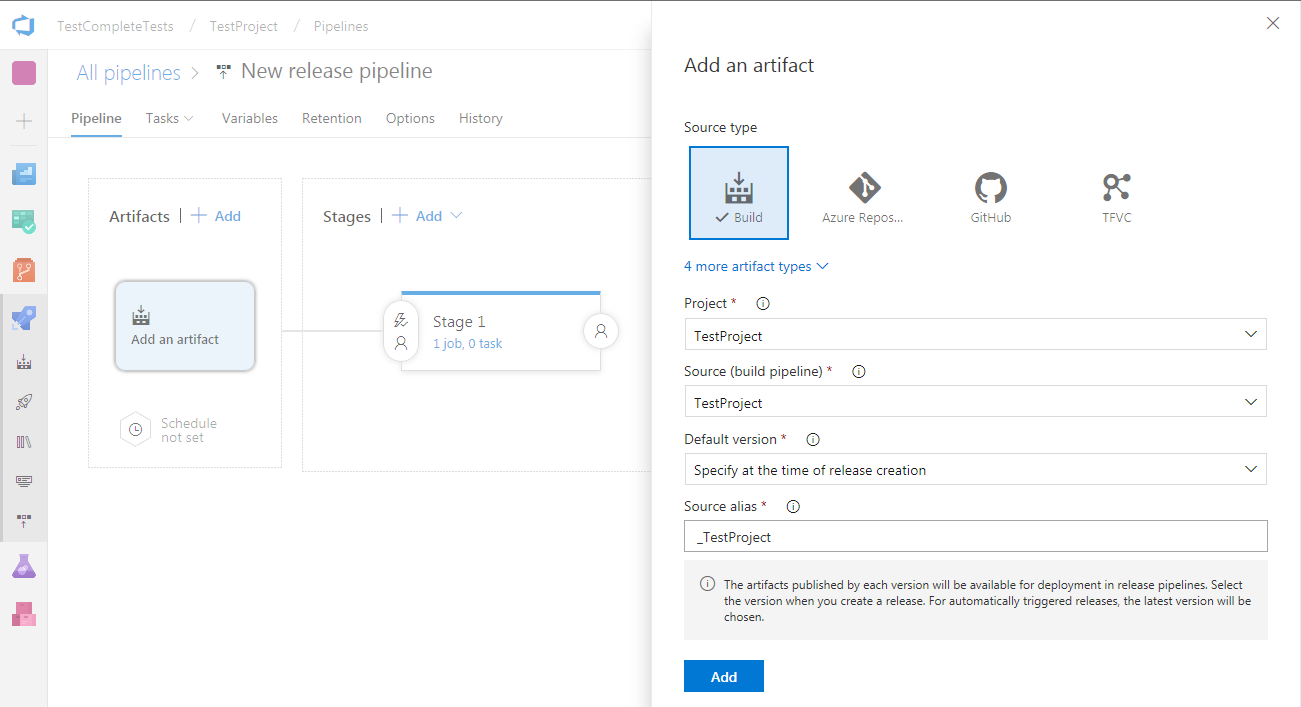
Add an artifact that includes your Visual Studio test project and TestComplete tests to the release:
-
Select a stage that will run your TestComplete tests or create a new stage.
-
Add a task that will run your TestComplete tests to the stage:
 Run Functional Tests Task (for Team Foundation Server 2015 Update 2–2017 On-Premises)
Visual Studio Test Task
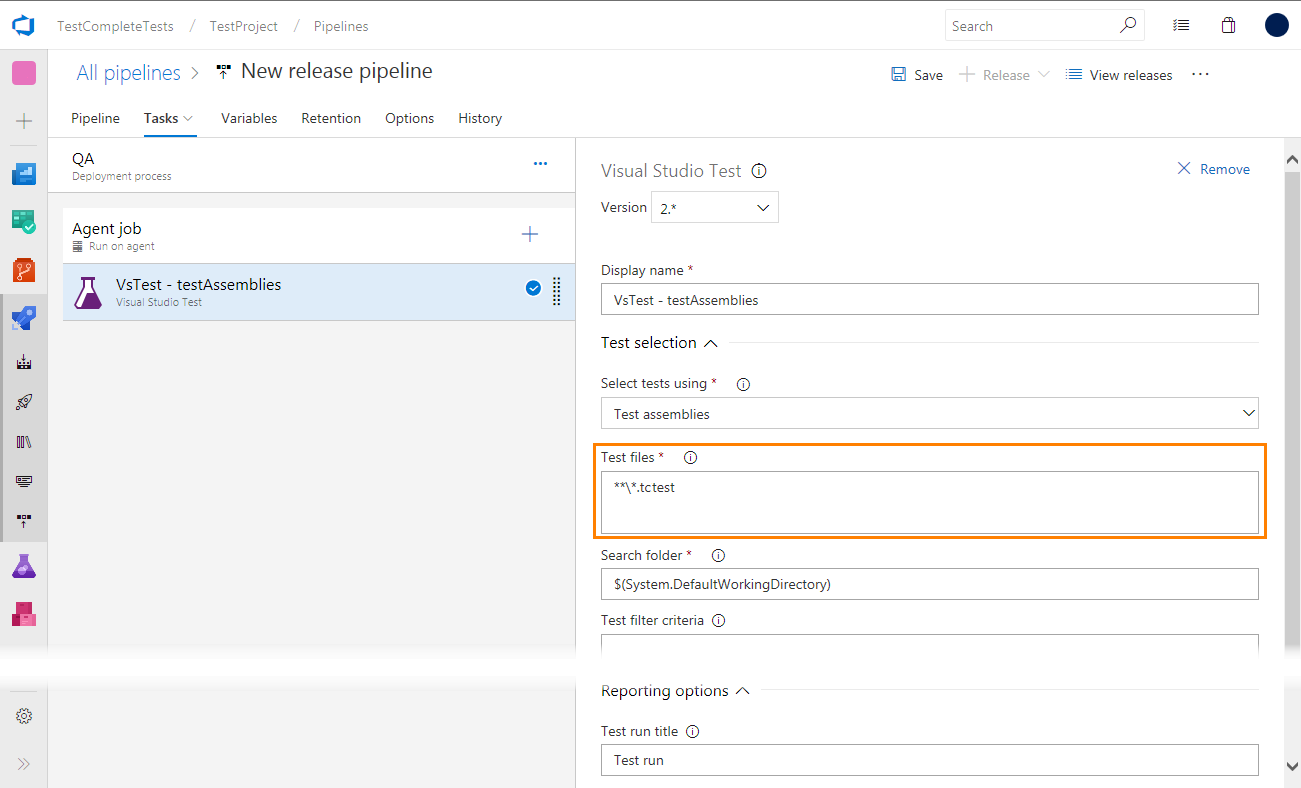
Add a Visual Studio Test task to the stage:
Configure the added task to run your TestComplete tests:
In the Select tests using drop-down list box, select Test assemblies.
In the Test files (or Test Assembly) text box, specify the TestComplete test items (.tctest files) to run.
In the Search folder text box, specify the folder on your test agent where the task should search for TestComplete tests.
In the Test run title text box, enter the name of the test run to which TestComplete test results will be assigned.
Run Functional Tests Task
Note: For Azure DevOps Services, Azure DevOps Server 2019, and Team Foundation Server 2018, this task is deprecated. You can use it if you use Team Foundation Server 2015 Update 2–2017 On-Premises.
-
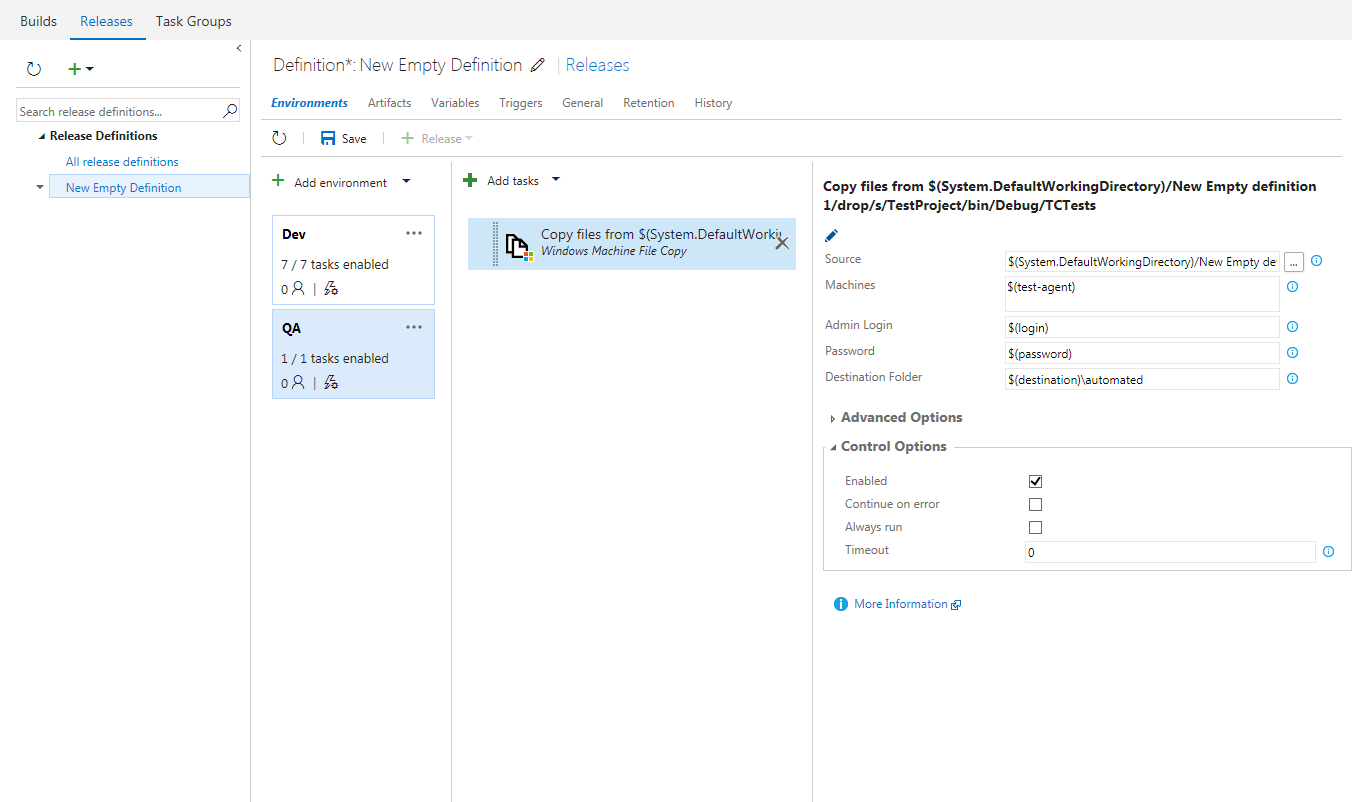
Configure your environment to copy your TestComplete tests from artifact drop folder to computers where tests will run. For example, you can use the Windows Machine File Copy task to do this:
Note: Make sure that the path to TestComplete projects or project suites that the TestComplete test items store remains valid. -
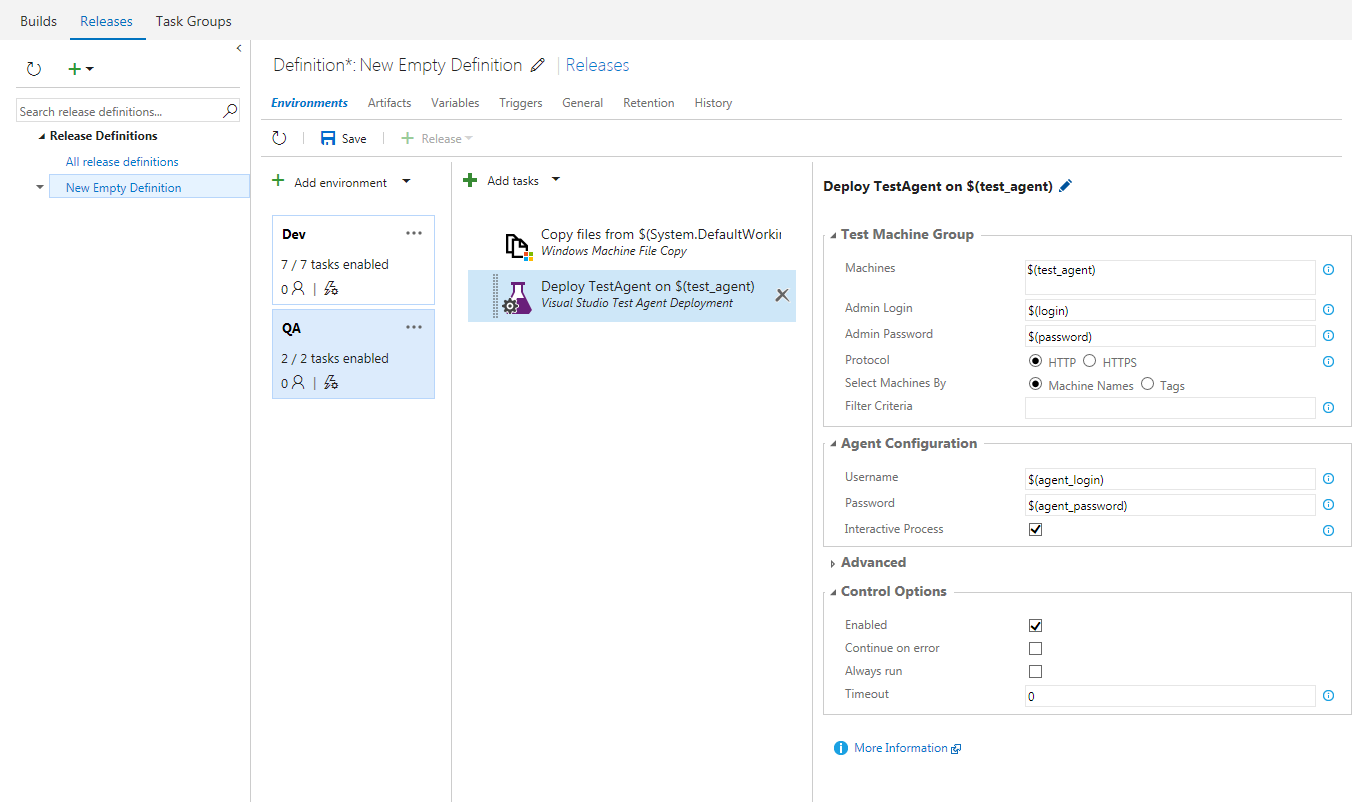
Configure your environment to deploy Test Agent for Visual Studio on computers where tests will run:
Specify the computers, to which the agent will be deployed. Specify the login and password of the user account that will be used to deploy agents.
Important: Configure the agent to run UI tests. Otherwise, the agent will launch TestComplete (or TestExecute) in non-interactive mode, and it will not be able to access UI elements to simulate user actions.
-
Make sure that TestComplete (or TestExecute) and the TestComplete Integration package are installed on remote test agents before you run tests.
You can configure your environment to install them by using the Run PowerShell Script on Target Machines task. Configure the task to run a script that will install TestComplete (or TestExecute) and the Integration package via command line in silent mode.
To learn more about installing TestComplete from the command line, see Installing TestComplete in Silent Mode. To learn about installing TestExecute in silent mode, see the appropriate topic in the TestExecute documentation.
To learn more about installing the Integration package via command line, see Installing Integration Package.
-
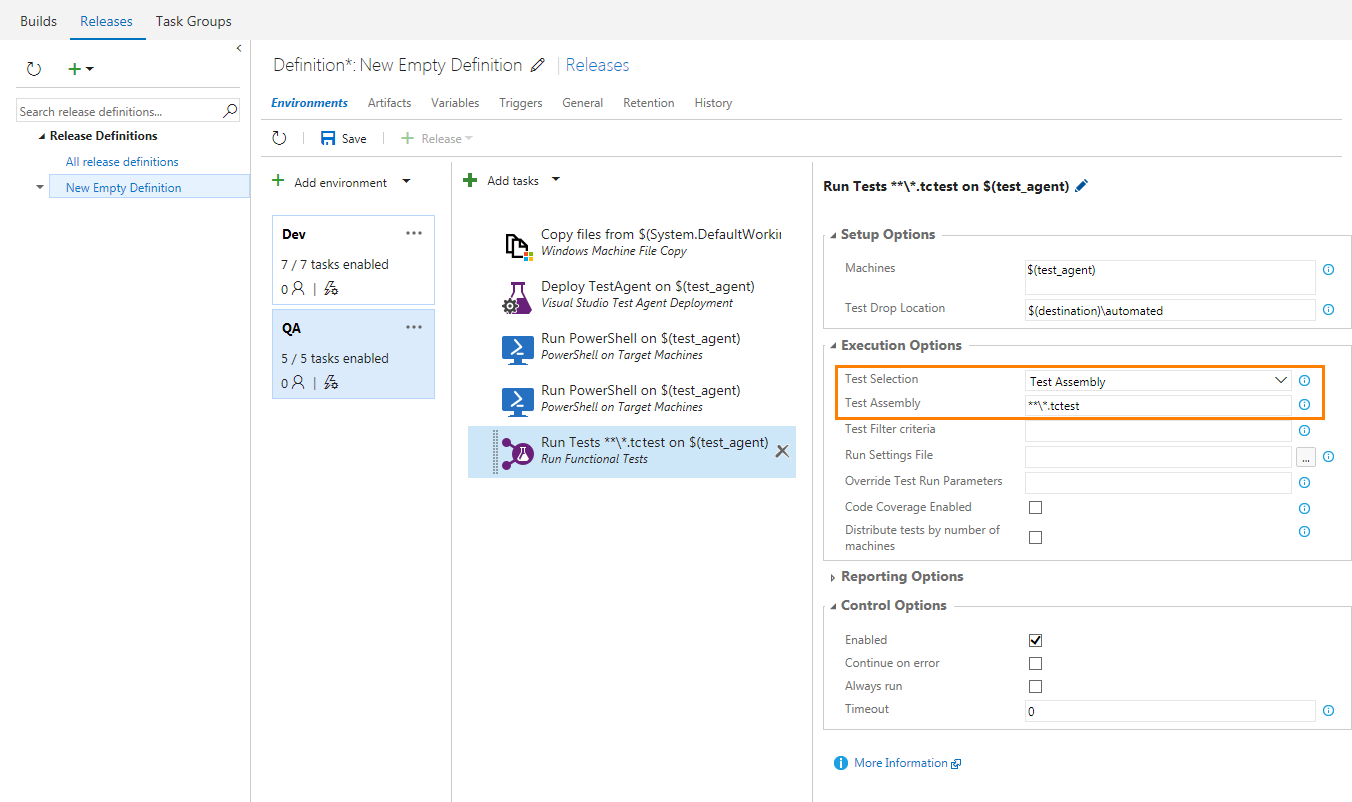
Add the Run Functional Tests task to the definition and configure it to run TestComplete tests:
In the Machines text box, enter the network names or IP addresses of test agents where tests will run.
In the Test Drop Location text box, enter the path where your tests reside.
In the Test Selection drop-down list box, select Test Assembly. In the Test Assembly text box, specify the .tctest files to be run.
You can find information about tasks in the Build and release tasks article of the MSDN Library.
-
-
Specify other release properties. You can learn how to do this at docs.microsoft.com/en-us/azure/devops/pipelines/index.
-
Save the changes.
After creating a release definition, deploy the release.
See Also
Creating a Build Containing TestComplete Tests
Running TestComplete Tests and Viewing Test Results

 Prev
Prev