Before installing TestComplete:
-
Read the license agreement. By installing TestComplete, you confirm that you agree to the terms and conditions of the license.
-
Review the Installation Considerations section and make sure your computer meets the hardware and software requirements.
To install TestComplete:
-
If you have TestComplete installed and running, close it.
-
Close all the applications that may use the same files that TestComplete uses, for example, web browsers, your tested application, Microsoft Visual Studio, and so on.
-
Double-click the TestComplete installation package in Windows Explorer. The installation wizard will start.
-
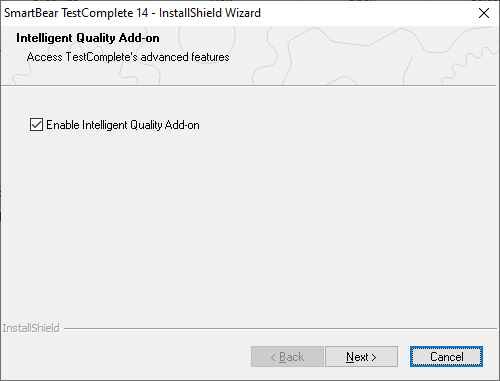
To enable the Intelligent Quality add-on, on the next page, click the link to read a third-party license agreement. If you agree to the license terms, leave the Intelligent Quality Add-on check-box enabled and click Next:

 The Intelligent Quality Add-on requires an active license. If you already have a license for the add-on, you will be able to activate it after the installation is complete. If you do not have a license for the add-on, you will have to purchase and activate it. Please, contact our Sales Team for this purpose.
If you do not agree to the third-party license terms, or if you are not planning to use the add-on, clear the Intelligent Quality Add-on check box and click Next.
Note: If you do not install the Intelligent Quality add-on when installing TestComplete, you can install it later via the File > Install Extensions dialog.
-
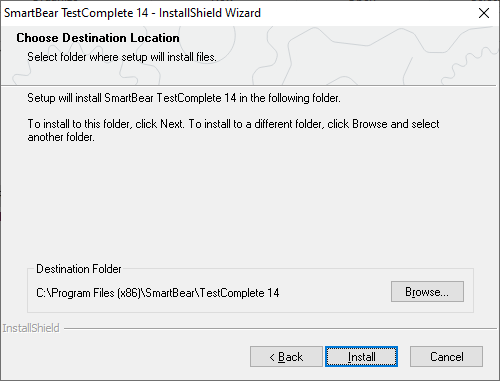
On the next page, select the folder to install TestComplete to:

Note: To test Windows Store applications and web pages in Microsoft Edge, you must install TestComplete to a subfolder of the Program Files folder (or Program Files (x86) on 64-bit Windows versions). The wizard will warn you when you try to install TestComplete to a different folder.
-
Click Install to start the installation. Copying the files and configuring the environment typically does not take much time.
Note: If the specified installation folder contains files, the wizard will overwrite them. It will display a message to warn you about this and to ask for your confirmation to continue.
-
After the installation completes, you will need to activate your TestComplete license:
-
If you installed TestComplete using the trial package downloaded from our website, TestComplete displays the Welcome dialog asking you to activate your license. Click Start a 30-Day Trial in the dialog and wait until TestComplete activates your trial license. After the activation is over, you will see the TestComplete window.
If the computer, on which you start the trial, has no Internet connection or cannot connect to the SmartBear licensing websites (https://ls1.smartbear.com or https://ls2.smartbear.com, port 443), TestComplete will not activate the trial license automatically. You will have to activate it manually.
-
If you downloaded the installation package from the My SmartBear portal (https://my.smartbear.com), TestComplete searches for an active license for the run. If TestComplete finds a Node-Locked license for a previous version on your computer, it will connect to the SmartBear website to get and activate the new license key automatically (this is possible, for example, if you have an active maintenance subscription).
If TestComplete fails to find an activated license on your computer, it will display a dialog asking you to activate your license. To resolve the most common issues with license activation, see Unable to Activate Your License.
For detailed information on the activation steps, see Activating Licenses.
-
See Also
Installing TestComplete
System Requirements
About TestComplete Platform, Modules and Add-Ons
Licensing
