 |
This approach to running TestComplete tests as part of a test plan is obsolete. We do not recommend using it. Starting from version 14.20, you can assign your TestComplete tests to Azure test cases directly from TestComplete IDE and run them as part of your team project’s test plan. To learn more, see Integration With Azure DevOps and Team Foundation Server. |
 This instruction applies to Azure DevOps Services, Azure DevOps Server 2019 and Team Foundation Server 2018 On-Premises.
If you use an earlier version of Team Foundation Server, you can use the Run Functional Tests task to run your test cases associated with TestComplete tests. You can also run TestComplete tests manually from the Test Plans page of your test project.
After you configure your test plan and associate test cases in your test plan with TestComplete tests, you can run your test cases with associated TestComplete projects.
Requirements
You must have access to your team project. You can access the project directly from your web browser by using Team Web Access:
-
For Azure DevOps Services (formerly known as Visual Studio Team Services or VSTS):
https://dev.azure.com/<Your_Azure_Account_Name>/<Project_Name>– or –
https://<Your_VSO_Account_Name>.visualstudio.com/<Project_Name>(if your organization has not moved to thedev.azure.comdomain yet) -
For On-Premises Azure DevOps Server and Team Foundation Server:
http://<Your_Server_Name>:8080/tfs/<Collection_Name>/<Project_Name>
You can find information on Web Portal at docs.microsoft.com/en-us/azure/devops/project/navigation/.
The remote computers where your TestComplete tests will run (test agents) must have the following software installed:
-
Build and Release Agent for Windows.
-
TestComplete 14 (or TestExecute 14).
-
TestComplete 14 Visual Studio Integration Package.
The Integration Package installer is shipped along with TestComplete. You can find it in the TestComplete folder after installing the product:
<TestComplete 14>\VS Integration\VSIntegration.exe
Run this installer after installing TestComplete on computers where tests will run. In the installation wizard, select a Build and Test Integration feature appropriate to your agent version.
Configure a Release Pipeline to Run Your Test Plan
-
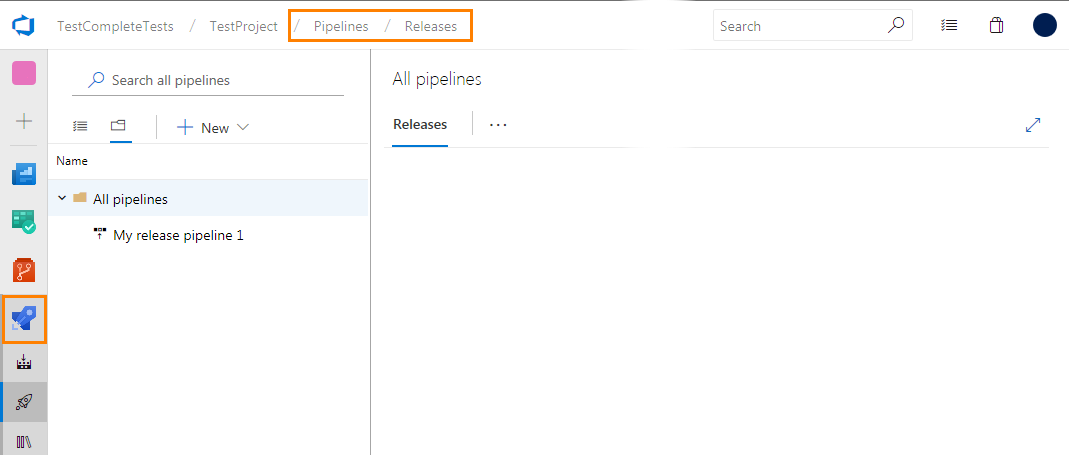
Open the web portal of your team project and navigate to the Pipelines > Releases page of your project:
-
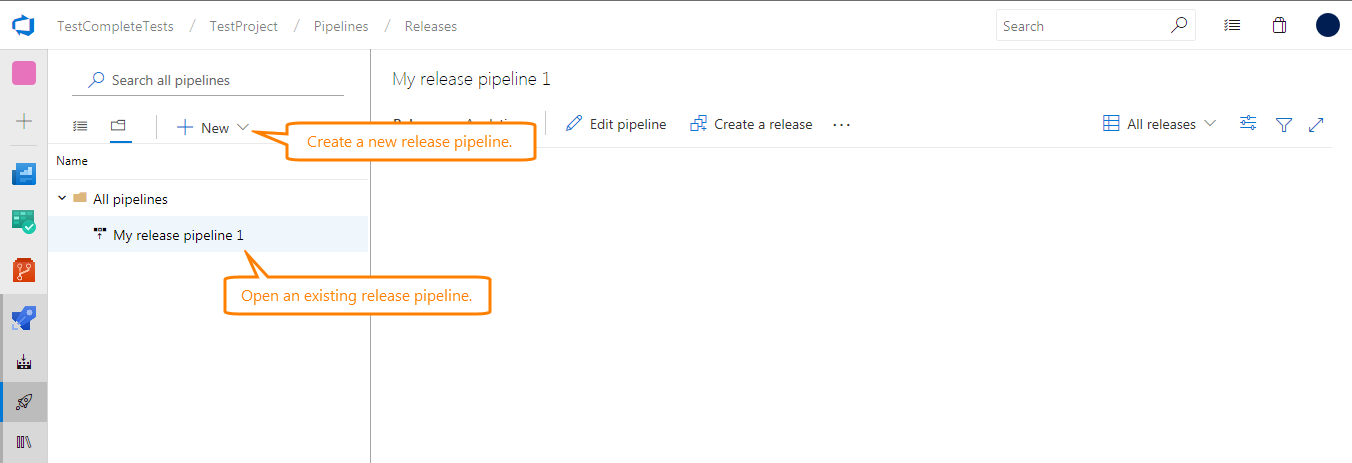
Open the release pipeline you want to use to run a test plan with associated TestComplete tests or create a new pipeline:
-
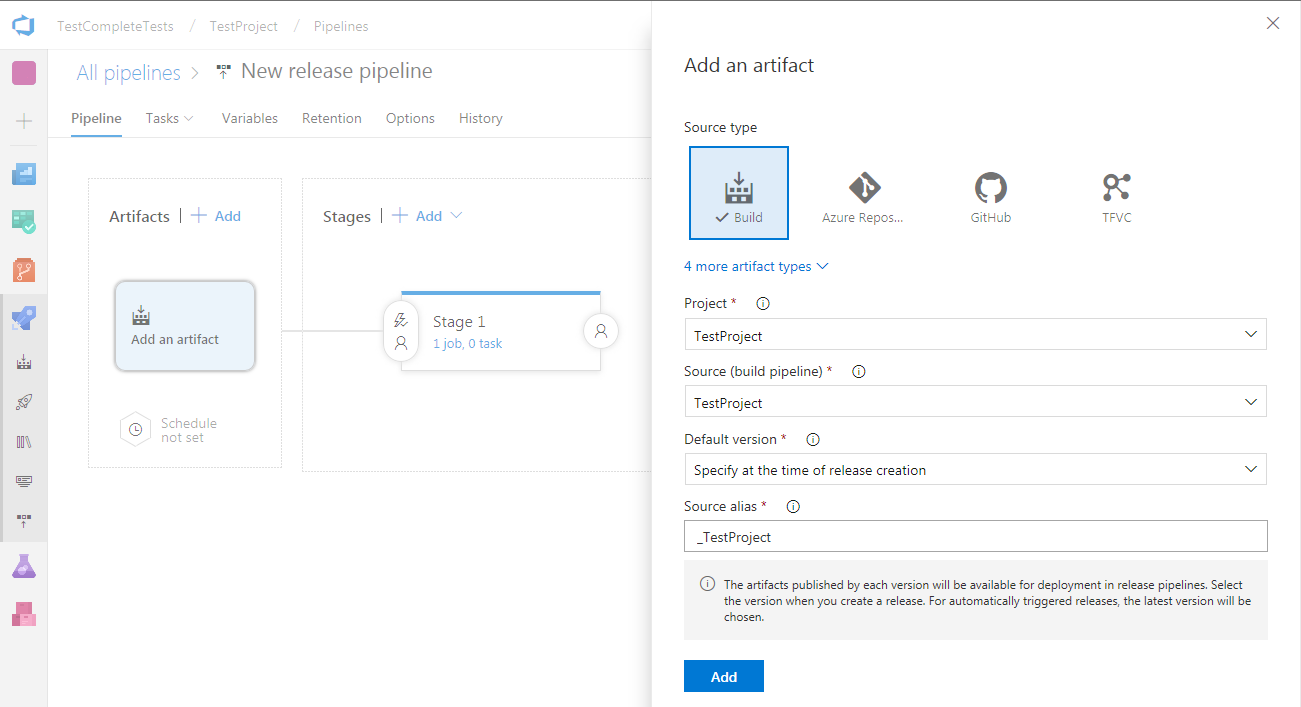
Add an artifact that includes your TestComplete tests (.tc12test files) to the pipeline:
-
Add a stage that will run your TestComplete tests.
-
Add the Visual Studio Test task to the pipeline.
-
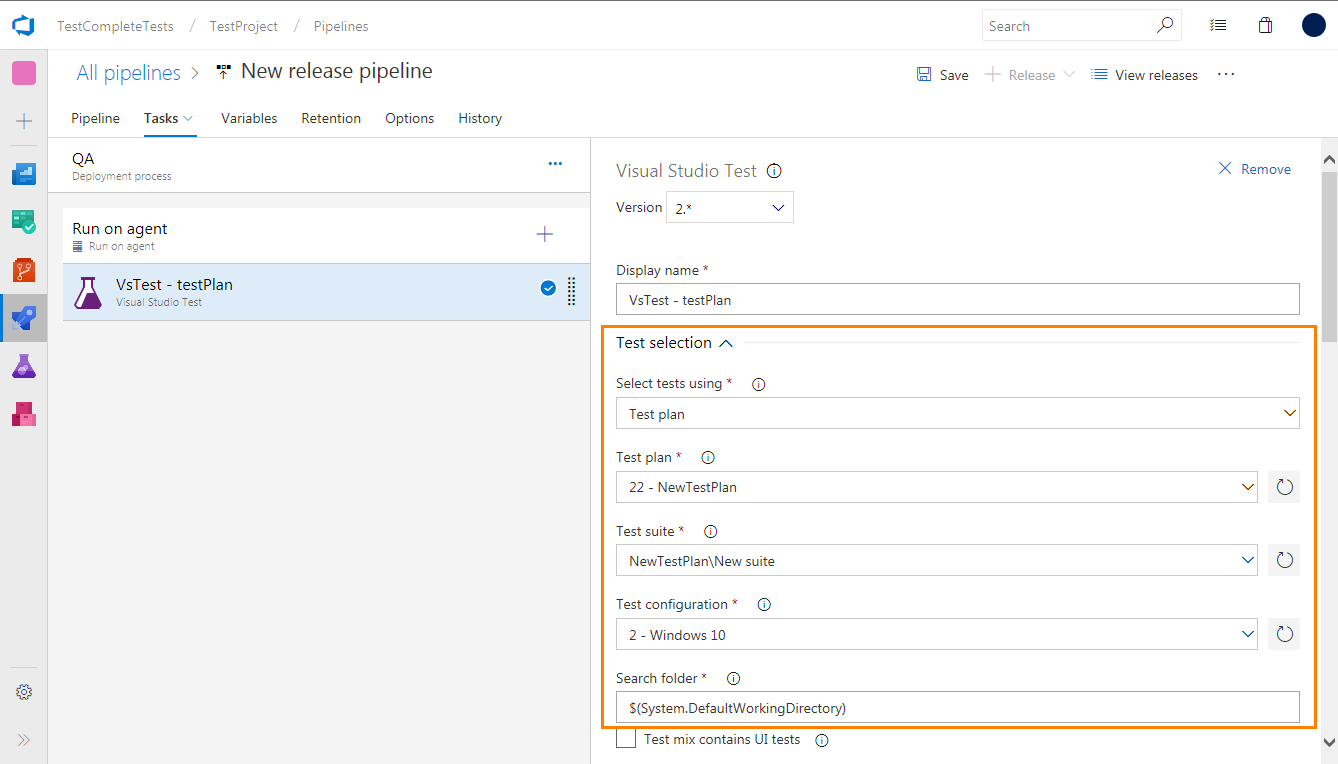
Configure the task to run the test plan that includes test cases with assigned TestComplete tests:
-
In the Select tests using drop-down list, select Test plan.
-
In the Test plan drop-down list, select your test plan.
-
In the Test suite drop-down list, select the entire test plan or test suites that include the needed test cases.
-
Select the needed test configuration.
-
In the Search folder text box, specify the directory on your test agent where the task should search for test files.
-
-
Specify other pipeline settings, if needed. You can learn about pipelines at docs.microsoft.com/en-us/azure/devops/pipelines/index.
-
Save the changes.
Run Tests and View Test Results
Create a release from the created pipeline. It will run TestComplete tests on the specified test agent and assign the test results to the appropriate test cases.
After the release run is over, you can view the test results:
-
Open the release and select the stage that ran your tests.
-
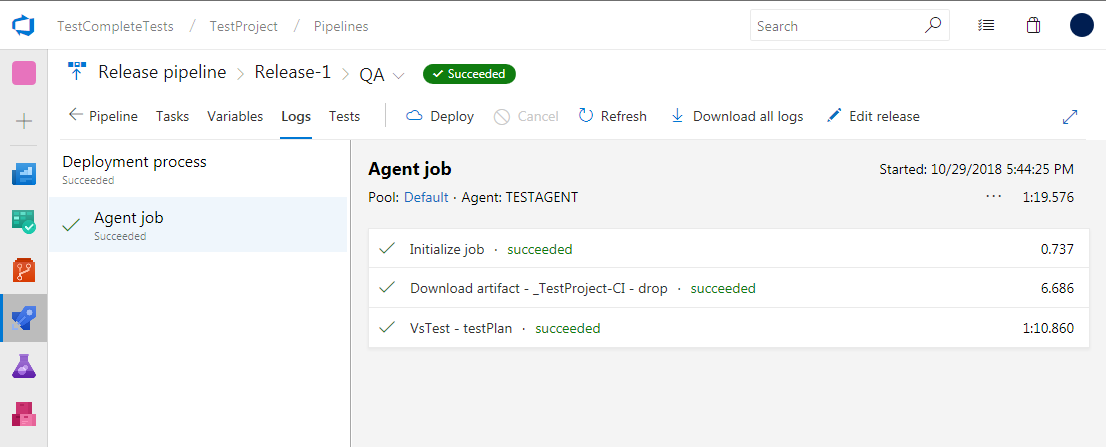
Open the stage logs:
-
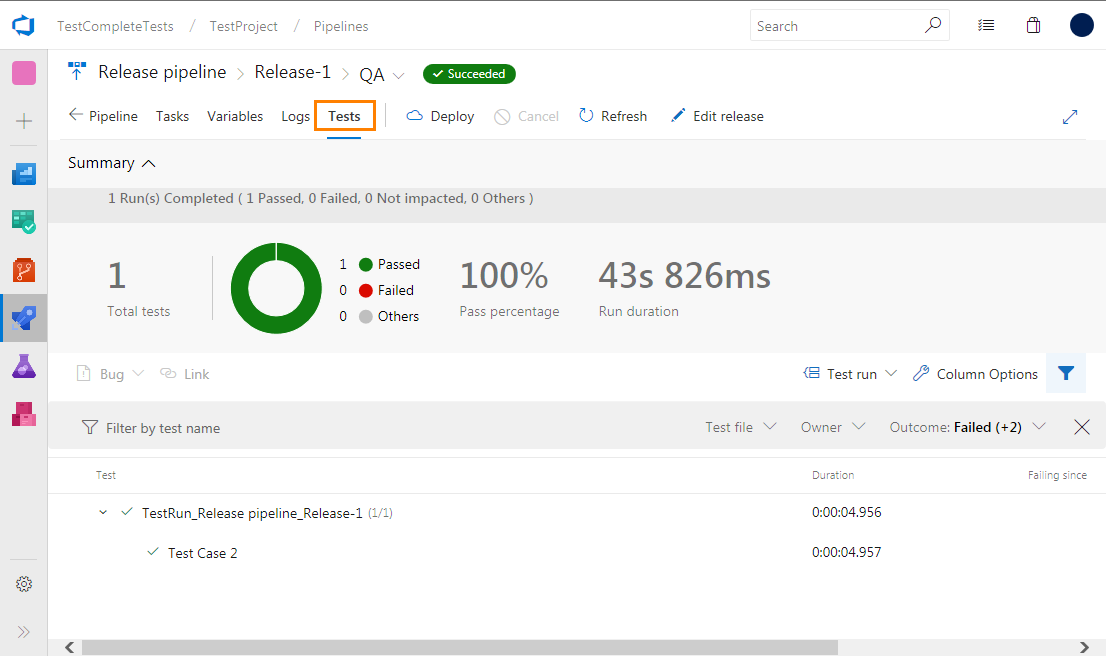
Switch to the Tests page of the stage:
-
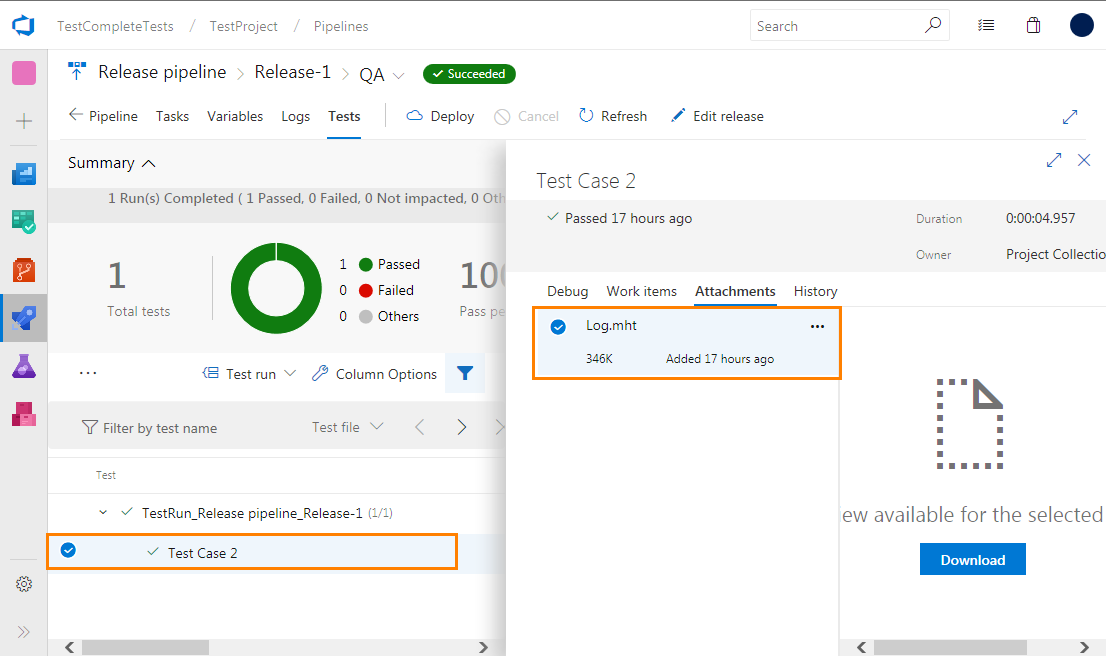
Select the needed test case to view its detailed results. The Attachments section includes the TestComplete test log:
Click it to view the attached log or to download it.
See Also
Running Test Cases with Associated TestComplete Tests
Assigning Builds Containing TestComplete Tests to a Test Plan

 Requirements
 Prev
Prev