Before you can test an iOS application with TestComplete, you need to:
Add Your Test Device to the Application's Provisioning Profile
If you have the iOS Developer Program, you need to add the test device to the provisioning profile of the tested iOS application to install the application on this device. You can register test devices on Apple Member Center web site.
1. Get your device identifier (UDID)
-
Connect your device to your PC (where iTunes is installed) or to your Mac via a USB cable.
-
Launch iTunes.
-
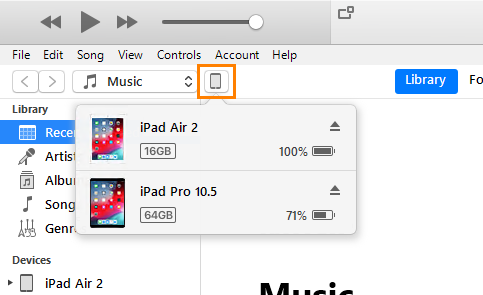
Click
 and select your device:
-
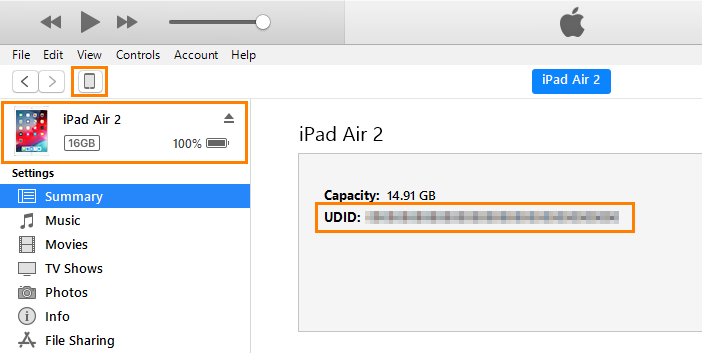
On the Summary tab, click Serial Number. It will be switched to UDID:

2. Register your device for testing
-
Open your web browser, navigate to the Apple Developer web site and use your Apple account to log in:
-
On the Member Center page, click Certificates, Identifiers & Profiles, and then click Devices > All.
-
Click the
 button in the upper-right corner.
 -
Click Register Device.
-
Enter the device name and UDID.
-
Click Continue, and then Register.
You have registered your device for testing.
3. Add your device to the application provisioning profile
Connect Your Device to TestComplete
Connect your iOS device to the TestComplete computer via a USB cable.
If the device shows a dialog asking whether you trust this computer, tap Trust.
In addition, we recommend that you configure your device as follows:
-
On your iOS device, go to Settings > General.
-
Tap Auto-Lock.
-
Select Never.
-
Go to Settings > DISPLAY & Brightness.
-
Move the brightness slider to the minimum value.
This will prevent the device from locking the screen during the test run and reduce battery consumption of the connected device.
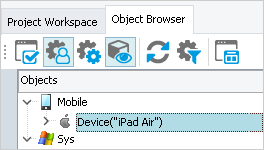
To make sure TestComplete “sees” the connected device, switch to the Object Browser. You should see the Device("your_device_name") object under the Mobile object.

On the next step, we will prepare the sample Orders application for testing.

 Add Your Test Device to the Application's Provisioning Profile
 Prev
Prev