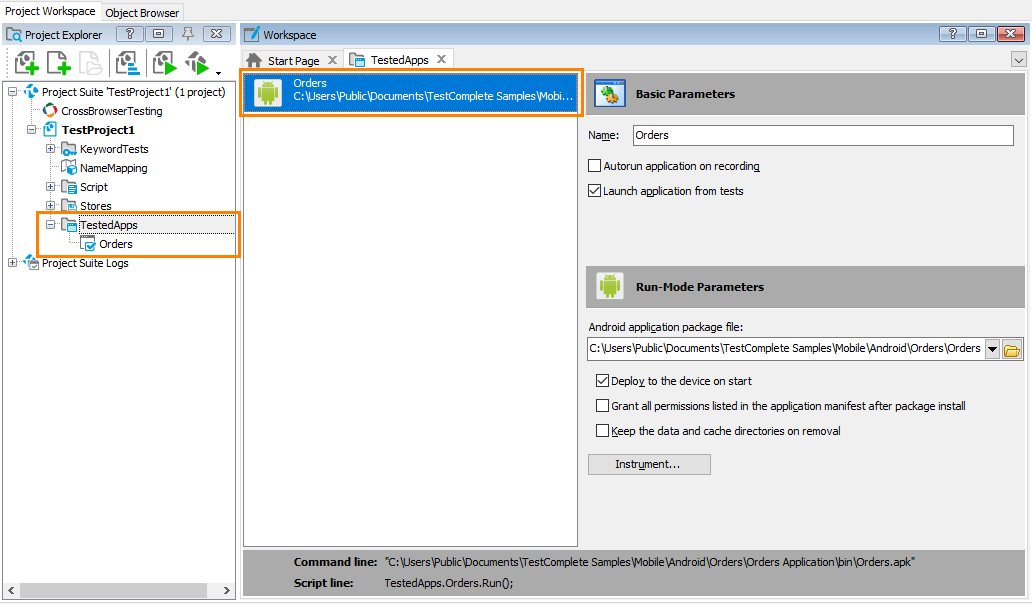
You can add Android application packages (.apk files) to the Tested Applications collection in your test project:
This provides an easy way to install and launch your tested application on your Android devices directly from the TestComplete IDE and from tests.
The .apk file can be stored either on your local computer (for example, C:\Apps\MyApp.apk) or in a shared network folder (for example, \\server\share\MyApp.apk).
To add an Android application to the Tested Applications collection:
-
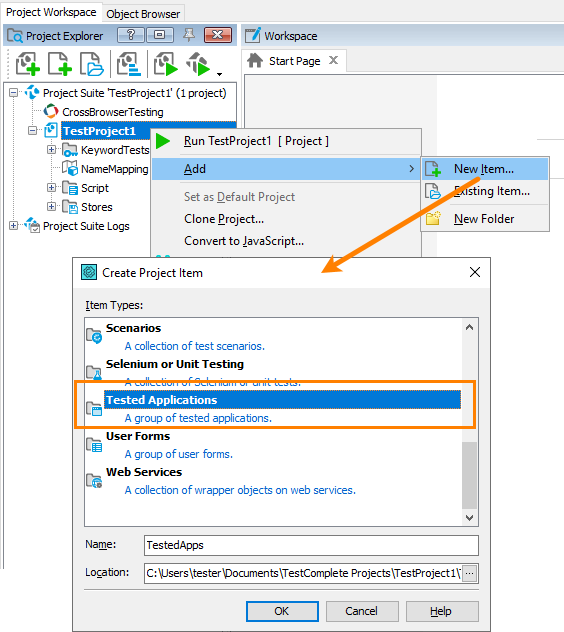
If your project does not have the Tested Applications collection, add it:
-
Open the TestedApps editor. To do this, double-click the TestedApps item in the Project Explorer.
-
Right-click somewhere within the editor and select
 Add Application from the context menu. This will invoke the Add Tested Application wizard.
 -
On the first page of the wizard, choose Android application.
-
On the next page of the wizard, specify the path to the desired Android application package file (.apk). You can enter the file path manually or you can click the
 button and browse for the needed file. Additionally, the following options are available:
-
If you want TestComplete to deploy the application to the device on each start, enable the Deploy to the device on start option.
-
If you want to automatically allow all permissions the application needs, enable the Grant all permissions listed in the application manifest after the package installation option.
-
If you want to keep the application’s data and cache upon removing the package, enable the Keep the data and cache directories on removal option.
-
-
On the next page of the wizard, choose whether you want to instrument the application. We recommend that you instrument all the applications you test. You can also test uninstrumented applications. In this case, you will be able to perform only image-based testing.
-
If you chose to instrument the application, specify where to store the uninstrumented backup version of the application. You can enter the file path manually or click the
 button and browse for the needed folder. Click Next.
 -
On the next page, you can specify certificate data for signing the recompiled application. Two options are available:
-
To generate a debug key and sign the application automatically, select Sign the application using the debug certificate.
-
To sign your application with your own certificate, select Sign the application using the following certificate and then specify the keystore file, alias and their passwords.
-
-
Click Finish to close the wizard.
TestComplete will add the specified Android application to the Tested Applications list.
Now, when you record a test, you can quickly launch your tested Android application by choosing it from the drop-down list on the Recording toolbar. TestComplete will record the application launch as the Run TestedApp keyword test operation or the TestedApps.AndroidAppName.Run scripting method.
You can specify additional settings for the Android application in the TestedApps editor. For example, you can instruct TestComplete to launch the application on the Android device automatically every time you start test recording. For more information, see Android Application Parameters.
For more information on installing and running Android applications, see the Installing Packages on Devices and Starting Tested Android Applications topics.
See Also
About Testing Android Applications
Installing Packages on Devices
Starting Tested Android Applications
About Tested Applications
Android Application Parameters
Working With Tested Android Applications


