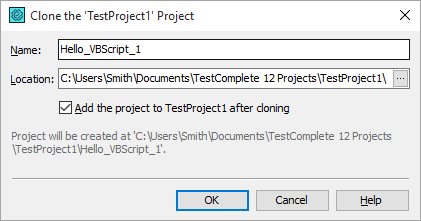
You use the Clone Project dialog to clone TestComplete projects. The dialog is displayed when you right-click a project in the Project Explorer panel and select Clone Project from the context menu. In the dialog, you can specify the name and location of the project-clone:

In the Name text box, enter the name of the project to be created. In the Location box, specify the folder that will contain the new project. You can type the folder name, or click the ellipsis button and select the folder in the resulting Browse for Folder dialog.
To clone the project, click OK. TestComplete will clone the contents of the selected project. If the Add the project to Project_Suite_Name after cloning check box is selected, TestComplete will also add the new project to the project suite to which the source project belongs. To cancel cloning, click Cancel.
