
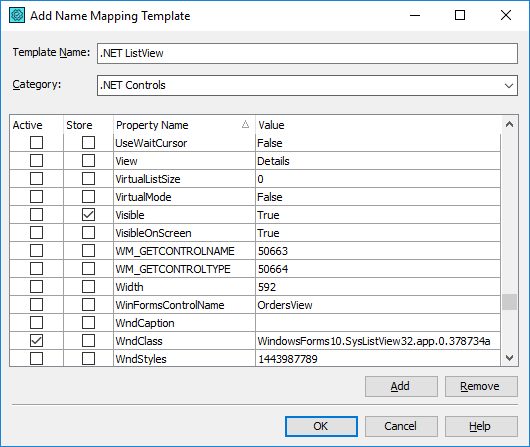
In the Add Name Mapping Template dialog, you can define a new name mapping template. The dialog is opened when you click Add in the Add Template or Edit Name Mapping Templates dialog.
1. Specify the basic template information
Enter the name for the template in the Template Name text box. Specify the template category in the Category text box or select an existing category from the drop-down list.
2. Match the template with an object (or objects)
To associate a template with an object or a group of objects, specify properties and values these objects have. To do this, select the Active check box next to the property and specify the typical property value in the Criteria cell. You can use regular expressions to specify variable parts of the property value.
In a way, these properties are like identification properties used in name mapping, only TestComplete uses them to find a relevant template for the object being mapped.
Tips:
-
To associate a template with an object that has a specific property regardless of the property value, specify .* in the property’s Criteria cell (this regular expression matches any string).
-
If you specify a set of properties that does not match the currently selected object, you will see a warning message upon closing the dialog. Click Yes to keep the set of properties, or click No and fix the set of properties.
3. Specify default identification properties
To specify identification properties that TestComplete will use to map objects that match the template, select the Store check box next to these properties.
 Important:
-
Do not use the
NameandFullNameproperties as identification properties. Objects mapped by these properties will be recorded using ordinary (non-mapped) names. -
Do not use the
MappedNameproperty for creating name mapping templates. This may cause infinite looping. Due to this,MappedNameis not listed among the available identification properties, nor can it be added as a custom identification property. -
Do not create templates for the
SysandMobileobjects. TestComplete maps these objects automatically and ignores any template defined for them.
To add a custom property to the list
By default, the dialog displays only the object’s direct properties. To use nested properties (for example, NativeClrObject.Name), you can add them to the list manually:
-
Click Add. TestComplete will append a new entry to the list.
-
Enter the property name in the Property Name cell.
-
To use the property to associate objects with the template:
-
Enter a typical value of the property or a regular expression pattern in the Value cell.
-
Select the Active check box.
To use the property as the default identification property for objects that match the template, select the Store check box.
-
To remove a property from the list
The list of available properties can be large and include properties that are not used as base template properties or identification properties. You can remove these unused properties from the list to avoid confusion.
To delete a specific property, select it in the list and click Remove.
Tip: You can add deleted properties back to the list using the Add button (see above).
To complete creating the new template, click OK. Cancel will close the dialog discarding any changes.
See Also
About Name Mapping
Name Mapping Templates
Regular Expressions Syntax