
You can create JIRA issues for failed tests directly from TestComplete. The test log can be automatically included in the issue as an attachment.
Requirements
-
Atlassian JIRA ver. 5.0 - 7.12 (self-hosted or Cloud).
-
The target JIRA project must have the Bug issue type.
-
Bug issues must:
-
have the following fields:
-
Summary
-
Description
-
Priority
-
Assignee
-
Environment
-
-
have no required fields except for the ones mentioned above,
-
allow attachments.
-
If your JIRA project does not have the Bug issue type, or if the Bugs are configured differently, ask your JIRA administrator to configure them as stated above.
Adding Issues to JIRA
-
In TestComplete, open the test log you want to submit to JIRA.
-
In the Log Items tree, select the part of the log you want to attach to the issue. For example, to attach the entire log, select the top-level log item.
-
Select
 Post Bug to JIRA from the test log’s toolbar.
-
In the dialog that appears, specify your JIRA server, user account and project key.
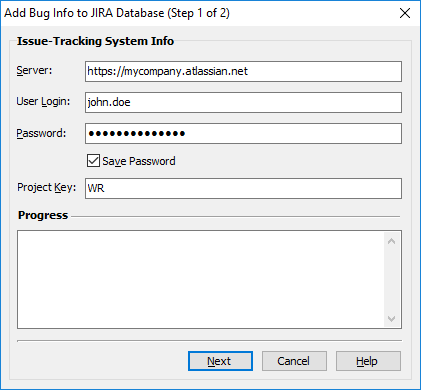
Option Description Server Your JIRA server URL, including http:// or https:// and (if needed) the port number. For example http://jira:8080 or https://<yourcompany>.atlassian.net. User Login Your JIRA username. It is usually the first part of your email address without the @domain part. For example, if you log in to JIRA as [email protected], your username is john.doe. You can see your username on your JIRA profile page. Password Your JIRA password. Save Password Select this check box to remember the password, so that you do not have to enter it again the next time you log in. The other settings (the server URL, username and project key) are always remembered. Project Key The project key of the JIRA project where you want to create an issue. This is the the prefix of issues in that project. For example, if issue IDs look like WR-1234, the key is WR. -
Click Next.
-
Specify issue details.
Option Description Priority The issue priority. Assign To The user to assign the issue to. Note: This option is disabled if you do not have the Assign Issues permission in the selected JIRA project. Contact your JIRA administrator to ask for additional permissions. Name The issue summary (title). Description (Optional.) A detailed description of the issue. Attach TestComplete Log Select this check box to attach the currently open test log to the issue. The log will be in the MHT format. Note: JIRA has a limit on the maximum size of attached files. If the MHT log size exceeds the attachment size limit, the issue will not be submitted. Contact your JIRA administrator to learn the attachment size limit or increase it. Attach System Information Select this check box to add your system information (the computer name, Windows version, and so on) to the issue’s Environment field and attach a file with a list of running processes. -
Click Send.
-
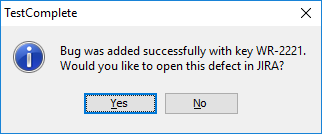
If the issue has been created successfully, TestComplete shows the issue ID and offers to open the issue in your browser. Click Yes to open the issue and fill in extra fields, or No if you are done.
See Also
Creating Issue Reports for Test Results
Script Extensions
Pre-Installed Script Extensions
Creating Script Extensions That Process Test Results