
Web comparison checkpoints verify that the web page under test contains expected data. To help you create web comparison checkpoints, TestComplete includes the Checkpoint Wizard.
 |
Creating web comparison checkpoints is available only if you have a license for the TestComplete Web module. Also, note that you can create web comparison checkpoints only for web pages that are displayed in web browsers supported by TestComplete. |
The rest of the topic provides step-by-step instructions on using the wizard to create checkpoints:
 1. Launching the Wizard
1. Launching the Wizard
The way you launch the wizard depends on the test creation mode:
-
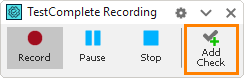
If you are recording a test –
-
Click Add Check on the Recording toolbar:
-
In the Checkpoint Wizard, select Web page, and then click Next.

Click the image to enlarge it.
-
-
If you are editing a keyword test –
-
Select the Checkpoints category in the Operations panel of the Keyword Test editor.
-
Find the Checkpoint Wizard operation in the list and drag it to your test. In the Checkpoint wizard, click Web page.
– or –
Find the Web Comparison Сheckpoint operation in the list and drag it to your test.

-
-
If you are editing a script –
-
Open the script to be edited.
-
Click
 on the Code Editor toolbar:
-
In the Checkpoint Wizard, select Web page, and then click Next.
-
2. Specifying the Web Page to Be Verified
On the next page of the wizard, specify the web page for verification:

Click the image to enlarge it.
-
Click the
 icon in the wizard and keep the mouse button pressed.
After you start dragging, the main window of TestComplete will automatically minimize. While you are dragging, a red frame indicates the element of the web page or frame that is currently under the mouse pointer.
-
Release the mouse button when the red frame highlights any element on the desired web page or frame.
-
Regardless of whether you select the page or an element on the page or frame, TestComplete will retrieve the full name of the
Pageobject that corresponds to the web page and display the object name in the Page object edit box.If you release the mouse button over an element other than a web page element, TestComplete will display an error message notifying you that the selected object is not supported by this checkpoint.
3. Specifying the Web Comparison Element
On the next page of the wizard, specify the type of verification you want to perform. Click Comparison to compare your tested web page against a baseline copy. (If you are configuring the Web Comparison Checkpoint operation, the wizard selects the appropriate verification type automatically.)
Specify the Web Comparison project element that will be used for verification. You can either select an existing element or create a new one. In the latter case, TestComplete will save the current content of the tested web page to this element.

Click the image to enlarge it.
To create a new set of comparison parameters
-
Click Select and save comparison settings.
-
Enter the name of the new WebComparison element in the Save as a new item to Stores edit box.
Note: The name is used to address the element from scripts, so it must be a valid script identifier. To specify the name that will match the naming rules adopted by all supported scripting languages, enter a string that starts with a letter and that contains only letters, digits, and underscore symbols. -
Specify the comparison settings:
-
Mode - Specifies one of the following verification modes:
-
Compare entire page - The checkpoint saves the whole HTML document to the Stores project item and checks the stored document against the actual document displayed by the web page under test.
-
Compare only tag structure - During verification the checkpoints will build a tree of web page elements for both. These trees include only tag names and do not include attributes, attribute values and element values. The checkpoint compares these trees and returns the comparison result.
-
Compare only specified tags - The checkpoint will check only those web page elements that are specified by the following settings:
-
Links - The checkpoint builds a collection of A elements for both stored and actual pages and then compares these collections. The comparison fails, if the collections contain a different number of items, or if the text or attributes of a stored element differ from the text or attributes of the actual element.
-
Images - The checkpoint builds a collection of IMG elements for both stored and actual pages and then compares these collections. The comparison fails if the collections contain a different number of items, or the elements’ attributes differ.
-
Input elements - The checkpoint builds a collection of INPUT elements for both stored and actual pages and then compares these collections. The comparison fails if the collections contain a different number of items, or the element attributes differ.
-
-
-
Read content from a server - This option specifies whether to read the web page's content from the browser’s window or from the web server. If this option is enabled, the checkpoint gets the address of the tested web page and reads its content directly from the server, otherwise, it gets the page's content from the browser window.
Tip: The browser window’s content can differ from the original content from the server, that is, if you want to make the comparison more stable, enable this option.
-
To use an existing set of comparison parameters
-
Click Use stored settings.
-
Select the needed element from the Stores item drop-down list.
4. Closing the Wizard
Click Finish to close the Checkpoint Wizard.
TestComplete will create a new Web Comparison element (if needed) and add the checkpoint to your test.
If you add the checkpoint to a keyword test, then upon closing the wizard TestComplete will insert the Web Comparison Checkpoint operation into the test.
If you add the checkpoint while editing a script, then, upon closing the wizard, TestComplete will generate the comparison code and display it in the Copy Text to Clipboard dialog. Here you can copy the generated code to the clipboard and then paste it to your script code.