This tutorial will walk you through creating a cross-browser mobile web test. We will record a simple keyword test for a sample application, http://services.smartbear.com/samples/TestComplete12/smartstore/, and configure the test to run it in different mobile browsers. The test will search the online store for ball and verify that the first link in the search results points to the All-Court Basketball item.
Requirements
To complete this tutorial, you need the following:
-
A license for the TestComplete Web module.
-
The Web Testing and Chrome Support plugins (they are part of the Web module).
-
Google Chrome 71, configured as described in the Preparing Chrome for Web Testing topic.
If you have a TestComplete version earlier than 12.42, then, to test web applications in Chrome 71, you will have to upgrade your TestComplete version to version 14.0.
If you use a later version of Google Chrome, check whether a patch is available for it.
1. Recording a Mobile Web Test
We will start with recording a keyword test using the iPhone 5 emulator.
-
If Chrome is running, close it.
-
Select Test > Record > Record Keyword Test from the TestComplete main menu to start test recording.
-
Expand the Recording toolbar and select Apple iPhone 5 from the drop-down list of mobile browser emulators:
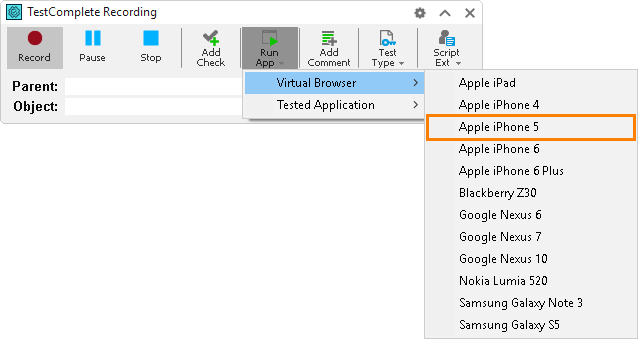
TestComplete will launch Chrome in the iPhone 5 emulation mode. In this mode, Chrome simulates the iPhone 5 browser’s user agent and screen resolution.
-
Navigate to http://services.smartbear.com/samples/TestComplete14/smartstore/ in the Chrome address bar.
You can see that Chrome displays the web page content with a limited width – the same width it would have if it were displayed in iPhone 5 browser.
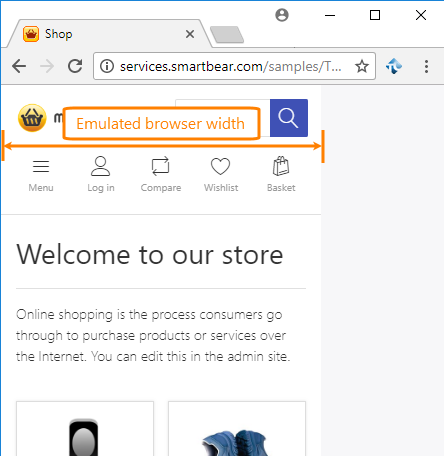
-
Enter ball in the Search box and click
 .
. -
Create a property checkpoint for verifying the text of the first item in the search results:
-
Click
 Add Check on the Recording toolbar.
-
TestComplete will open the Checkpoint wizard.
Click Object property to create a property checkpoint.
-
Select the text All-Court Basketball on the web page using one of the options suggested in the wizard.
Option Description Drag the target to an object
Click
 and drag the target glyph to the object you want to select, and then release the mouse button.
Point and press the shortcut (SHIFT+CTRL+A)
Click
 , hover the mouse pointer over the object you want to select, and press SHIFT+CTRL+A.
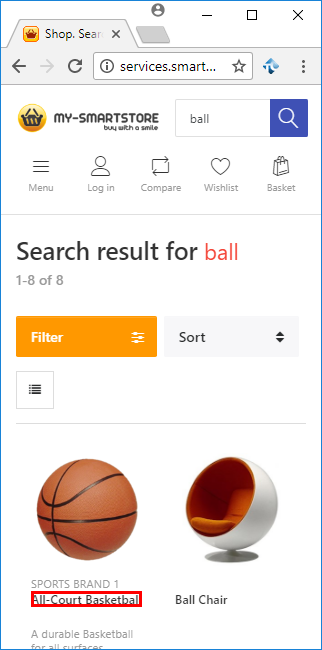
Click Next.
-
Select the
contentTextproperty. If it is not in the list, click More Properties to view all the properties. -
Click Next, and then Finish.
-
-
Close the browser and stop the recording.
2. Viewing the Recorded Test
Take a look at the recorded test:

The test consists of operations (steps) - user actions, checkpoints, and various utility operations:
-
The first operation, Run Virtual Browser, launches the mobile browser emulator. The emulator will simulate iPhone 5 browser.
-
The
browser.ToUrloperation opens the SmartStore web site in the emulator. -
The
pageServicesSmartbearComSamplesT2.Waitoperation waits until the SmartStore main page is loaded. -
The
ClickandSetTextoperations enter ball in the Search box. TheClickButtonoperation clicks the Search button. -
Another
Waitoperation waits until the search results page is loaded. -
The Property Checkpoint operation checks that the first item in the search results contains the expected text.
-
Finally, the
BrowserWindow.Closeoperation closes the mobile browser emulator.
3. Running the Recorded Test
Before modifying the recorded test, run it to make sure it works as expected. To run the test, click  Run Test on the toolbar of the keyword test editor. TestComplete will play back the test in the same mobile browser emulator – iPhone 5 – that we used for test recording.
The test has passed, so you can proceed.

If your test ran with errors, examine and fix the errors to make the test pass. You can also try recording the test anew using the same steps as before.
4. Making the Test Cross-Browser
Currently, the test runs in the iPhone 5 emulator – as it was recorded. Modify the test so that it runs in different mobile browser emulators, one after another.
-
Add the Virtual Browser Loop operation at the beginning of the test.
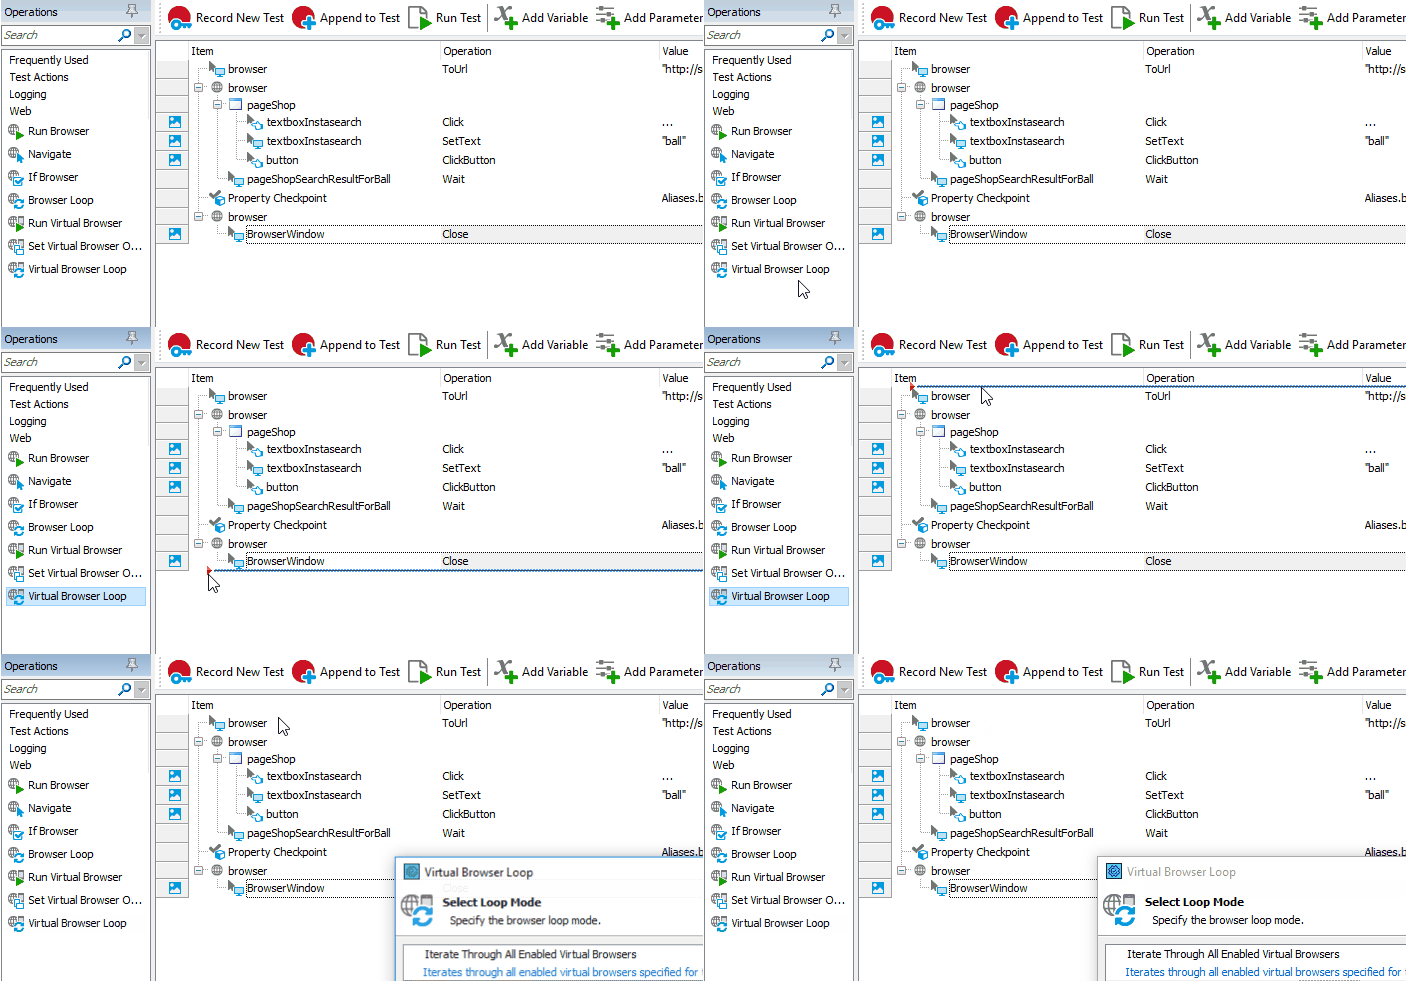
In the resulting dialog, specify the operation parameters:
-
Select Iterate Through All Enabled Virtual Browsers. TestComplete will run the test using all the mobile browser profiles enabled in your project. You can view them on the Tools > Current Project Properties > Open Applications > Web Testing > Virtual Browsers page.
Click Next.
-
In the URL parameter, specify the URL of the tested web site:
http://services.smartbear.com/samples/TestComplete14/smartstore/ -
Click Finish.
-
-
Delete the Run Virtual Browser and
browser.ToUrloperations from the test. They are not needed anymore, because the Virtual Browser Loop operation launches mobile browser emulators and navigates to the URL. -
Select all the test operations that go after the Virtual Browser Loop operation and click
 to move them inside the loop. Now these operations will be executed on each loop iteration.
Here is what the resulting test should look like:

-
Save the test by selecting File > Save from the TestComplete main menu.
Now run the resulting test.
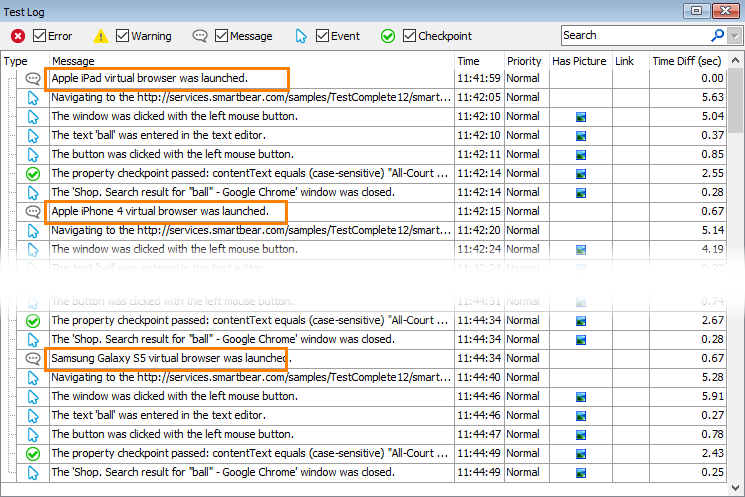
TestComplete will repeat the test operations several times. Each time, the tested web site will be opened in a different mobile browser emulator.
The test log contains information about which mobile browser emulators were launched and the results of the test operations performed in each browser.
Conclusion
Creating mobile web tests with TestComplete is really easy. You can record tests in the mobile browser emulator without having to write any code. You can use TestComplete to emulate various smartphone and tablet browsers and run tests in multiple browsers for device compatibility testing.
To learn more about mobile web testing with TestComplete, see the following topics:
See Also
Testing Mobile Web Applications Using Emulator - Overview
Creating Cross-Browser Mobile Web Tests Using Emulator
Creating Mobile Browser Profiles

