 |
Information in this topic applies to web applications. |
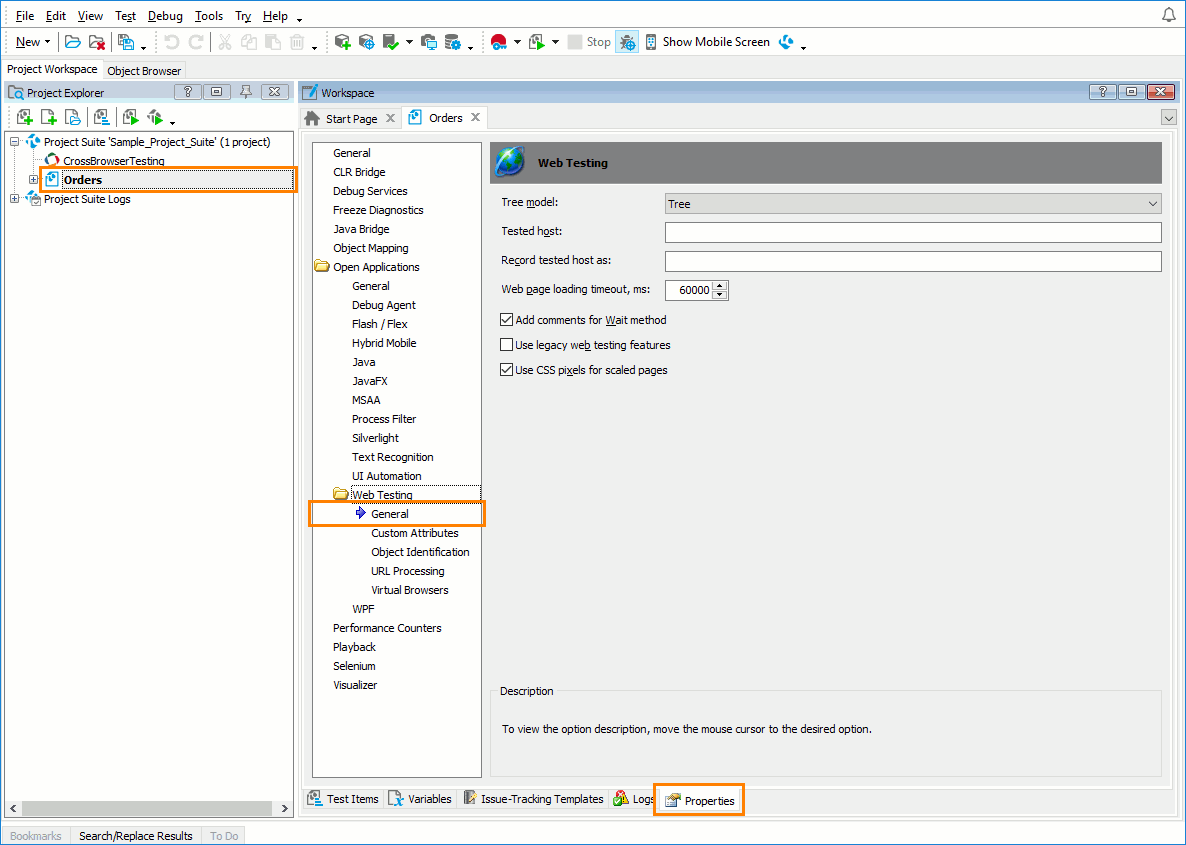
The Open Applications > Web Testing options customize settings for web testing.
| Note: | The Web Testing settings are available only if the web testing plugins are installed and enabled in File > Install Extensions. (See Requirements for Web Testing.) |
To view or modify the Web Testing options:
-
Select Tools > Current Project Properties from the TestComplete menu.
– or –
Double-click the project in the Project Explorer. In the project editor that opens, select the Properties tab.
– or –
Select Edit > Properties from the context menu of the project in the Project Explorer.
-
In the tree on the left of the project properties editor, select Open Applications > Web Testing.
You can change the following options:
-
Tree model - Specifies the web object model that is used to represent the hierarchy of test objects for web page elements. Possible values are: Tree (recommended), DOM, Tag and Hybrid.
The object model affects how web page object are identified and addressed in your tests and the Object Browser. As a result, tests created for one model will not play back correctly for another model. An exception is the Hybrid model, which supports running tests created in both the Tree and DOM models.

The Tree model is the only recommended web object model. Other models are legacy and not fully supported for cross-browser web testing. 
The Tag and Hybrid models are not supported for Chrome. If the Tag or Hybrid model is selected, TestComplete uses the Tree model for these browsers instead.
The Tree model is the only supported model for Edge. If any other model is selected, TestComplete will use the Tree model for this browser instead.
You can set the Tree model option directly from tests using the
Options.Web.TreeModelproperty. For more information, see Changing Web Object Model From Tests. -
Tested host and Record tested host as - To address the opened Web page in tests, TestComplete uses the
Pagemethod of the Internet Explorer window.Pagehas the only input parameter that specifies the URL of the desired Web page. Sometimes this parameter depends on the computer where the test was created. (For instance, if you test an HTML file stored on your computer or on any other computer in the local network, this parameter specifies the path to the file. The file path is computer-dependent.) If another machine has the file open, the test may not work. The Tested host and Record tested host as options helps you solve this problem. When you open a page during recording, TestComplete searches for the Tested host string in the page path and replaces it with the string specified in Record tested host as.Suppose these options hold the following strings:
Tested host: C:\Program Files\Projects\MyProject\
Record tested host as: Project.Variables.MyPathIf you record a test script for the C:\Program Files\Projects\MyProject\default.htm page opened in Internet Explorer, TestComplete will record the code like the following --
obj.Page(Project.Variables.MyPath + "default.htm")
It is very convenient to specify a local variable name in the Record tested host as option (in our example we used a hypothetical variable called
MyPath). If you use local variables, the test can run on another computer with minimal changes. All you have to do is change the variable value in the Variables page of the project, project suite or network suite editor. -
Web page loading timeout - Specifies the default time (in milliseconds) to wait for the web page to be loaded. The default value is 60000.
You can set the Web page loading timeout option directly from tests using the
Options.Web.WebPageLoadingTimeoutproperty. For more information, see the description of the Options object. -
Add comments for Wait method - When recording web tests, TestComplete inserts
Page.Waitmethod calls after page navigation operations. This ensures that the page has been loaded completely before attempting to interact with any web page objects.This option specifies whether or not TestComplete adds comments with URLs of loaded web pages that were loaded before
Page.Waitcalls. These comments can make the recorded test easier to understand. By default, the option is disabled. -
Use legacy web testing features - This option lets you activate or deactivate the legacy web testing mode that was used in TestComplete 8 and earlier. You should select this option only if you are experiencing issues when running web tests created in TestComplete versions prior to 9. For more information on legacy web testing features, see documentation on earlier versions of TestComplete.
When this option is selected, cross-browser and web testing enhancements introduced in TestComplete 9 become unavailable. Specifically:
-
Browser processes are identified as
Processobjects rather thanBrowserobjects. -
Browser windows are represented by browser-specific test objects rather than cross-browser
BrowserWindowobjects. -
HTML5 elements are not identified.
-
The
contentTextproperty is not available for web objects. -
The
contentDocumentproperty is not available forPageobjects in Internet Explorer. -
JavaScript popups and browser dialogs are identified as browser-specific objects rather than cross-browser
Alert,Promptand other objects. -
SPAN elements with no text contents of their own are not included in the Tree object model.
-
Use CSS pixels for scaled pages - If this option is enabled, TestComplete takes into account the browser zoom and DPI setting when getting the object coordinates and the Width and Height properties. It is important when the browser zoom is not set to 100% and the DPI setting differs from 100% (96 DPI).
The default values for the Web testing options that will be used in new TestComplete projects can be specified in the Default Project Properties - Web Testing Options dialog.
See Also
Testing Web Applications
Default Project Properties - General Web Testing Options
Project Properties

