
Use the Create Project dialog to add a new project to the current project suite and to specify properties of this project. To invoke the dialog:
- Right-click the project suite in the Project Explorer panel and select Add | New Item from the context menu.
-- or --
- Select File | New | New Project from the TestComplete main menu.
-- or --
- Open the project suite Test Items page and click
 Add New Item on the toolbar, or right-click somewhere within the Test Items page and select New Item.
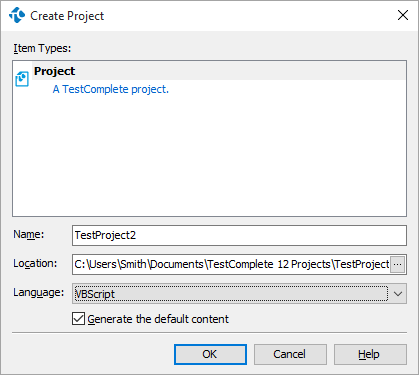
In the Name edit box specify the project file name. TestComplete will automatically add the .mds extension to it when the project file is generated.
The Location box specifies the full name of the folder that holds the project file. You can either type the folder name, or click the ellipsis button and select the desired folder from the ensuing Browse for Folder dialog.
The Language box specifies the scripting language for the project. For information on which language to choose, see Selecting the Scripting Language.
Select the Generate default content check box to generate a project holding the default set of project items. If this check box is clear, TestComplete will create an empty project.
To create a project with the specified properties, click OK. Cancel will close the dialog without creating a project.
See Also
Creating Projects and Project Suites
Projects in TestComplete
Project Suites in TestComplete
Managing Projects, Project Suites and Project Items
Project Items