To run TestComplete tests during the release deployment, create a build that will include your test project and place your TestComplete test files to the needed output folder.
Requirements
The computer, where you create a build definition, must have access to your team project:
-
You can access the project from Visual Studio Team Explorer. To do this, you must have Microsoft Visual Studio 2015 - 2017 (Community, Enterprise or Professional) with the Team Explorer component.
– or –
-
On the computer, where Visual Studio is not installed, you can access the project directly from your web browser by using Team Web Access:
For On-Premises Team Foundation Server
http://<Your_Server_Name>:8080/tfs/<Collection_Name>/<Project_Name>For Team Foundation Services
https://<Your_VSO_Account_Name>.visualstudio.com/<Project_Name>You can find information on Web Access in the Work in the TFS Web Portal article of the MSDN Library.
Configuring a Build Definition
-
Open the web portal of your team project. You can navigate to it directly in your web browser, or you can open it from Team Explorer in Visual Studio.
-
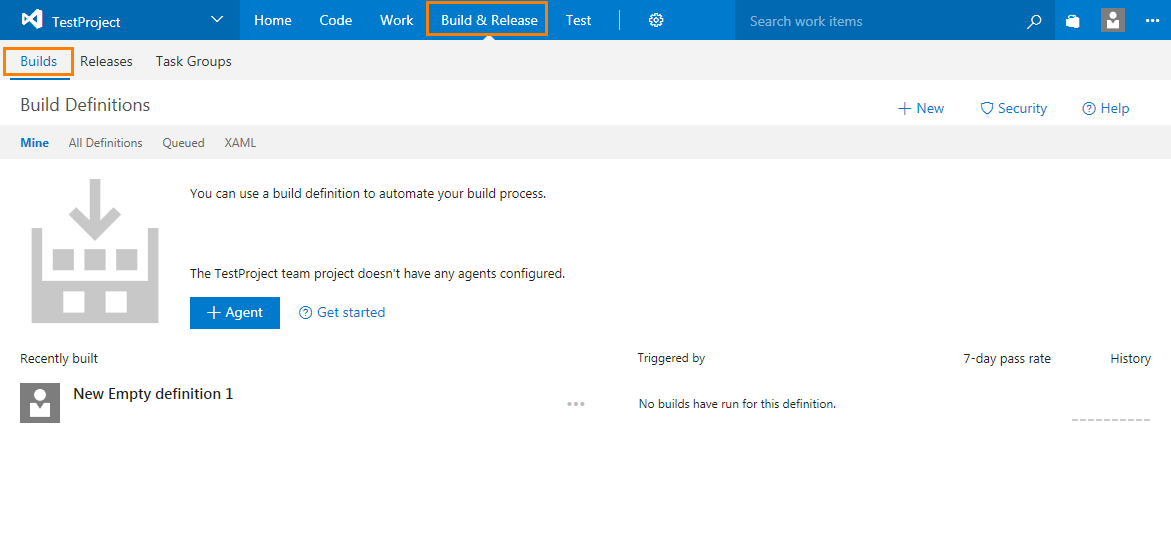
Navigate to the Builds page of the Build & Release hub:
-
Open an existing build definition or click
 New to create a new build definition:
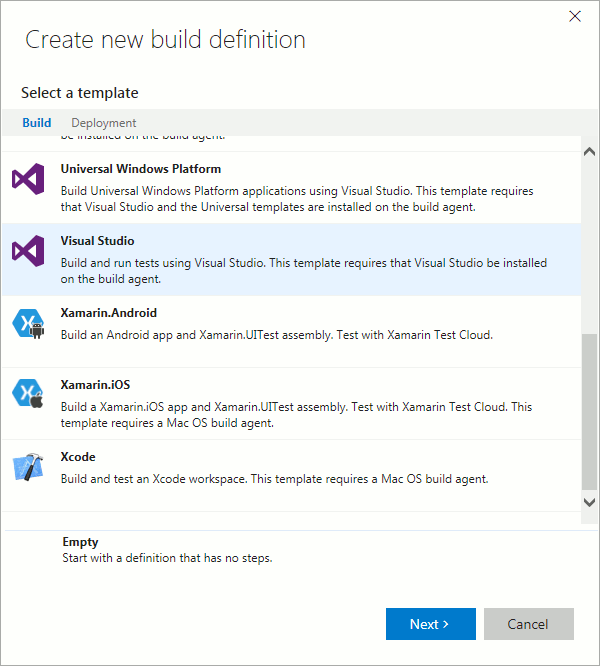
In the Create new build definition wizard, configure the definition to be created:
-
Select the needed definition type.
-
On the Settings page of the wizard, specify the build source.
-
Select the queue for the build and click Create.
-
-
On the Repository page of the definition, configure your build definition to get the needed files from your source control:
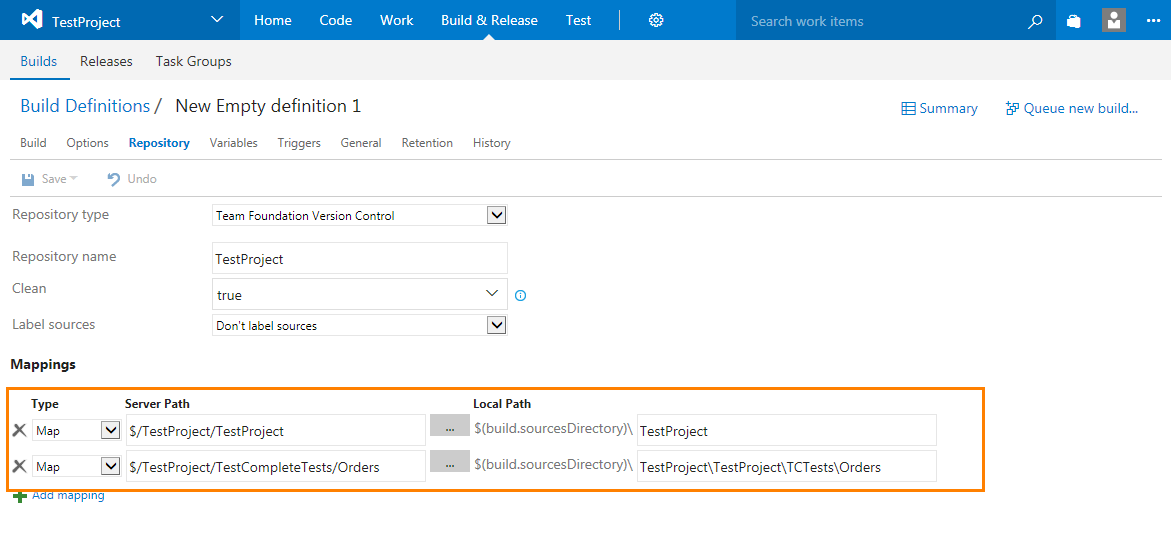
If You Use Team Foundation Version Control
Map the source control directories that store your Visual Studio test project and TestComplete projects to the appropriate local directories on the build computer:
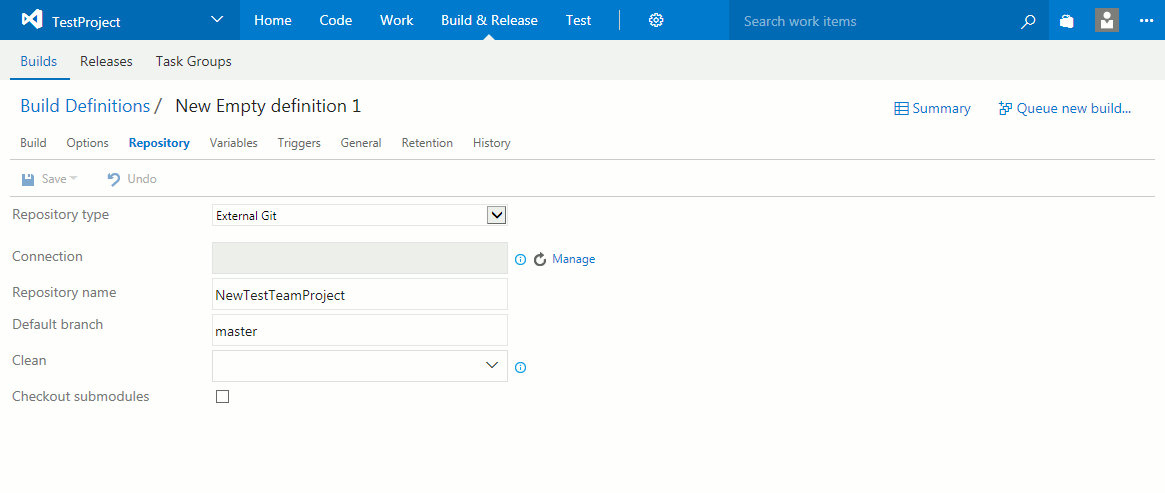
If You Use Git or Subversion
Specify the repository and the branches that store your team project files:

Keep in mind that the test project stores the relative path to TestComplete tests. When mapping the TestComplete source control path, make sure to select a local folder to keep the relative path specified in the test project valid. -
On the Build page of the definition, specify the details of the build process (what functions the team build will perform):
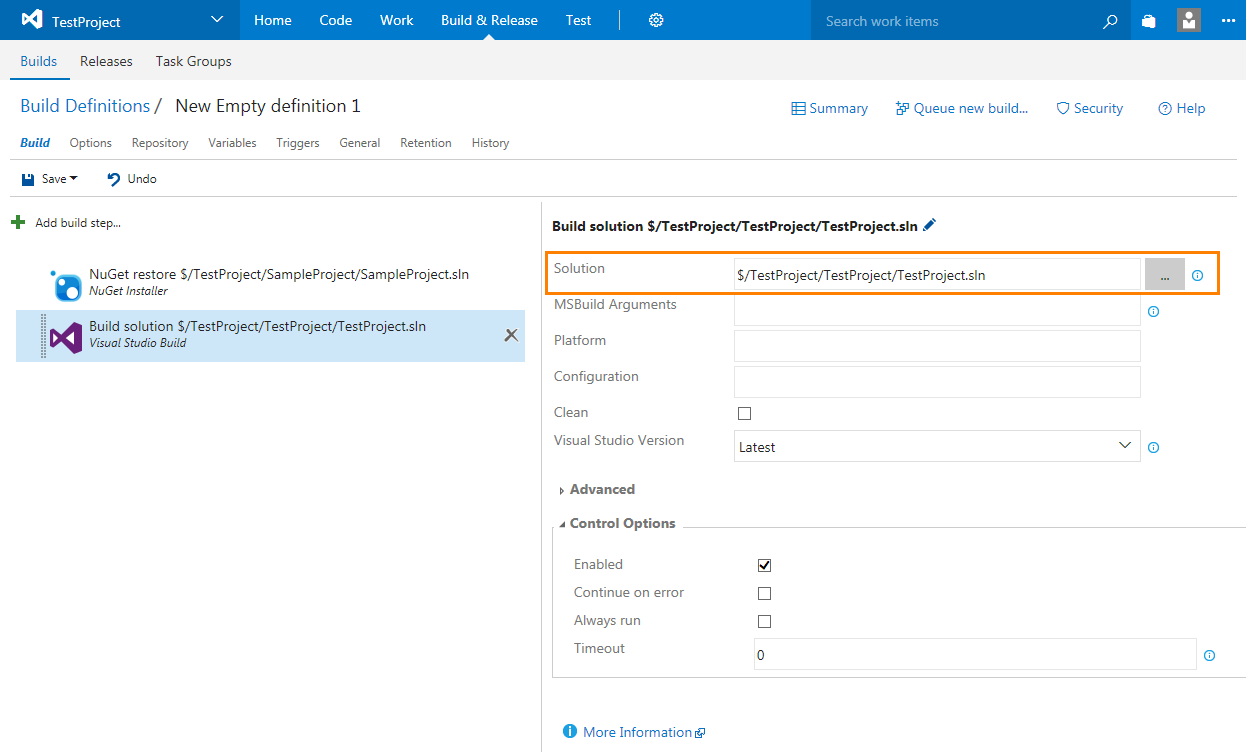
Add a task that will build your Visual Studio test project containing TestComplete tests:
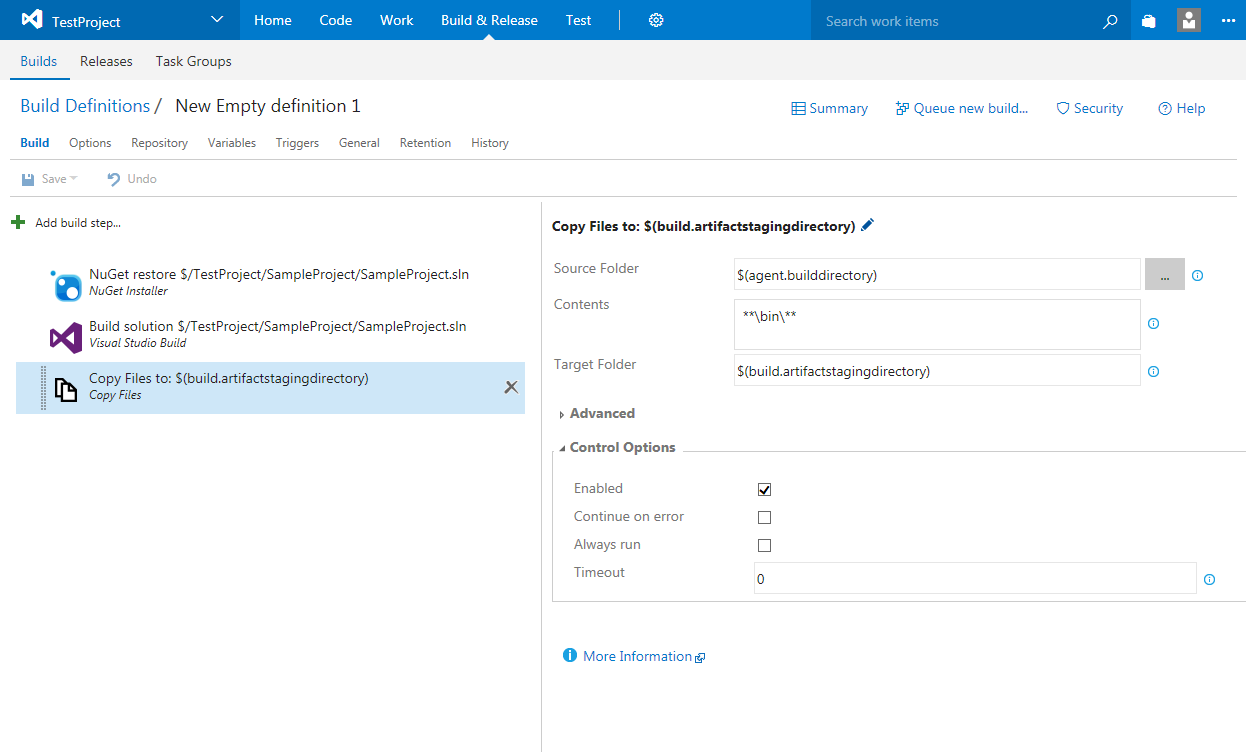
Add a task that will copy test files to an artifact staging folder on your build computer:
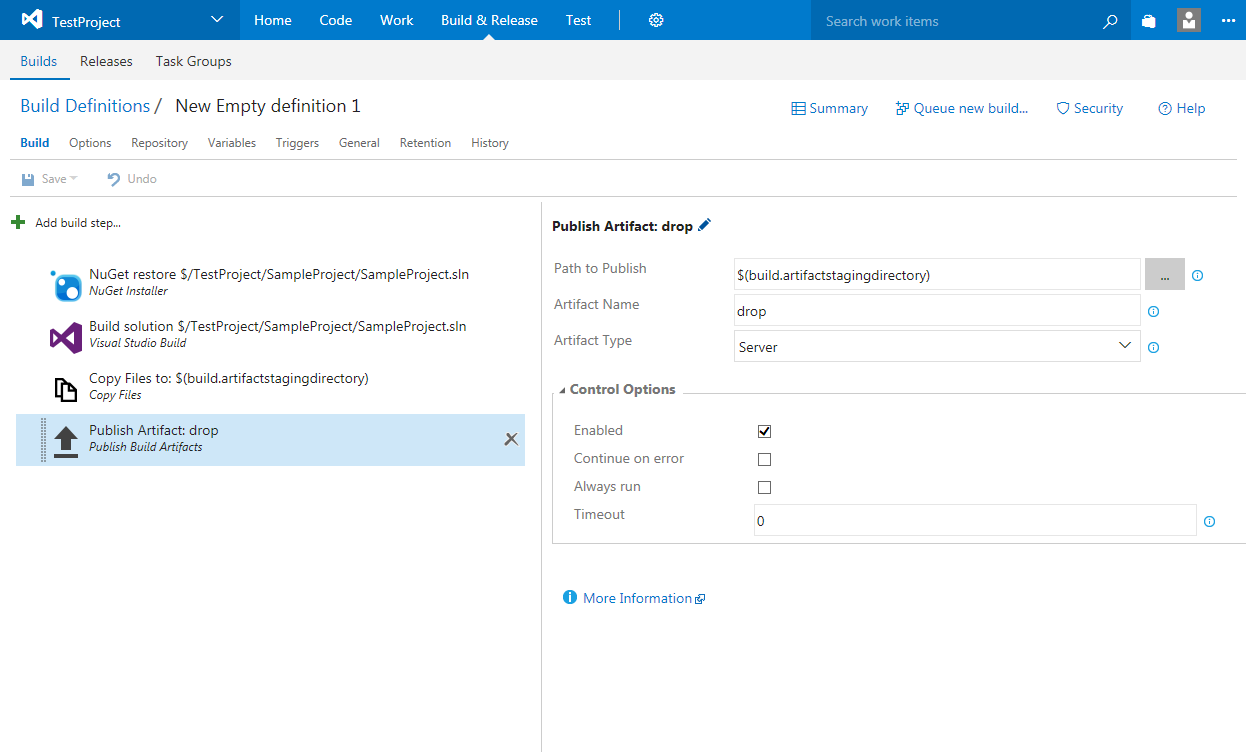
Add a task that will publish your artifacts to a needed location:
You can find information about tasks in the Build and release tasks article in the MSDN Library.
-
If needed, specify other build properties. To learn more, see the Continuous integration and deployment section in the MSDN Library.
-
Save the changes.
Creating a Build Instance
Run the created build definition to create a build that you will release:
-
On the Builds page of the Build & Release hub, click the ellipsis button of the created build definition and then click
 Queue new build.
 -
In the Queue Build dialog, configure the build run and click OK.
After the build is complete, create a release for it.
See Also
Creating a Build Containing TestComplete Tests
Defining a Release Process

 Requirements

 Prev
Prev