During test run, the Test Visualizer captures images for test commands that simulate user actions and posts these images to the test log. You can then review the results and see which actions the test command performed and what was the application state at that moment.
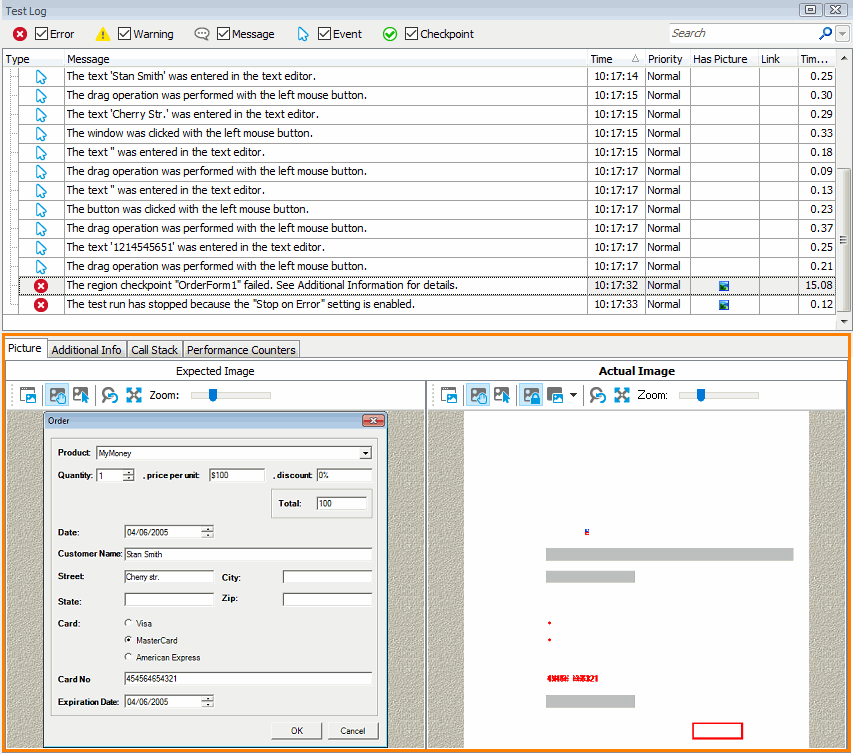
If a test command has an image that was recorded for it, then the Visualizer posts both “recorded” and “playback” images to the log. The test log shows these images in the Picture panel:
The Picture panel has two sections: Expected Image and Actual Image. The Expected Image section contains the “recorded” image and the Actual Image section displays the screenshot that was captured during the test playback. The object with which the test command worked is highlighted with a red rectangle on both images. Note that if the Auto-update frames during the run project option is enabled and Test Visualizer does not find an image for a test command, it will capture it during the first test run and display it in the Expected Image section. In this case, the Expected Image and Actual Image sections of the Picture panel will display the same images.
Both sections contain a toolbar that contains items that change the view scale and switch between the selection and browse modes. See description of the Picture panel for more information.
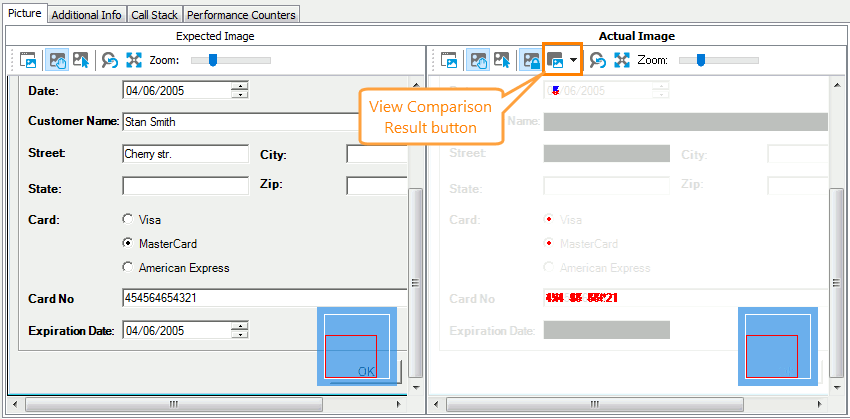
You may explore the images and see if they differ. One more feature that is convenient for browsing and comparing the images is the  Synchronize View button on the Actual Image toolbar. Click this button to synchronize viewing of the images. If this mode is enabled, then when you are scrolling one of the images, TestComplete will automatically scroll the other onto the same distance and direction.
To highlight the differences, click  View Comparison Result on the Actual Image toolbar. TestComplete will hide the actual image and visually display the difference between the “recorded” and “playback” images. The pixels that differ will be displayed in red. The color of identical pixels depends on the selected comparison mode (they can be light, dark or replaced with white pixels).

TestComplete compares the “recorded” and “playback” images pixel-by-pixel. It uses the same comparison engine that is used by the region checkpoints and by scripting methods that perform image comparison. For detailed information on the comparison algorithm and on factors that influence the comparison, see How the Image Comparison Works and Factors Affecting Image Comparison.
The test log does not use the comparison parameters like Transparent, PixelTolerance or ColorTolerance that are described in the How the Image Comparison Works topic. These parameters can be specified by you when you are creating a region checkpoint or call the scripting methods, but they cannot be set by TestComplete.
We would recommend that you pay attention to factors that affect the comparison. This information will help you understand why the test log says the recorded and actual images differ while they are looking quite similar.
See Also
Test Visualizer
Test Visualizer -- Overview
About Test Visualizer Panel

