
You can export your test results to an external file and view them outside of TestComplete, in a web browser. For example, you can send the result files to your colleague, who does not use TestComplete, and open the results there.
 Viewing Results in Web Browser
Viewing Results in Web Browser
To view test results in your web browser, first, export them to an HTML or MHT file. See Exporting Test Results.
You can also preview the exported results in Internet Explorer:
-
Open the desired test log.
-
Right-click the needed log item in the Log Items panel and then click View Results in IE.
TestComplete will create a temporary .mht file and show it in Internet Explorer.
The image below shows the overall view of the test results in a web browser:

Click the image to enlarge it.
The results look similar to the Test Log window in TestComplete. The left part of the result page shows the log item tree. The right part of the page shows the content of the log item selected on the left.
Depending on the log item type (Project, Project Suite, Script and so on), the browser window may display additional panels below or to the left of the log item contents. For instance, if the selected log item corresponds to a project, the result page will display the Messages panel below the log contents. If you are browsing the script execution results, the window will display the extended log messages below the “main” log contents.
| Note: | The extended information panels and the test log tree can be hidden by clicking the arrow in the panel caption. |
 |
By default, Google Chrome does not allow web pages that reside on a local computer to access other local files. Therefore, the test results displayed by Google Chrome may be incorrect.
To view test results in Google Chrome, run the browser with the -allow-file-access-from-files command-line flag. |
Filtering Test Results
By values
-
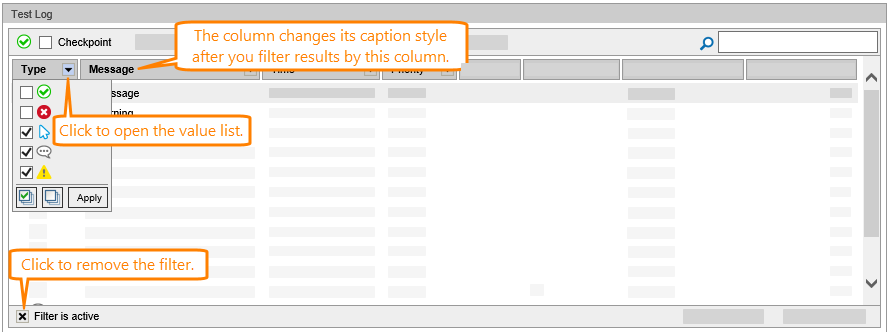
Click the arrow in the column header. This will show a list of values for this column.
-
In the list, check the values you want to show and uncheck those you want to hide (to quickly check or uncheck all items, click Select All and Unselect All).
-
Click Apply.
The log will only display those records that hold the selected value in the column:
You can filter results in multiple columns. To do this, specify the needed filter condition for each column.
By message type
To filter test results by the message type (informative messages, warnings, errors, and so on), select or clear the appropriate check boxes on the log toolbar:

This will filter the contents of the log so that it shows only messages of the selected type.
By contents
To view messages that contain specific words or phrases, type the desired words in the Quick Search edit box:
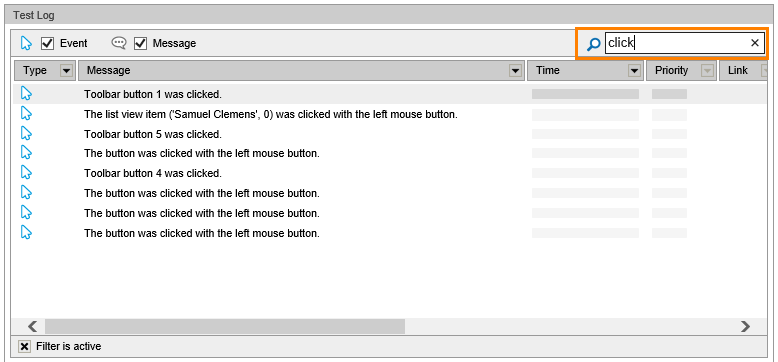
The results will show only those messages that contain all typed words.
Note: The search is performed in all visible columns.
Cancel filtering
When the log results are filtered by one or more columns, the “Filter is active” message is displayed at the bottom of the log. Click  next to this line to remove the current filter.
See Also
Viewing Test Results
Test Results
Exporting Test Results
Exported Results Structure