 |
The manual testing functionality is deprecated but still available in TestComplete. While we recommend using other approaches for new tests, you can continue to create and run manual tests if needed.. |
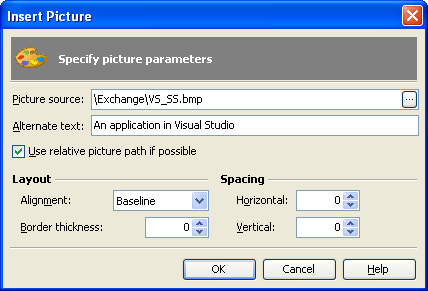
The Insert Picture dialog is displayed when you press the  item in the manual test editor (this item is only available if you use the HTML format for step instructions). In this dialog you can specify properties of the image to be inserted:

Using this dialog you can quickly specify the desired image and its properties.
You can set the following options --
- Picture Source - Defines a path to the image. You can type it in a text box or click the ellipsis button and select an image with the Select File dialog. This field is mandatory, all other parameters are optional.
- Alternative text - Specifies a string to be displayed as a hint or when the image is not loaded.
- Use relative picture path if possible - The image path can be absolute or relative. If this option is enabled TestComplete tries to use the relative path.
- Alignment - Specifies the alignment of the image. The possible values are:
- Left
- Right
- Top
- Texttop
- Middle
- Absmiddle
- Baseline
- Bottom
- Absbottom
Left and Right specify floating horizontal alignment of the image in the browser window, and subsequent text will wrap around the image. The other values specify vertical alignment of text relative to the image on the same line.
- Border thickness - Specifies the width in pixels of the image’s border.
- Horizontal and Vertical spacing - Sets the width in pixels of the horizontal and vertical gutters around the image.
| Note: | TestComplete does not store the image in the project, it will only saves a path to it. If you open the manual testing file from another computer, the corresponding picture may be not found. To avoid this situation, place the pictures in a shared folder and specify the path to this shared folder. |
To add an image with the specified parameters, press OK. Cancel will close the dialog without any changes.
