
The Add Breakpoint dialog allows you to set a breakpoint on a script routine. To display the dialog, right-click somewhere within the Breakpoints panel and choose Add Breakpoint by Routine from the context menu:
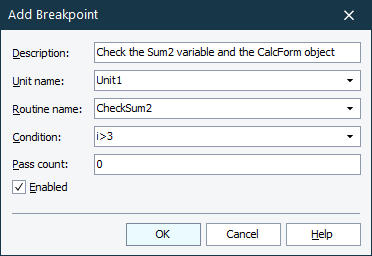
In the Description box, specify the text that describes the breakpoint. After the breakpoint is created, the text will be displayed in the Description column of the Breakpoints panel.
In the Unit name box, specify the script unit that contains the desired routine. You can type the name or select it from the drop-down list.
In the Routine name box, specify the name of the routine where the breakpoint will be set. You can type the name or choose it from the drop-down list (note that this list is populated only after you specify the unit in the Unit name edit field).
The Condition and Pass count edit boxes specify additional attributes to be used to activate the breakpoint. For more information on them, see Conditional Breakpoints.
The Enabled check box specifies whether the breakpoint will be active or disabled after creation.
To create a breakpoint with the specified properties, press OK. TestComplete will set the breakpoint to the first executed line of the specified script routine and add a row for the new breakpoint to the Breakpoints panel. The values that you specified in the Condition, Pass count, Description and Enabled boxes will be displayed in the appropriate columns of this panel.
To close the dialog and abandon the breakpoint creation, press Cancel.
See Also
Using Breakpoints
Conditional Breakpoints
About Breakpoints Panel